
Pests and Diseases
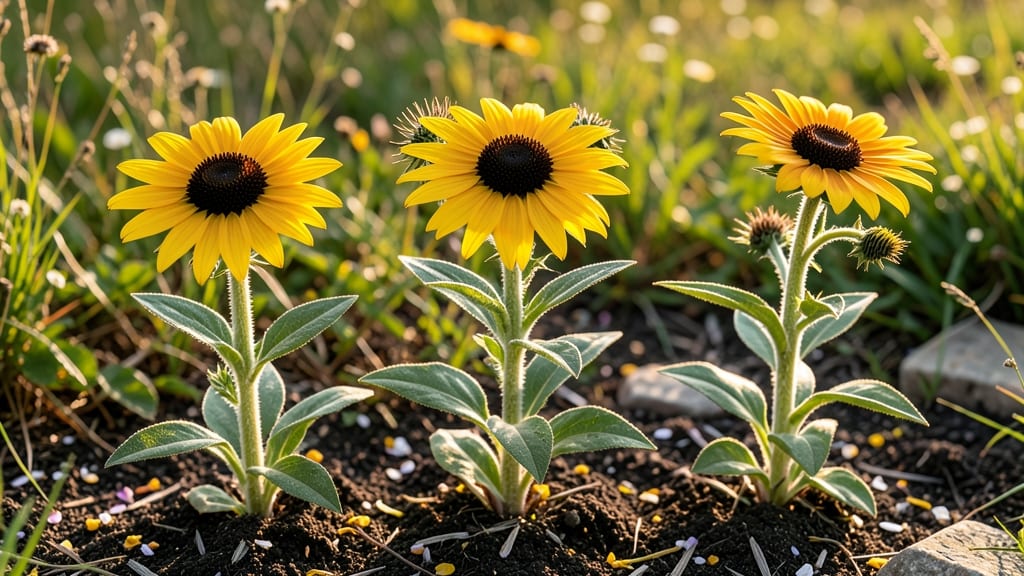
Black-eyed Susans (Rudbeckia hirta) look pretty in wildflower meadows but turn into stubborn weeds in your garden beds. 🌻 I’ve wrestled with these tenacious plants for years, and the twist-and-pull method finally gives me the upper hand—no more sneaky regrowth or wasted effort.
The secret lies in grabbing the root at the base and giving it a sharp twist to loosen it from the soil. Most gardeners pull too gently, leaving fragments that sprout new plants.
With this technique, you’ll yank the whole taproot out clean, and your garden will stay clear for good.
Start early in the season when the soil is soft, and the plants are still small. Wear gloves—those roots are tough, and the sap can stain. If a few stubborn ones slip through, spot-treat with vinegar or a targeted herbicide, but prevention is always easier than cleanup.
📚 In This Guide
- What you need
- Instructions
- Tips and common mistakes
- Wrapping up and next steps
What you need
- ● Garden gloves (1 pair) – Heavy-duty, long-cuffed gloves to protect your hands from prickles and dirt.
- ● Weeding tool or hori-hori knife (1) – A sharp, sturdy tool for digging deep roots without straining your back.
- ● Garden fork or trowel (1) – For loosening compacted soil around stubborn roots.
- ● Bucket or wheelbarrow (1) – To collect weeds and debris (aim for at least 5 gallons capacity).
- ● Pruners or shears (1 pair) – For trimming thick stems before pulling.
- ● Kneeling pad (1) – To keep you comfortable during long weeding sessions.
- ● Watering can or hose with nozzle – For pre-wetting soil to ease root extraction.
- ● Compost bag or trash bin – For disposing of weeds (avoid composting if seeds may spread).
- ● Vinegar spray (20-30% acetic acid) – For spot-treating regrowth (mix 1 gallon vinegar + 1 tbsp dish soap).
- ● Mulch (straw, wood chips, or cardboard) – To suppress future weed growth.
- ● Knee saver or ergonomic weeding tool – Reduces back and knee strain.
- ● Sunscreen and hat – If working in direct sunlight for extended periods.
How to remove black-eyed Susan weed using the twist-and-pull method
This stubborn perennial won't quit—but with the right technique, you'll pull it out completely.
🌱 Step 1: Identify and Prepare the Plant
Start by locating the entire plant, including any hidden stems or runners. Black-eyed Susans spread aggressively, so look for additional shoots within 12-18 inches of the main plant. You'll notice the classic yellow-orange daisy-like flowers, but focus on the woody base where the roots connect to the soil.
Wear gloves to protect your hands from sap and prickly stems. The twist-and-pull method works best on plants in full bloom or just after flowering, when energy is concentrated in the roots. If you spot smaller shoots, mark their locations with small sticks so you can dig them later.
💧 Step 2: Soften the Soil for Easier Extraction
Water the area around the plant 24 hours before removal to loosen the soil. You want the ground moist but not soggy—think of it like a damp sponge, not a mud puddle. This helps the roots release from the soil without breaking, making the twist-and-pull method effective.
Use a garden fork to gently loosen the soil around the base of the plant. Insert the fork 2-3 inches away from the stem and wiggle it back and forth to create space. Avoid digging directly into the roots, as this can cause them to fragment and regrow. The goal is to break the soil's grip, not the plant's structure.
✂️ Step 3: Twist and Pull the Roots Free
Grasp the plant's stem 1-2 inches above the soil line with one hand, using a firm but gentle grip. With your other hand, twist the stem clockwise and counterclockwise in a slow, steady motion. You'll feel resistance as the roots release from the soil—this is the twist part of the method.
Once the roots begin to loosen, pull upward with a steady, even force. You'll hear a slight pop as the roots break free. If the plant resists, twist a little more before pulling again. The key is patience—don't yank or jerk, as this can leave root fragments behind to regrow. Aim for a clean extraction with the entire root ball intact.
☀️ Step 4: Check for Remaining Roots and Prevent Regrowth
After pulling the main plant, inspect the soil for any remaining root pieces or shoots. Use your fingers or a small trowel to dig 3-4 inches deep around the area where the plant was growing. Even small root fragments can sprout new plants, so remove everything you find.
Apply a 2-3 inch layer of cardboard or newspaper over the area to smother any hidden roots or shoots. Top this with 3-4 inches of mulch to block sunlight and prevent new growth. Water lightly to settle the mulch, and avoid disturbing the area for at least 2 weeks. This ensures no regrowth while keeping your garden bed intact.
🪴 Step 5: Monitor and Repeat as Needed
Keep an eye on the area over the next 4-6 weeks for any new shoots. Black-eyed Susans are persistent, so check regularly, especially after rain, which can trigger new growth. If you spot any regrowth, repeat the twist-and-pull method immediately—smaller plants are easier to remove than established ones.
For stubborn patches, consider applying a vinegar-based herbicide (1 part white vinegar, 1 part water) directly to the soil surface. This won’t harm existing plants if used carefully but will help kill any lingering roots. Always test a small area first to ensure it doesn’t damage nearby vegetation.
Tips & tricks for perfect black-eyed Susan weed removal
Here's what nobody tells you about making this method work flawlessly.
Timing is Everything: The 24-hour watering step is non-negotiable—this is when the soil reaches that perfect "damp sponge" consistency. I've tried rushing it, and the roots just won't release cleanly. If you're short on time, water the night before and check soil moisture in the morning. You want it to hold together when squeezed but not drip water.
Root Release Technique: When twisting in Step 3, think of it like unscrewing a stubborn jar lid. The key is consistent pressure—not jerky movements. I've found that twisting clockwise first, then counterclockwise, helps break the soil's grip differently each time. If you feel resistance after 30 seconds of twisting, stop and let the soil relax for 10 seconds before pulling.
Preventing Regrowth: The mulch layer in Step 4 is your secret weapon. I've learned the hard way that skipping this step leads to regrowth within weeks. Use heavy mulch like wood chips or straw—they block sunlight better than lighter options. For extra insurance, add a thin layer of landscape fabric under the mulch to create a complete barrier against any remaining roots.
Stubborn Plant Rescue: If you encounter a particularly tough root that won't budge, try this: Use a small hand trowel to make a vertical cut around the root ball about 1 inch from the stem. This creates a clean break line while minimizing soil disturbance. Then resume twisting—you'll often feel the root pop free immediately after this step.
Pro Tips for Black Eyed Susan Weed
- Here's what nobody tells you about making this method work flawlessly.
- Timing is Everything: The 24-hour watering step is non-negotiable—this is when the soil reaches that perfect "damp sp...
- Root Release Technique: When twisting in Step 3, think of it like unscrewing a stubborn jar lid. The key is consisten...
Frequently asked questions
Got questions about tackling black-eyed Susan weed? You’re not alone!
Here are some of the most common concerns—and straightforward answers—to help you reclaim your garden without the guesswork.
Is black-eyed Susan weed really that hard to remove?
Yes, but not impossible! This stubborn perennial spreads via deep roots and seeds, making it a persistent nuisance. The twist-and-pull method works best when the soil is moist—grab the base, twist sharply, and yank. Repeat weekly to starve the roots. Pro tip: Wear gloves—those roots are tough!
What’s the best time of year to pull black-eyed Susan weed?
Spring and fall are your golden windows! Soil is softer, and weeds are less aggressive. Avoid summer heat, which stresses plants (and you) and lets roots regrow faster. Early morning or late evening pulls minimize sun exposure—your hands (and back) will thank you!
Will vinegar or herbicide kill black-eyed Susan weed?
Vinegar (10–20% acetic acid) can work for small patches, but it’s non-selective—neighboring plants may suffer too. For herbicides, glyphosate is effective but requires careful application (follow label instructions!). For organic gardens, repeated hand-pulling or smothering with cardboard/mulch is safer long-term.
Why does black-eyed Susan weed keep coming back after I pull it?
Likely due to root fragments left behind or buried seeds. Always pull the entire root (aim for a 2-inch depth) and dispose of debris in the trash—not compost. For stubborn spots, try a mulch barrier (3+ inches thick) to block sunlight and prevent regrowth.
Can I prevent black-eyed Susan weed from spreading to my lawn?
Start with dense grass—mow regularly (3+ inches tall) to outcompete weeds. Apply pre-emergent herbicide in early spring (check local regulations). For borders, install edging or lay landscape fabric before mulching. Bonus: Plant native ground covers like creeping thyme or clover to crowd it out naturally.
Wrapping up and next steps
Black-eyed Susan weed might seem like a stubborn foe, but with the right tools and techniques, you can reclaim your garden with ease! 🌱 The twist-and-pull method is a game-changer—simple, chemical-free, and effective for tackling these pesky invaders. Once you’ve mastered it, you’ll wonder why you didn’t try it sooner.
Ready to take action? Grab your gloves, gather your supplies, and give your garden the fresh start it deserves! 🌿 Start small—clear one patch today, and soon, your entire yard will thank you.