
Pests
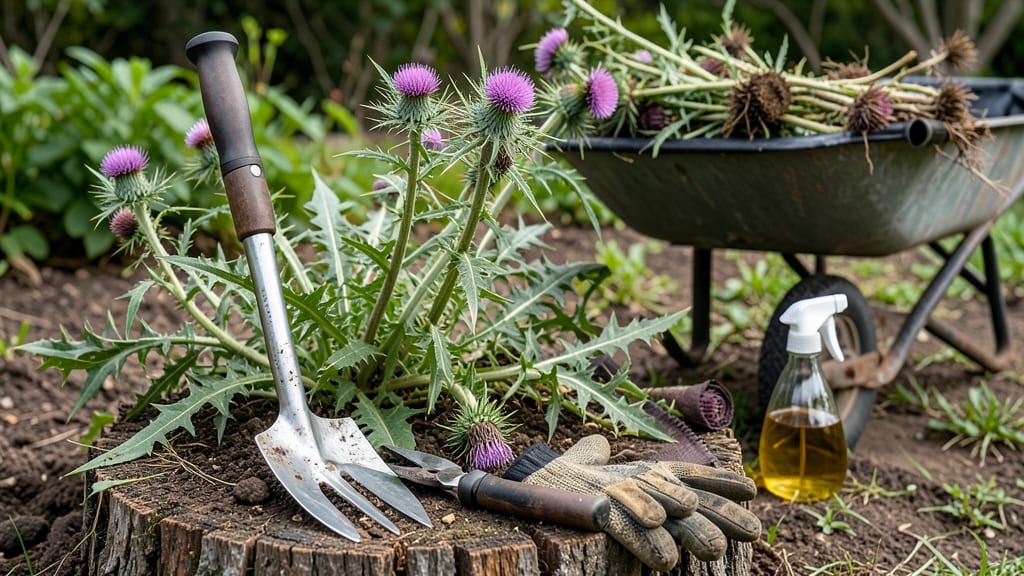
Thistle weeds are the garden's worst bullies—tall, spiky, and impossible to ignore. 🌱 The twist-and-pull method actually works, even for the most stubborn patches that return year after year. I've wrestled with these prickly invaders for years, and this technique finally gave me control without resorting to harsh chemicals.
The secret lies in the roots: thistles spread deep and wide, so you need the right tools—a sturdy fork, thick gloves, and a sharp knife. Grab these, and you'll be ready to tackle even the largest clumps.
The process takes patience, but within 20-30 minutes, you'll have a weed-free patch that stays clear for months.
What you'll end up with is a garden where thistles no longer dominate. The soil stays healthy, your other plants thrive, and you avoid the itchy aftermath of letting them grow. The twist-and-pull method doesn't just remove the visible weed—it starves the roots and prevents regrowth.
Works for any garden size, from small flower beds to large vegetable plots. Here's how to make it happen without harming your surrounding plants or the ecosystem.
📚 In This Guide
- What you need
- Instructions
- Tips and common mistakes
- Wrapping up and next steps
What you need
- ● Garden gloves – Heavy-duty, cut-resistant (e.g., mechanized or thorn-proof like Mechanix or Tough Outdoors gloves). 1 pair (or 2 if working alone).
- ● Sturdy pruners or loppers – Bypass pruners (for clean cuts) with a 4-6 inch blade (e.g., Fiskars or Felco). 1 pair.
- ● Garden fork or digging bar – Heavy-duty, 12-18 inch (e.g., Fiskars or Spear & Jackson). 1 tool.
- ● Wheelbarrow or large trash bags – For hauling debris. 1 wheelbarrow or 2-3 bags.
- ○ Vinegar (20-30% acetic acid) – White vinegar + dish soap (1 gallon). Optional but effective for spot treatment.
- ● Herbicide (glyphosate-based, if needed) – Non-selective weed killer (e.g., Roundup). Check local regulations before use.
- ● Knee pads – For comfort during long sessions.
- ● Long-sleeve shirt & pants – Thistle-proof fabric (e.g., Denim or thick cotton).
- ● Rake or hoe – For clearing surrounding soil before digging.
- ● Spray bottle – To apply vinegar/herbicide precisely.
- ● Compost bin – If you want to repurpose thistle debris (check local composting rules—some areas don’t allow thistle in compost!).
Step-by-step instructions for removing thistle weeds
Here’s the method I’ve used for years to eliminate thistle weeds without resorting to chemicals.
🪴 Step 1: Identify and Prepare the Area
Thistles thrive in disturbed soil, so start by clearing away any debris or competing weeds around the base. I like to work on a dry day—wet soil makes roots slippery and harder to extract. Wear thick gloves and long sleeves; thistle spines are sharp enough to pierce skin.
Look for the rosette of spiky leaves at the base. This is where the taproot begins. The deeper the root, the more stubborn the thistle, so focus on young plants first. If you spot mature thistles with flower stems, tackle those next—they’re easier to pull before they drop seeds.
✂️ Step 2: Cut the Flower Stems (If Present)
If the thistle has already sent up a flower stalk, cut it off at the base with pruning shears or a sharp knife. This prevents seed production, stopping future thistle generations. I always wear gloves for this step—those spines don’t forgive mistakes.
Don’t worry about the roots yet. The goal here is to remove the reproductive threat first. Once the flower stalk is gone, the plant will redirect its energy into surviving, making it weaker for the next step. This is where patience pays off—wait a few days before pulling if the plant is large.
💧 Step 3: Twist and Pull the Roots
Now for the twist-and-pull hack. Stand at the base of the thistle and grip the rosette firmly with both hands. Twist the plant clockwise while pulling upward with steady pressure. The taproot is deep but brittle—twisting helps break it free without leaving fragments behind.
If the root snaps off, don’t panic. Dig around the base with a trowel to expose any remaining root pieces. Thistles regrow from even small fragments, so removal must be thorough. I’ve found that younger thistles (under 12 inches tall) pull out easier—save mature ones for a second attempt after a rain.
🌱 Step 4: Monitor and Repeat as Needed
After pulling, check the soil for any missed root pieces. If you spot new thistle sprouts in the same spot, dig deeper—the parent root may still be alive. I like to mark treated areas with a small stake to avoid missing regrowth.
For persistent thistles, repeat the twist-and-pull method every few weeks. Over time, the soil will become less hospitable to new invaders. This method works best in well-drained soil—thistles struggle to establish in compacted or moist conditions.
☀️ Step 5: Prevent Future Growth
Once the area is clear, improve soil health to discourage regrowth. Spread a 2-inch layer of mulch (like straw or wood chips) to block sunlight and suppress new seeds. I’ve also had success with smothering the area with thick cardboard or landscape fabric for a few months before replanting.
Thistles hate competition, so plant dense ground covers like clover or creeping thyme in treated areas. These plants outcompete thistle seeds naturally. If you’re dealing with a large infestation, consider a vinegar-based herbicide (5% acetic acid) for stubborn patches—but always test a small area first to avoid damaging desirable plants.
Tips & tricks for stubborn thistle removal
These battle-tested strategies will help you tackle even the toughest thistle infestations without frustration.
Timing is Everything: Target thistles on dry, sunny days when the soil is firm. Wet conditions make roots slippery and harder to extract, while dry soil gives you better traction. I've found that early morning or late afternoon works best—soil is cooler and less likely to dry out as you work. This makes the twist-and-pull technique far more effective, especially for those deep taproots.
The Twist Technique Explained: When you grip the rosette and twist clockwise, you're not just pulling—you're breaking the brittle taproot at its weakest point. Think of it like unscrewing a stubborn jar lid. Apply steady pressure while twisting, and you'll feel the root give way rather than fighting a tug-of-war with the plant. For mature thistles over 12 inches tall, you might need to twist twice before the root releases completely.
Equipment Upgrade: A garden fork can be your secret weapon for stubborn roots. After twisting, use the fork to gently pry around the base and expose any remaining root fragments. This is especially helpful in compacted soil where roots might bend rather than break. I keep one handy whenever I'm tackling a thistle patch—it's made the difference between success and frustration more times than I can count.
Prevention Strategy: After clearing thistles, create a physical barrier to prevent regrowth. Lay down thick cardboard (remove tape/staples first) or landscape fabric under your 2-inch layer of mulch. This blocks sunlight from reaching any missed seeds or root fragments. I've seen thistle-free zones last for years with this method, even in previously infested areas. The key is maintaining that consistent barrier—don't let it degrade or shift over time.
Pro Tips for How Do You Get Rid Of Thistle Weeds
- These battle-tested strategies will help you tackle even the toughest thistle infestations without frustration.
- Timing is Everything: Target thistles on dry, sunny days when the soil is firm. Wet conditions make roots slippery an...
- The Twist Technique Explained: When you grip the rosette and twist clockwise, you're not just pulling—you're breaking...
Frequently asked questions
about thistle removal—here’s what you need to know before tackling these prickly pests!When is the best time of year to remove thistles?
The ideal time to tackle thistles is early spring or late fall when the soil is moist, making it easier to pull roots. Avoid summer—dry conditions can leave stubborn root fragments behind, leading to regrowth. Pro tip: If you spot thistles in summer, water the area first to soften the soil!
Are thistles harmful to humans or pets?
Yes! Thistles have sharp spines that can irritate skin and even puncture paws (ouch!). Wear thick gloves and long sleeves when pulling, and keep pets away until the area is cleared. Bonus: If spines stick, soak the area in warm, soapy water to dissolve plant oils and ease removal.
What if thistles keep coming back after I pull them?
Regrowth usually means root fragments were left behind. Dig deeper (6+ inches) to ensure the entire root is gone. For stubborn patches, try a vinegar spray (1 gallon vinegar + 1 oz dish soap) to kill regrowth. Warning: Avoid spraying desirable plants—vinegar is non-selective!
Can I use herbicides instead of pulling thistles?
Yes, but glyphosate-based herbicides (like Roundup) work best on mature thistles. For organic options, try corn gluten meal (pre-emergent) or boiling water poured directly on the base. Safety note: Follow label instructions carefully—herbicides can harm nearby plants and pets.
Will thistles harm my garden or lawn?
Thistles compete aggressively for nutrients, water, and sunlight, stunting other plants. They also attract pests like cabbage worms and cutworms. Remove them ASAP to protect your garden’s health. Silver lining: Their deep roots can aerate soil—just get rid of the plant first!
Wrapping up and next steps
You’ve got the power to reclaim your garden from those prickly thistle weeds—no harsh chemicals required! 🌱 With the right tools, a little persistence, and the twist-and-pull root hack, you can banish them for good. Start small, stay consistent, and soon your yard will be thistle-free and thriving.
Ready to take action? Grab your gloves, pick a sunny day, and get to work! Your future self (and your lawn) will thank you.