
Tools
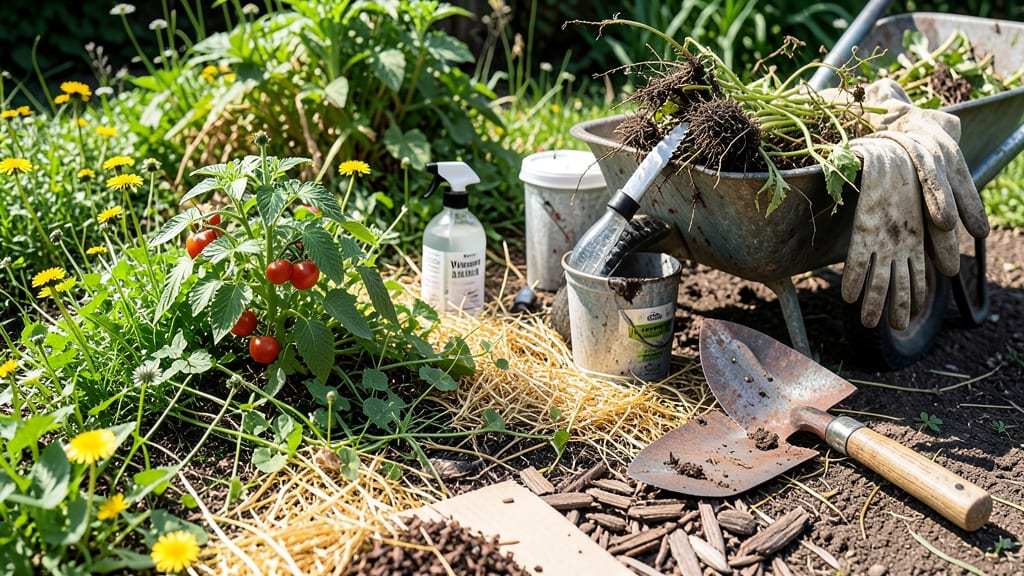
How to eliminate weeds from the garden starts with a single, satisfying pull—but only if you tackle roots right. 🌱 I’ve spent years wrestling with dandelions and crabgrass, and the secret isn’t brute force—it’s timing, technique, and a few unexpected tricks that actually work. Most gardeners focus on leaves, but roots are where the real battle happens, and ignoring them means weeds just come back stronger next year.
The good news? You don’t need expensive tools or harsh chemicals to win. A sturdy hand weeder, a sharp hoe, and a boiling-water kettle (yes, really) are all you need for most stubborn weeds.
The key is working when weeds are young—before they drop seeds or spread underground—and using the right method for each type. For example, dandelions need a deep pull to avoid regrowing, while clover thrives in compacted soil, so aeration helps more than pulling.
By the end of this, your garden beds will stay cleaner for weeks longer than before, and you’ll know exactly when to strike—whether it’s early morning dew or a hot afternoon when weeds are most vulnerable.
The best part? These methods protect your soil and plants while keeping weeds from staging a comeback.
Works for vegetable patches, flower beds, and even sidewalks—just adjust the tools and timing. Let’s get those roots for good this time.
📚 In This Guide
- What you need
- Instructions
- Tips and common mistakes
- Wrapping up and next steps
What you need
- ● Boiling water (1–2 gallons per targeted area, depending on weed density) – The secret weapon! 🔥
- ● Water kettle or large pot (minimum 2-quart capacity, with a pour spout for precision)
- ● Garden gloves (heavy-duty, chemical-resistant, e.g., GlovesUSA or FrogToggs)
- ● Hand trowel or small garden fork (for loosening soil and exposing roots)
- ● Garden hose with nozzle (for pre-wetting soil and rinsing)
- ○ White vinegar (1 gallon, 5% acetic acid – optional but powerful for stubborn weeds)
- ● Dish soap (1–2 tbsp, to break surface tension when mixing with vinegar)
- ● Spray bottle or watering can (for vinegar-soap solution application)
- ● Mulch (straw, wood chips, or cardboard) (5–10 lbs, to smother regrowth)
- ● Weed torch (propane-powered, for large or overgrown areas – safety first!)
- ● Corn gluten meal (10–20 lbs, organic pre-emergent for long-term prevention)
- ● Knee pad or stool (for comfort during long sessions)
- ● Thermometer (to check water temp – aim for 212°F (100°C) for maximum weed kill)
- ● Label maker (to mark treated areas if rotating methods)
How to eliminate weeds naturally without chemicals
Here's my go-to method for clearing weeds permanently—no harsh sprays, just smart timing and simple tools.
🌱 Step 1: Identify and Time Your Attack
Weeds thrive when they're small, so focus on young plants with just a few leaves—these pull up easiest. Mature weeds with deep roots (like dandelions) need a different approach. I always work on a dry, sunny afternoon when soil is warmest; weeds are most vulnerable then. You'll know you've timed it right when the ground feels slightly firm underfoot but not rock-hard.
Scan your garden for weed hotspots—areas with dense growth or along pathways where they regrow fastest. Mark these zones with a stick or string so you can monitor progress. The key is consistency: spot-treating small weeds prevents them from becoming unmanageable.
💧 Step 2: Use the Right Tools for the Job
Grab a sturdy hand trowel or weeding knife for deep-rooted weeds, and a simple hand fork for loosening soil around stubborn plants. I keep a small bucket nearby to collect weeds as I go—this keeps my workspace tidy and prevents accidental regrowth. For broadleaf weeds like chickweed, a sharp hoe works best when dragged just below the soil surface.
Never use your hands for large weeds—they'll snap off at the surface and regrow. Instead, grip the weed at its base and wiggle it gently while pulling upward. You'll hear a satisfying pop when the root breaks free. For weeds in cracks between pavers, a narrow tool prevents disturbing surrounding plants.
☀️ Step 3: Apply Heat for Deep Root Death
Fill a kettle with fresh water and bring it to a rolling boil. Pour the boiling water directly over the weed's base, aiming for the root zone. The sudden heat kills the plant immediately and sears the roots, preventing regrowth. I repeat this 2-3 times per stubborn weed—you'll see the leaves wilt instantly and turn brown within minutes.
This method works best on weeds in soil, not in cracks where water can't penetrate. For weeds growing between stones or in crevices, use a metal spoon to scrape them out first, then apply a small amount of boiling water to the exposed root. Avoid nearby plants—keep the stream narrow and controlled to prevent heat damage.
✂️ Step 4: Prevent Future Growth with Mulch
After clearing weeds, spread a 2-3 inch layer of organic mulch (like straw or wood chips) over the soil. This blocks sunlight, which weeds need to germinate. I always mulch after weeding because it smothers new seeds before they sprout. For pathways, use gravel instead—it prevents weeds from taking root while allowing water to drain.
Reapply mulch every 3-4 months or after heavy rain washes it away. You'll notice fewer weeds appearing over time as the mulch layer thickens. For vegetable gardens, use straw mulch—it breaks down slowly and adds nutrients to the soil as it decomposes.
🌿 Step 5: Monitor and Maintain Weed-Free Zones
Check your garden weekly for new weeds, especially after rain when seeds germinate fastest. I set a reminder on my phone for every Sunday morning—it takes just 10 minutes to spot and remove small weeds before they spread. Pull weeds when the soil is moist (after watering or rain) because dry soil makes roots brittle and easier to remove.
If weeds keep returning in the same spot, dig deeper—there might be a network of roots or seeds buried in the top inch of soil. For persistent areas, try vinegar spray (a 1:1 ratio of white vinegar and water) as a natural herbicide, but apply it carefully to avoid damaging nearby plants.
Tips & tricks for natural weed elimination
Let me share the hard-won lessons I've learned after years of battling weeds—these tricks will save you time and frustration.
Timing Secret: The 10-minute weekly check I mentioned is non-negotiable for long-term success. Set that phone reminder I suggested, but here's the real trick: do your weeding right after a light rain when soil is moist but not soggy. The roots pull out cleaner, and you'll see fewer regrowth spots. I've found that early morning weeding (before 9 AM) means you're working with cooler soil that's easier on your hands too.
Tool Technique: That hand fork I recommended isn't just for loosening soil—use it to gently pry up weeds from between pavers without disturbing the surrounding stones. For weeds growing in tight spots, try a butter knife (the kind with a thin blade) to slide between cracks and lift weeds cleanly. The key is to work at a slight angle so you don't damage your plants while removing weeds.
Heat Application Strategy: When using boiling water in Step 3, I've discovered that adding 1 teaspoon of salt to the boiling water (optional) enhances the effect—it helps break down cell walls even faster. But here's what nobody tells you: if you're working in a garden bed with flowers or vegetables, pour the boiling water through a funnel or small cup to create a precise stream. This prevents accidental damage to nearby plants while still delivering the heat directly to the roots.
Mulch Layering: That 2-3 inch mulch layer is perfect, but I've learned to add a thin layer of cardboard (newspaper works too) underneath before applying the mulch. This creates a barrier that blocks light completely, preventing any weed seeds that might be buried from sprouting. Just make sure the cardboard is unbleached and free of glossy coatings—those can leach chemicals into your soil.
Pro Tips for Eliminate Weeds From Garden
- Let me share the hard-won lessons I've learned after years of battling weeds—these tricks will save you time and frus...
- Timing Secret: The 10-minute weekly check I mentioned is non-negotiable for long-term success. Set that phone reminde...
- Tool Technique: That hand fork I recommended isn't just for loosening soil—use it to gently pry up weeds from between...
Frequently asked questions
Got questions about tackling weeds without breaking a sweat? You’re not alone! Here are some of the most common concerns—plus straightforward answers to help you reclaim your garden like a pro.
What’s the best time of year to eliminate weeds?
Spring and early fall are ideal! Weeds are actively growing but haven’t yet formed deep roots. For perennial weeds (like dandelions), target them in late summer when they’re storing energy in their roots—making them easier to kill with boiling water or vinegar.
How long does it take for boiling water to kill weeds?
Immediate action! Boiling water kills weeds on contact by destroying their cells. However, for deep-rooted weeds, you may need to repeat the process after 1–2 weeks to ensure the entire root system is dead. Consistency is key.
Is boiling water safe for my garden soil?
Yes, but use it sparingly. Boiling water won’t harm beneficial soil microbes if applied directly to weeds (not the soil around them). For large areas, consider mulching or vinegar-based sprays as gentler alternatives to avoid overheating the soil.
Can I use vinegar instead of boiling water?
A mix of 1 gallon white vinegar + 1 cup salt + 1 tbsp dish soap works well for non-woody weeds. Spray on a sunny day to maximize effectiveness. However, vinegar kills everything it touches—so avoid spraying near desired plants.
Why do weeds keep coming back even after treatment?
Stubborn weeds often return because their roots or seeds survived. For rooted weeds, dig deeper to remove fragments. For seed-based weeds (like crabgrass), use a pre-emergent herbicide in early spring or hand-pull them before they seed.
What tools do I need beyond boiling water?
A few essentials:
- Kettle or watering can (for boiling water)
- Gloves & long sleeves (to protect from heat/irritants)
- Hand trowel or weeder (for stubborn roots)
- Mulch or landscape fabric (to prevent regrowth)
Wrapping up and next steps
Eliminating weeds doesn’t have to be a never-ending battle—with the right tools and techniques, you can reclaim your garden with confidence! 🌱 Whether you opt for the boiling water blitz, manual removal, or organic mulching, consistency is key.
Start small, stay patient, and watch your garden thrive without those pesky invaders.
Ready to take action? Pick your preferred method, gather your supplies, and roll up your sleeves. Your weed-free oasis awaits—happy gardening! 🌿