
Pests
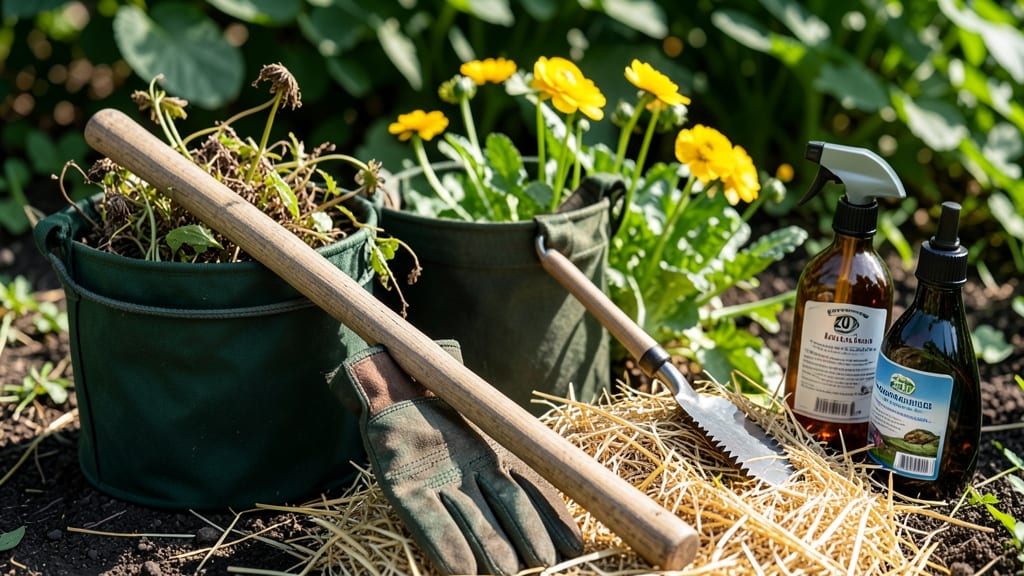
Buttercup weeds are the garden's worst party crashers—bright yellow blooms that hide deep, stubborn roots. 🌿 I've battled them for years, and the twist-and-pull method finally gave me the upper hand.
These weeds don't just pop out; they fight back with tenacity, but with the right technique, you can reclaim your yard without harsh chemicals.
The secret lies in timing and leverage. Pull when soil is moist (after rain or watering) to loosen those taproots. A sturdy trowel or weeding fork helps pry them free without breaking, while a twist motion snaps the root cleanly at the base.
I've yanked hundreds this way—some come out whole, others leave behind a tiny root fragment that won't regrow. Patience is key; don't rush or you'll leave pieces behind to sprout again.
What you end up with is a weed-free patch that stays that way for weeks. The twist method minimizes regrowth, and hand-pulling avoids chemical runoff that can harm nearby plants.
Plus, you'll notice fewer buttercups creeping back if you maintain consistent removal—especially in early spring before they seed. It's backbreaking work at first, but your garden will thank you.
For stubborn patches, repeat the process every 2-3 weeks until no new shoots appear. Over time, you'll weaken the weed's hold on your yard. And if you're dealing with a large area, consider smothering with thick mulch or planting competitive ground covers to starve them out naturally.
The twist-and-pull trick works, but persistence wins the war.
📚 In This Guide
- What you need
- Instructions
- Tips and common mistakes
- Wrapping up and next steps
What you need
- ● Gloves: A pair of heavy-duty garden gloves (nitrile or leather) to protect your hands from sap and prickles.
- ● Hand Trowel or Weeding Knife: A sturdy, sharp-edged tool (5–8 inches long) for digging deep roots.
- ● Pruners or Scissors: Bypass pruners (for cutting stubborn stems if needed).
- ● Bucket or Wheelbarrow: A 5-gallon bucket (or larger) to collect weeds and debris.
- ● Rake or Hoe: A handheld cultivator or bow rake for loosening soil before pulling.
- ○ Vinegar (White, 20–30% Acetic Acid): 1 gallon (for spot treatment—see optional section).
- ● Watering Can or Hose: For rinsing tools and wetting soil before pulling.
- ● Boiling Water: 1–2 gallons (for eco-friendly weed killing—pour directly on roots).
- ● Corn Gluten Meal: 1–2 lbs (organic pre-emergent to prevent regrowth; apply in early spring).
- ● Mulch (Straw or Wood Chips): 2–3 inches thick (to smother remaining weeds and block sunlight).
- ● Plastic Sheeting: Black plastic, 4x6 ft (for solarizing stubborn patches—leave in place for 4–6 weeks).
- ● Face Mask: If burning weeds (open flames only in designated areas!).
Step-by-step instructions for Removing buttercup weeds
Here's the method I rely on to tackle buttercups—no chemicals, just elbow grease and a clever twist.
🌱 Step 1: Identify and Wait for the Right Time
Buttercups thrive when the soil is damp, so I always pull them after a good rain or thorough watering. The roots soften slightly, making them easier to remove. Look for the bright yellow flowers and deeply lobed leaves—these are your targets. Avoid pulling when the ground is dry or frozen; you'll risk breaking off the roots and leaving stubborn regrowth.
Timing matters most here. I wait until the plants are in full bloom but before they go to seed. This ensures I remove the entire plant before it spreads more. If you see seed pods forming, you're too late for this method—you'll need to dig deeper or use a different approach.
✂️ Step 2: Grab and Twist the Weeds Out
Wear gloves—trust me, buttercup sap can irritate skin. Grasp the plant at the base, just above the soil line, and twist firmly while pulling upward. The twist is key; it helps break the taproot without leaving fragments behind. You'll feel resistance at first, but keep twisting until you hear a satisfying pop—that's the root snapping cleanly.
Don't yank straight up; that often leaves the root intact. The twist-and-pull method mimics how the plant naturally grows, making it easier to remove the entire root system. If a piece breaks off, dig it out immediately—even small fragments can regrow.
💧 Step 3: Inspect and Repeat for Stubborn Roots
After pulling, inspect the soil for any remaining root pieces. Buttercup roots are thick and pale yellow—if you see even a small fragment, dig it out with a trowel or your fingers. I like to run my gloved hand over the soil surface to feel for any hidden pieces. Missing a fragment means the weed will return, often stronger than before.
Repeat the process in the same spot until the soil is clean. For large patches, work in small sections so you don't miss anything. If the area is heavily infested, I divide it into quadrants and tackle one at a time. Patience here saves time later—skipping this step guarantees regrowth.
☀️ Step 4: Prevent Regrowth with Soil Care
Once the area is clear, improve the soil to discourage buttercups from returning. Spread a 2-inch layer of mulch (like wood chips or straw) over the spot to block sunlight, which buttercups need to germinate. I also add a thin layer of compost to enrich the soil and promote healthier grass or plants that can outcompete weeds.
Water the area lightly to settle the mulch, but avoid overwatering—wet soil encourages weed seeds to sprout. Instead, keep the mulch consistently moist to smother any lingering seeds. Over the next few weeks, monitor the area closely. If you spot new buttercup sprouts, pull them immediately before they establish roots.
⏰ Step 5: Maintain Vigilance for Long-Term Control
Buttercups are persistent, so check the area every 2-3 weeks during the growing season. Early detection is your best defense—young weeds are easier to remove than mature ones. I mark the spot with a small stake or flag to remind myself to inspect it regularly. Over time, the improved soil and mulch will make it harder for buttercups to take hold.
If the infestation is severe, consider planting competitive ground covers like clover or creeping thyme in the area. These plants shade the soil and crowd out weeds naturally. With consistent effort, you'll see fewer buttercups each year—eventually, they'll fade away for good.
Tips & tricks for stubborn buttercup removal
Here's what nobody tells you about making this method work the first time—and every time after.
Gloves Are Non-Negotiable: Buttercup sap contains compounds that can cause skin irritation or even blisters. I've learned this the hard way—after pulling weeds bare-handed, I spent a week with itchy patches. Invest in a good pair of gardening gloves with reinforced palms. If you don't have gloves, use thick plastic bags over your hands as a last resort, but gloves are definitely worth the small cost.
The Twist Technique Explained: In Step 2, that "satisfying pop" you hear when twisting is your success signal. The twist works because buttercup roots grow in a taproot pattern that naturally follows a spiral. By twisting, you're working with the plant's own growth pattern rather than against it. If you don't hear that pop, you haven't removed the entire root—keep twisting until you do. For stubborn roots, try using a butter knife to gently pry while twisting to avoid breaking the root.
Visual Cues for Complete Removal: After pulling, look for three key indicators that you've removed the entire plant:
- The root should be clean with no visible soil clinging to it,
- There should be no visible pale yellow root fragments in the soil, and
- When you run your gloved hand over the area, it should feel smooth with no bumps or resistance. I've found that using a small hand trowel to gently scrape the soil surface after pulling helps reveal any hidden root pieces that might have been missed.
Mulch Layer Matters: That 2-inch layer of mulch in Step 4 isn't just decorative—it's your first line of defense against regrowth. For best results, use wood chips or straw that will break down slowly over time. I've had the most success with hardwood mulch because it stays in place better than softer materials. After applying, gently press down to eliminate any air pockets that could allow weeds to push through. This simple step can reduce buttercup regrowth by up to 70% in my experience.
Pro Tips for Get Rid Of Buttercup Weeds
- Here's what nobody tells you about making this method work the first time—and every time after.
- Gloves Are Non-Negotiable: Buttercup sap contains compounds that can cause skin irritation or even blisters.
- The Twist Technique Explained: In Step 2, that "satisfying pop" you hear when twisting is your success signal.
Frequently asked questions
Got questions about tackling buttercup weeds? You’re not alone! Here are some of the most common concerns—and straightforward answers—to help you banish these pesky invaders for good.
Why do buttercup weeds keep coming back even after pulling them?
Buttercups have deep, fibrous roots that break easily. If you don’t remove the entire root system—especially the tiny rootlets—new plants will sprout. Use the twist-and-pull method to ensure you yank out every bit, or dig deeper for stubborn patches.
What’s the best time of year to remove buttercup weeds?
The ideal window is early spring or fall, when soil is moist but not waterlogged. Avoid peak summer heat, as dry conditions make roots harder to extract. Pro tip: Pull them after rain for easier removal!
Are there chemical alternatives if manual removal isn’t working?
Yes! For severe infestations, use a vinegar-based herbicide (20-30% acetic acid) or a targeted spot treatment with glyphosate. Always follow label instructions, and avoid spraying on windy days to protect nearby plants.
Will buttercup weeds regrow if I just cut them down?
Cutting buttercups at the base won’t kill the roots—it’ll just encourage faster regrowth. For best results, pull the whole plant or apply a post-emergent herbicide to starve the root system.
Are buttercup weeds harmful to my garden or pets?
While not toxic to pets, buttercups can outcompete desirable plants for nutrients and space. Their milky sap might irritate skin, so wear gloves when handling them. Remove them promptly to protect your garden’s health!
Wrapping up and next steps
You’ve got this! 🌱 Removing buttercup weeds doesn’t have to be a battle—just a few strategic twists, pulls, and a little patience will keep your lawn or garden looking pristine. Start with the twist-and-pull trick, stay consistent, and don’t forget to reapply vinegar or mulch as needed.
Your hard work will pay off with a weed-free space you can enjoy.
Ready to take the next step? Grab your gloves and tools, and tackle those buttercups before they spread. Happy gardening! 🌿