
Pests
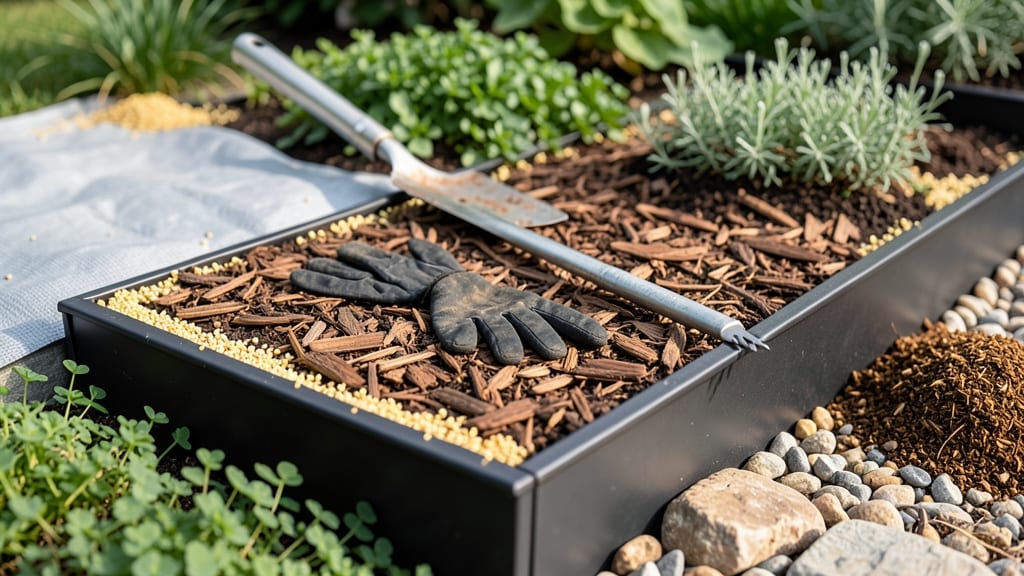
How to keep weeds out of the garden without endless pulling or harsh chemicals? I’ve spent years battling them—until I discovered the pre-emergent barrier trick that cuts weed seeds off at the pass before they sprout. It’s not about constant digging or toxic sprays; it’s about stopping weeds where they start, right in the soil.
The secret lies in a simple, two-layer system: a breathable barrier (like cardboard or landscape fabric) topped with organic mulch. This combo blocks sunlight—weeds’ #1 trigger to germinate—while letting rain and air reach your plants.
No digging, no chemicals, just a permanent weed shield that lasts all season. I’ve used it in both raised beds and in-ground gardens, and the difference is night-and-day.
By mid-summer, your garden stays cleaner with less effort—no more wrestling with stubborn dandelions or sneaky crabgrass. The mulch layer also retains moisture, feeds soil microbes, and keeps roots cool. It’s the smartest hour you’ll spend in the garden all year.
Works for vegetables, flowers, and shrubs alike, whether you’re dealing with a sunny border or a shady corner. The best part? Once installed, it’s almost invisible—just healthy plants and happy soil. Let’s get started with the exact steps that’ve kept my garden weed-free for years.
📚 In This Guide
- What you need
- Instructions
- Tips and common mistakes
- Wrapping up and next steps
What you need
- ● Landscape fabric (woven or non-woven): 1 roll (10-20 ft. wide, 50-100 ft. long, depending on garden size). Opt for thick (3-5 oz. per sq. yd.) fabric for durability.
- ● Staple gun + staples: Heavy-duty stapler (e.g., 18-gauge) with 1-inch galvanized staples (100+ staples per roll).
- ● Edging material: Choose one: Metal or plastic landscape edging (12-18 inches tall, cut to garden perimeter).
- ● Brick, stone, or pavers (enough to line the garden’s edge).
- ○ Pre-emergent herbicide (optional but recommended): Granular or liquid (e.g., corn gluten meal or pendimethalin). Follow label rates for your garden size.
- ● Shovel or spade: For digging trenches (6-8 inches deep) around garden edges.
- ● Rake: To smooth soil and fabric before securing.
- ● Scissors or utility knife: For trimming fabric to size.
- ● Gloves: Heavy-duty work gloves to protect your hands.
- ● Mulch: Straw, wood chips, or pine needles (2-4 inches thick) to top the fabric for extra weed suppression.
- ● Ground cover plants: Creeping thyme, clover, or moss to naturally smother weeds.
- ● Hose with spray nozzle: For wetting fabric before installation (helps it conform to contours).
- ● Soil tester kit: To check pH before applying pre-emergent herbicides.
Step-by-Step guide to creating a pre-emergent weed barrier
Here's the method I've used for years to keep weeds from ever taking root in my garden beds.
Clear the Existing Garden Bed Thoroughly
Start by removing all existing weeds, grass, and debris from the bed. Use a garden fork or trowel to dig out roots—even small fragments will regrow. I like to work in sections, pulling weeds by hand first, then using the fork to loosen stubborn roots. This ensures no weed seeds remain hidden in the soil to sprout later.
Rake the area smooth and break up any large clumps of soil. The goal is a clean, level surface where you can apply your weed barrier evenly. If you spot any weed seedlings you missed, snip them at the soil line with pruning shears before proceeding. Pay special attention to edges where weeds often creep in from surrounding areas.
Apply a Layer of Landscape Fabric or Cardboard
Lay down a 2-3 millimeter thick layer of landscape fabric or unbleached cardboard to block light from reaching weed seeds. For fabric, overlap edges by 4-6 inches to prevent gaps where weeds could push through. Secure it with U-shaped landscape staples every 12 inches along the perimeter and at intersections.
If using cardboard, choose plain, unbleached varieties without glossy coatings that might prevent decomposition. Remove any tape or staples first. Soak the cardboard thoroughly before placing it—this helps it break down faster and prevents it from wicking moisture away from your plants. For raised beds, cut fabric or cardboard to size before placing it in the bottom layer.
Cover with 2-3 Inches of Mulch
Spread a 2-3 inch layer of organic mulch—such as wood chips, straw, or shredded leaves—over the fabric or cardboard. Press it lightly into place to eliminate air pockets, but don't compact it too tightly. This thickness blocks sunlight while allowing water and air to reach your soil.
For pathways or high-traffic areas, use gravel or crushed stone instead of organic mulch. These materials stay in place better and won't decompose, but they won't improve soil fertility like organic options. Always keep mulch 2-3 inches away from plant stems to prevent rot and pest issues. Replenish the mulch layer as it breaks down, typically once or twice a year.
Plant Through the Mulch Layer
Create small openings in the mulch layer where you'll plant. Use a hand trowel to cut 4-6 inch diameter holes directly above planting spots. Place plants in these openings, then gently pull mulch back around the base. This keeps weeds from invading near stems while allowing roots to access moisture.
For seeds, make shallow furrows in the mulch and plant directly through it. Cover seeds with a thin layer of soil before replacing mulch. Water gently to settle everything in place. The key is maintaining this mulch layer consistently—even a small gap can let weeds sneak through. Check periodically and add more mulch if it thins below 2 inches.
Maintain the Barrier System
Monitor the mulch layer monthly, especially after rain or watering. Organic mulch breaks down over time and may need replenishing. When you notice gaps, add fresh mulch immediately—weeds can sprout in as little as 3-5 days if given access to light.
For perennial weeds like dandelions or creeping Charlie, extend the fabric 12 inches beyond the garden bed edges. These weeds spread aggressively through underground runners, so containment is critical. In late fall, top off the mulch with an extra 1-inch layer to protect soil and plants through winter. This layered approach creates a nearly impenetrable barrier that keeps your garden weed-free for years.
Tips & tricks for perfect pre-emergent weed barriers
These battle-tested strategies will help you create a weed barrier that lasts—without the constant upkeep. I've learned these the hard way after battling weeds for years.
Edge Defense Strategy: In Step 1, when clearing your garden bed, pay special attention to the edges where weeds often creep in. Extend your barrier at least 6 inches beyond the planting area, especially if you have aggressive weeds like creeping Charlie. I've found that even a small gap can become a weed highway within weeks. For raised beds, create a 2-inch lip of soil at the edges to prevent weeds from climbing in from the sides.
Material Selection Matters: When choosing between landscape fabric and cardboard in Step 2, consider your specific needs. Landscape fabric lasts 5-7 years and works well for permanent beds, while cardboard breaks down in 6-12 months, making it ideal for temporary solutions or areas where you plan to replant. For cardboard, avoid glossy varieties—they won't decompose properly. I've had the most success with plain, unbleached cardboard from moving stores, which is often free or very inexpensive.
Mulch Layer Precision: The 2-3 inch mulch thickness in Step 3 is crucial for effectiveness. Too thin, and weeds will find cracks to grow through; too thick, and it can suffocate your plants. For pathways, I recommend using 3-4 inches of gravel or crushed stone to prevent erosion and maintain a clean look. When replenishing mulch, add it gradually—don't pile it up in one spot, which can create uneven surfaces where weeds might take hold.
Planting Technique: In Step 4, when creating those 4-6 inch diameter holes for plants, make them just large enough to accommodate roots without excessive soil disturbance. I've found that using a serrated knife or small handsaw makes clean cuts through mulch and fabric. For seeds, create shallow furrows that allow light penetration for germination while still maintaining the barrier's integrity. The key is to disturb the mulch layer as little as possible—every small tear creates a potential weed entry point.
Pro Tips for Keep Weeds Out Of Garden
- These battle-tested strategies will help you create a weed barrier that lasts—without the constant upkeep.
- Edge Defense Strategy: In Step 1, when clearing your garden bed, pay special attention to the edges where weeds often creep in.
- Material Selection Matters: When choosing between landscape fabric and cardboard in Step 2, consider your specific needs.
Frequently asked questions
Got questions about keeping weeds at bay? You’re not alone! Here are some of the most common concerns—and straightforward answers—to help you maintain a lush, weed-free garden with ease.
What’s the best time of year to apply pre-emergent weed barriers?
Apply pre-emergent barriers before weeds germinate—typically in early spring (just as soil warms) or fall (after summer weeds die). For perennial weeds, a fall application can prevent regrowth the following spring. Check your product’s instructions for specific timing, as some work best in cooler weather.
How long does a pre-emergent barrier last, and do I need to reapply?
Most pre-emergent barriers last 2–6 months, depending on the product and weather. Heavy rain or irrigation can wash them away faster, so reapply every 3–4 months for continuous protection. Set a reminder to avoid gaps in coverage—consistency is key!
Will pre-emergent barriers kill existing weeds or only prevent new ones?
No, pre-emergent barriers only stop weeds from sprouting. For existing weeds, use a post-emergent herbicide (like vinegar or glyphosate) or pull them by hand. Combine both methods for the best results: prevent new growth while eliminating current invaders.
Are pre-emergent barriers safe for vegetables, flowers, or lawns?
It depends! Most corn gluten-based or organic pre-emergents are safe for edible gardens and flowers once applied. However, synthetic barriers (like those with pendimethalin) can harm plants if not used carefully. Always check the label for plant-safe timing (e.g., apply before sowing seeds or planting). For lawns, choose selective barriers that target weeds without killing grass.
What should I do if weeds still grow through the barrier?
If weeds break through, you might have gaps in coverage or resistant weed species. Try these fixes:
- Reapply the barrier, ensuring full coverage (no missed spots!).
- Hand-pull stubborn weeds and their roots.
- Switch to a different active ingredient (e.g., if crabgrass keeps coming back, try a barrier with dimethenamid).
- Add a mulch layer (straw, wood chips) to block light and smother weeds.
Persistent weeds may also indicate poor soil health—amend with compost to improve conditions for your plants (and discourage weeds).
Wrapping up and next steps
Keeping weeds at bay doesn’t have to be a battle—just a smart strategy!
By using a pre-emergent barrier, mulching, and consistent maintenance, you’ll create a garden where your plants thrive without the unwanted competition. 🌱✨ The key is proactivity: act before weeds sprout, and enjoy a cleaner, healthier garden with less effort.
Ready to take the next step? Start small—test a section of your garden with the methods above, then expand as you see results. Your green thumb (and your lawn) will thank you!