
Pruning
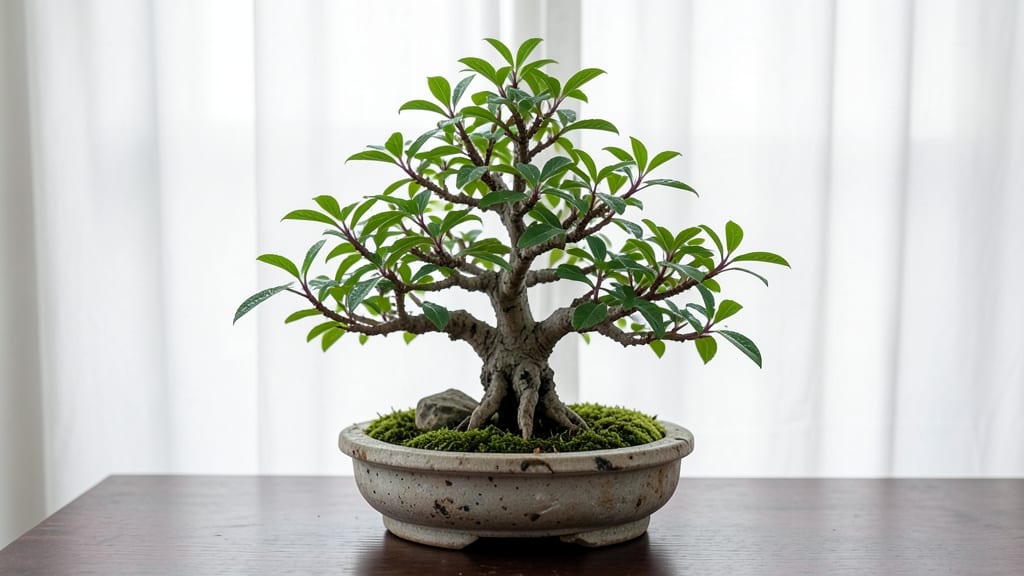
Japanese knotweed bonsai sounds like an ambitious project—but honestly, it’s a risky experiment that could turn your garden into an ecological nightmare. 🌱 This invasive species spreads aggressively through underground rhizomes, and even a small bonsai could escape containment, choking out native plants in your yard (or worse, your neighbors').
If you’re still curious, the process would require extreme measures: severe pruning every 2-3 weeks to stunt growth, root barriers buried 3+ feet deep, and constant monitoring for any signs of escape.
Most bonsai enthusiasts avoid it entirely because the risks far outweigh the rewards—especially in regions where Japanese knotweed is illegal to grow.
Instead of wrestling with an invasive plant, consider native alternatives like Fatsia japonica or Cotoneaster, which offer similar texture and structure without the ecological guilt. These plants thrive with standard bonsai techniques and won’t wreak havoc if they escape. Your garden—and local ecosystems—will thank you.
Before you even think about attempting this, check your state’s invasive species laws. Some areas impose hefty fines for transporting or cultivating Japanese knotweed, even in a pot. When in doubt, skip the experiment and opt for a safer, equally satisfying bonsai subject.
📚 In This Guide
- What you need
- Instructions
- Tips and common mistakes
- Wrapping up and next steps
What you need
- ● Japanese knotweed (Fallopia japonica) – A healthy, established plant (1-3 years old) with strong rhizomes. Pro tip: Ensure it’s free of pests or diseases!
- ● Bonsai pot – 6-12 inches wide, with drainage holes. Size matters: Start small (6-8 inches) for beginners.
- ● Bonsai soil mix – 60% inorganic (pumice, perlite) + 40% organic (peat moss, compost). Why? Prevents root rot and mimics natural conditions.
- ● Pruning shears – Sharp, bypass-style shears (for clean cuts). Bonus: A concave cutter for thicker stems.
- ● Root hook – For gently teasing and shaping roots without damage.
- ● Wire (aluminum or copper) – 1-2mm thickness, for branch positioning.
- ● Spray bottle – For misting leaves during pruning (keeps the plant hydrated).
- ● Horticultural glue or pruning sealant – To seal large cuts and prevent disease.
- ● Bonsai wire cutters – For removing wire after training.
- ● Rooting hormone – Speeds up recovery if you’re propagating cuttings.
- ● Moss (e.g., sheet moss) – For aesthetic pot covering and moisture retention.
- ● Slow-release fertilizer – Balanced NPK (e.g., 10-10-10) for seasonal feeding.
- ● Humidity tray – Keeps the environment moist, especially in dry climates.
- ● Gloves – Protects hands from rhizome sap (can irritate skin).
Instructions for pruning Japanese knotweed bonsai
Mastering the art of pruning this resilient plant transforms its wild growth into a refined, controlled bonsai masterpiece.
✂️ Step 1: Assess the Plant’s Growth Structure
Begin by examining your Japanese knotweed bonsai for its natural framework. Look for the thickest stems—they’ll form the backbone of your design. These stems are your primary branches, and you’ll work to emphasize their strength while shaping the rest of the plant around them. I always start by mapping out the main branches with my fingers, tracing their paths to visualize how they’ll support the final shape.
Pay close attention to where branches intersect or cross. These areas will need careful thinning to create an open, airy structure. Use a small notepad to sketch a rough outline of your vision—this helps clarify which branches to keep and which to remove. The goal is to create a balanced, harmonious silhouette that reflects the natural beauty of the plant while maintaining its bonsai integrity.
✂️ Step 2: Prune for Structure in Early Spring
Timing is everything with Japanese knotweed bonsai. Prune in early spring, just as new growth begins to emerge but before the leaves fully unfurl. This is when the plant is most responsive to shaping. I use sharp, clean bonsai shears to make precise cuts at a 45-degree angle, just above a leaf node or bud. This angle helps water bead away from the cut, reducing the risk of rot.
Focus on reducing the length of overly long branches by about one-third to encourage bushier growth. Avoid cutting back to bare wood—leave at least two or three leaf nodes on each branch to maintain photosynthesis. If a branch is weak or unproductive, remove it entirely at its base. You’ll notice new shoots emerging from the nodes within 2-3 weeks, signaling successful pruning.
☀️ Step 3: Refine and Thin in Late Spring to Early Summer
Once the initial flush of growth has hardened off, it’s time for a second round of pruning to refine the bonsai’s shape. This is where you’ll thin out crowded branches and remove any that detract from the overall design. I like to step back frequently and squint—this helps me see the plant as a whole rather than focusing on individual branches. Look for branches that grow inward or cross over others; these are prime candidates for removal.
For thicker branches, use your shears to make clean cuts. For finer branches, I find that my fingers work best—pinching them off just above a leaf node prevents damage to the surrounding foliage. Water the plant thoroughly after pruning to help it recover. You’ll see fresh, vibrant growth filling in within 3-4 weeks, giving your bonsai a fuller, more dynamic appearance.
✂️ Step 4: Light Maintenance Pruning Through Fall
As the growing season winds down, shift to light maintenance pruning. This involves removing any dead, diseased, or weak growth that appears throughout late summer and fall. Japanese knotweed is particularly resilient, so it can handle minor adjustments even as temperatures cool. I focus on keeping the bonsai’s shape intact while allowing it to enter dormancy with a clean, healthy structure.
During this phase, I also remove any seed heads or flowers if they appear—bonsai prioritize form over function, and these can detract from the plant’s aesthetic. Reduce watering gradually as the plant prepares for dormancy, but keep the soil lightly moist. By mid-fall, your bonsai should look polished and ready for winter, with no dead or unsightly growth remaining.
⏰ Step 5: Winter Dormancy and Preparing for Next Year
The final step in your pruning routine is preparing the bonsai for dormancy. In late fall, give the plant one last inspection to ensure no lingering dead branches or weak growth remains. If you notice any, remove them now to prevent pests or disease from taking hold during the colder months. Japanese knotweed is hardy, but even it benefits from a clean slate heading into winter.
Reduce watering to once every 2-3 weeks, allowing the soil to dry out slightly between waterings. Store your bonsai in a sheltered location where temperatures stay above 20°F but avoid direct heat sources like radiators. In early spring, resume your pruning routine, and you’ll be amazed at how the plant responds to your careful shaping. Over time, your bonsai will develop a strong, balanced structure that showcases the natural elegance of Japanese knotweed.
Tips & tricks for perfect Japanese knotweed bonsai pruning
Transforming wild growth into bonsai artistry takes patience—and these insights will help you refine your technique year after year.
Tool Selection: Invest in a pair of high-quality bonsai shears with sharp, precision blades. The 45-degree angle cuts you make in Step 2 won't just shape your plant—they'll also prevent water from pooling at the cut site, reducing rot risk. I keep a small bottle of rubbing alcohol nearby to wipe down blades between cuts, ensuring clean incisions every time. For finer branches, I've found that using my fingers to pinch rather than cut preserves more delicate foliage while still maintaining the plant's natural structure.
Visual Assessment Trick: When assessing your plant's framework in Step 1, try this technique: Hold your bonsai at arm's length and squint your eyes. This simple visual trick helps you see the overall silhouette more clearly, making it easier to identify branches that need thinning or removal. I always sketch my vision on a small notepad first—this forces me to think about the plant's balance before making any cuts. The key is to maintain that open, airy structure that defines bonsai aesthetics, even with knotweed's naturally dense growth.
Seasonal Timing Insight: The 2-3 week window mentioned in Step 2 for new growth to emerge after early spring pruning can vary slightly based on your climate. In cooler regions, you might extend this to 3-4 weeks—just watch for those first fresh shoots rather than relying strictly on the calendar. The same principle applies to the 3-4 week recovery period after late spring pruning: patience pays off as the plant fills in with vibrant new growth. I've learned to mark my calendar with these seasonal milestones to stay ahead of the plant's natural rhythm.
Winter Care Strategy: While the instructions specify storing your bonsai above 20°F, I've found that adding a layer of protective covering (like a breathable frost cloth) during the coldest months provides extra insurance against temperature fluctuations. This is particularly important if your bonsai sits near drafty windows or doors. The once every 2-3 weeks watering schedule during dormancy should be adjusted based on your specific microclimate—always check soil moisture before watering rather than following the schedule rigidly.
Pro Tips for Japanese Knotweed Bonsai
- Transforming wild growth into bonsai artistry takes patience—and these insights will help you refine your technique y...
- Tool Selection: Invest in a pair of high-quality bonsai shears with sharp, precision blades. The 45-degree angle cuts...
- Visual Assessment Trick: When assessing your plant's framework in Step 1, try this technique: Hold your bonsai at arm...
Frequently asked questions
Got questions about growing Japanese knotweed bonsai? You’re not alone—this plant is as fascinating as it is tricky! Below, we’ve answered the most common queries to help you master its care and pruning.
Is Japanese knotweed bonsai legal to grow?
In most places, yes, but check local regulations first! Japanese knotweed (Reynoutria japonica) is invasive in some regions (like the U.S. and parts of Europe). If you’re in a restricted area, opt for sterile cultivars or consult your state’s agricultural department to avoid fines or removal orders.
When is the best time to prune Japanese knotweed bonsai?
Prune in late winter or early spring (just before new growth starts) to shape the plant and control its aggressive spread. For bonsai styling, light pruning can happen year-round, but avoid heavy cuts in fall—it may encourage unwanted regrowth before dormancy.
What if my Japanese knotweed keeps spreading despite pruning?
If it’s escaping your bonsai pot, you’re likely dealing with rhizome growth. Dig up the plant, trim the roots aggressively (wear gloves!), and repot with a root barrier or a deep container to contain it. For severe cases, consider sterile bonsai alternatives like Fatsia japonica or Pieris.
Can I use regular bonsai tools on Japanese knotweed?
Yes, but sterilize them afterward! Japanese knotweed’s sap can clog tools, and its rhizomes are tough. Use sharp, heavy-duty pruners or a serrated knife for thick stems. A root saw is ideal for cutting stubborn rhizomes—just clean tools with rubbing alcohol or bleach between uses.
Pro Tip: How do I prevent regrowth after pruning?
Apply a mulch layer (like gravel or sand) around the base to smother emerging shoots. For stubborn sprouts, spot-treat with vinegar (50% water, 50% acetic acid) or a glyphosate-free herbicide (follow label instructions carefully). Consistency is key—check for new growth weekly in spring!
Wrapping up and next steps
Mastering Japanese knotweed bonsai is all about patience, precision, and passion—turning an invasive plant into a stunning, miniature masterpiece! 🌿 With the right tools, techniques, and seasonal care, you can keep its growth in check while nurturing its natural beauty.
Whether you’re a beginner or a seasoned bonsai enthusiast, every trim brings you closer to that perfect balance.
Ready to take the next step? Experiment with different pruning styles, document your progress, and share your journey with fellow bonsai lovers. Who knows? Your Japanese knotweed bonsai could become the star of your collection—or even inspire others to try their hand at this rewarding art! 🌟