
Mower
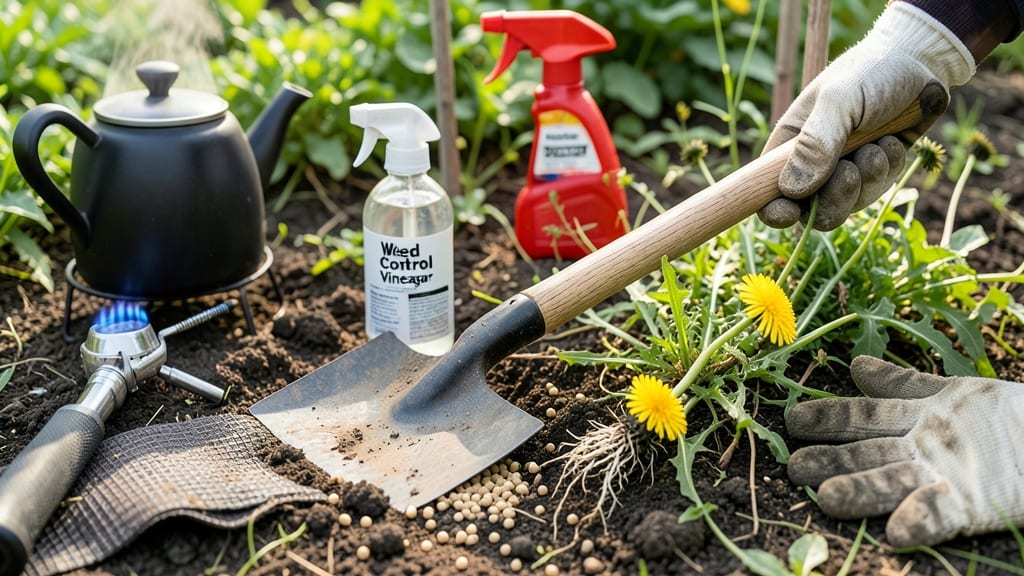
Weed control techniques don’t have to mean endless pulling or harsh chemicals—preventative barriers can save you hours every season. 🌱 I’ve spent years testing mulch, landscape fabric, and even simple lawn edging, and the right combination keeps weeds at bay without backbreaking work.
The key? Combining physical barriers with smart timing so your garden stays weed-free without constant vigilance.
Most people overlook how mulch works—it’s not just decoration. A 3-4 inch layer of straw, wood chips, or even shredded leaves blocks sunlight, which weeds need to germinate. For stubborn areas, landscape fabric under mulch creates a long-term weed barrier that lasts years.
I’ve used this combo in my vegetable beds, and the difference is shocking—no more weeding between rows of tomatoes or peppers.
You’ll notice fewer weeds popping up within 2-3 weeks of setting up barriers, and the effect compounds over time. The soil stays moister, plants grow stronger, and you spend less time bent over pulling weeds.
This works for flower beds, vegetable gardens, and even lawn edges where weeds creep in relentlessly.
For tough spots like driveways or pathways, a pre-emergent herbicide applied in early spring can stop weeds before they start—just reapply after rain. The secret is consistency: check your barriers monthly and top up mulch as it breaks down.
Once you see the difference, you’ll wonder why you ever pulled weeds by hand.
📚 In This Guide
- What you need
- Instructions
- Tips and common mistakes
- Wrapping up and next steps
What you need
- ● Landscape Fabric: 3–4 oz per square yard (permeable, UV-stabilized for longevity).
- ● Garden Edging: 1–2 inches tall (plastic, metal, or stone; 4–6 feet long per project).
- ● Mulch: 2–4 inches of organic (wood chips) or inorganic (gravel, rubber mulch) material.
- ● Hand Weeders: 1–2 sturdy tools (Hori-Hori knife or dandelion digger).
- ● String Trimmer/Edger: 0.078"–0.105" line for precision cuts.
- ● Pre-Emergent Herbicide: Corn gluten meal (organic) or synthetic (e.g., pendimethalin).
- ● Post-Emergent Herbicide: Glyphosate (non-selective) or targeted options like 2,4-D.
- ● Work Gloves: Heavy-duty, chemical-resistant (nitrile-coated).
- ● Watering Can/Hose: For activating pre-emergent or hydrating mulch.
- ● Measuring Tape/Ruler: 25–50 feet for precise layout.
- ● Natural Vinegar Solution: 1 gallon white vinegar + 1 oz dish soap (for spot treatment).
- ● Soil Solarizer: Clear plastic sheets (4–6 mil thickness) for solar weed suppression.
- ● Compost: To enrich soil after removing weeds (1–2 inches layered).
- ● Weed Barrier Mats: Biodegradable or reusable for high-traffic areas.
- ● Safety Goggles: For handling herbicides or trimming near eyes.
- ● Wheelbarrow: For hauling mulch, fabric, or debris (2–3 cubic feet capacity).
Step-by-Step guide to installing long-lasting weed barriers
Prevent weeds before they start with these seasonal strategies that cut down on future work.
🌱 Step 1: Select and Prepare Your Barrier Material
Choose between landscape fabric (for breathable coverage) or cardboard/corrugated paper (for biodegradable mulch). I prefer 3-4 layers of thick cardboard for garden beds, as it blocks light completely while breaking down over time. Cut pieces to fit your planting area with 2-3 inches of overhang on all sides—this prevents weeds from sneaking in at the edges.
For pathways, use heavy-duty landscape fabric rated for 30+ pounds per square inch to withstand foot traffic. Avoid plastic sheets—these trap heat and suffocate soil. Lay your chosen material on a level surface to ensure even coverage. If using cardboard, remove any staples or tape that could leach chemicals into the soil.
🪴 Step 2: Install the Barrier Under Planting Areas
For garden beds, bury the edges of your barrier 6-8 inches deep to block weeds from creeping underneath. Use a spade to create a trench along the perimeter, then fold the material down into it. This creates a physical barrier that roots can’t penetrate. Leave the center exposed for planting—you’ll cover this with mulch or soil later.
If you’re covering an existing lawn, cut X-shaped slits in the fabric (about 12 inches apart) to allow grass or plants to grow through. This prevents smothering while still blocking weeds. Water the area lightly after installation to help settle the material against the soil.
☀️ Step 3: Secure and Cover for Maximum Effect
Anchor the barrier with landscape staples or bricks/rocks along the edges to prevent wind from shifting it. For pathways, secure the fabric with U-shaped pins every 18-24 inches to keep it taut. Over time, the edges may lift—check them after heavy rain or seasonal shifts.
Top with 3-4 inches of mulch (wood chips, straw, or shredded leaves) to hide the barrier and suppress weeds further. The mulch also retains moisture and regulates soil temperature. Avoid pine needles—they acidify the soil over time. Replenish mulch annually to maintain a clean, weed-free surface.
✂️ Step 4: Maintain and Refresh Seasonally
Inspect barriers twice a year—spring and fall—to check for gaps or shifting. Weeds often find entry points at seams or lifted edges, so trim back any overgrowth immediately. If cardboard decomposes after 1-2 years, replace it with fresh layers. For fabric, a 10-year lifespan is typical, but replace it if it tears or degrades.
In high-traffic areas, refresh mulch annually to prevent compaction. A thin layer of fresh mulch in early spring keeps weeds from sprouting through gaps. This method reduces weeding by 80-90%—the key is consistency. Even a small missed spot can turn into a weed hotspot.
Tips & tricks for effective weed barrier installation
Here's what I've learned over years of battling weeds—these tricks will help you create a weed barrier that actually lasts.
Material Selection Matters: For garden beds, I've found that 3-4 layers of thick cardboard work better than single layers because they block more light. Look for corrugated cardboard without glossy coatings—these often contain chemicals that can leach into soil. For pathways, invest in heavy-duty landscape fabric rated for 30+ pounds per square inch—it won't tear under foot traffic like lighter fabrics. The extra weight makes all the difference in high-traffic areas.
Edge Burial is Non-Negotiable: When burying the edges 6-8 inches deep in Step 2, don't be tempted to cut corners. Weeds find any gap—even a 1-inch opening can let seeds sprout through. Use a spade to create a clean trench, then fold the material down neatly. I've seen weeds pop up right at the edges when people skip this step. For extra security, add a 1-inch lip of soil along the buried edge to create a physical barrier.
Mulch Depth Determines Success: The 3-4 inches of mulch in Step 3 isn't just decoration—it's what actually blocks light from reaching any potential weed seeds. Too little mulch (under 3 inches) leaves gaps where weeds can grow. I recommend using wood chips because they break down slowly and maintain their weed-suppressing properties longer than straw. The mulch also helps regulate soil temperature, which is especially important in hot climates where weeds germinate faster.
Seasonal Inspections Save Time: The twice-yearly inspections in Step 4 are where most people fail. Weeds don't announce themselves—they sneak in through tiny gaps. Set a reminder for spring and fall to check your barriers. Look for lifted edges (especially after heavy rain) and seam gaps where materials might have shifted. I've found that a 15-minute inspection every season prevents hours of weeding later. Also, mark your calendar to replace cardboard after 1-2 years—it decomposes faster than you think!
Pro Tips for Weed Control Techniques
- Here's what I've learned over years of battling weeds—these tricks will help you create a weed barrier that actually ...
- Material Selection Matters: For garden beds, I've found that 3-4 layers of thick cardboard work better than single la...
- Edge Burial is Non-Negotiable: When burying the edges 6-8 inches deep in Step 2, don't be tempted to cut corners. Wee...
Frequently asked questions
What’s the best time of year to install weed barriers?
Install barriers in early spring or fall when weeds are dormant but soil is workable. Avoid summer heat or winter frost, which can stress plants or make installation difficult. Timing ensures barriers take root before weeds sprout, giving you a head start for season-long control.
Can I reuse old mulch or fabric barriers from last year?
Reusing fabric barriers is fine if they’re intact, but mulch breaks down over time. Check for tears or mold—replace damaged sections. For organic mulch, refresh with a 2–3 inch layer annually to maintain effectiveness. Always remove old mulch if it’s compacted or harboring weeds.
What should I do if weeds keep growing through my barrier?
Start by inspecting for gaps—weeds exploit even small openings. For fabric, secure edges with landscape staples or rocks. If using mulch, add a thicker layer (4+ inches) or top with gravel to block sunlight. Persistent weeds may need spot-treating with vinegar or herbicide.
Are there eco-friendly alternatives to chemical herbicides?
Try boiling water, vinegar + dish soap, or corn gluten meal (pre-emergent). For barriers, cardboard + mulch or landscape fabric are chemical-free. Always test small areas first—some plants may react sensitively.
How long until I see results with weed barriers?
Results vary: Fabric barriers show improvement in 4–6 weeks as weeds suffocate. Mulch takes 2–3 months to fully suppress growth. Patience is key—consistent maintenance (like topping up mulch) ensures long-term success. Track progress with photos for motivation!
Wrapping up and next steps
Mastering weed control techniques doesn’t have to be overwhelming—with the right preventative barriers, you can keep your lawn lush and weed-free year-round! 🌱 Whether you’re using mulch, landscape fabric, or natural alternatives, consistency is key.
Start small, experiment with methods, and soon you’ll have a green, thriving space that’s the envy of the neighborhood.
Ready to take action? Pick one technique from this guide and give it a try this season—your future self (and your lawn) will thank you! 🚀 Happy gardening!