
Tools
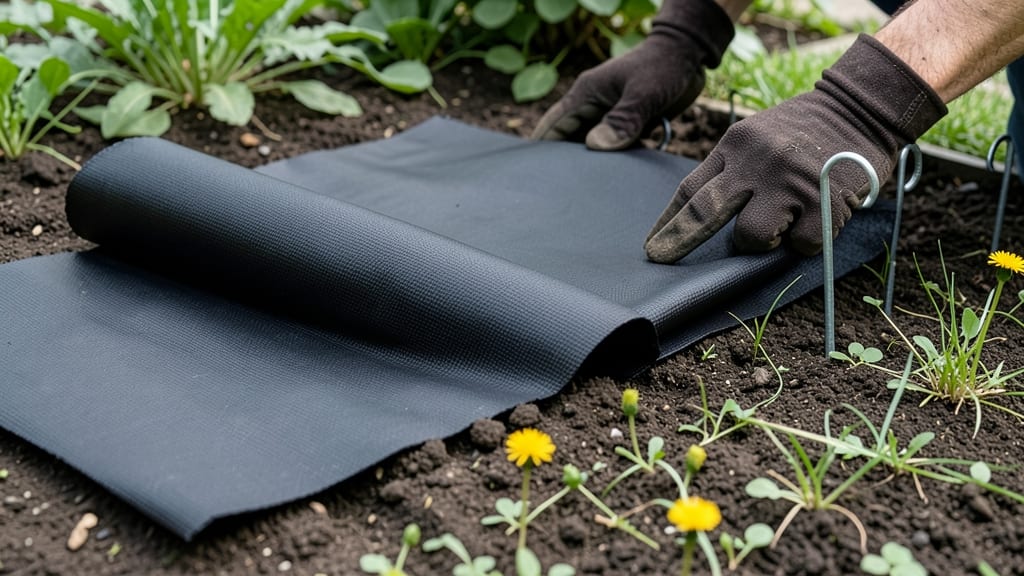
This anti-weed garden fabric that actually works—no more pulling weeds by hand. 🌱 I’ve tried every trick in the book, but this light-blocking barrier finally gave me the weed-free garden I’ve been dreaming of in just a few weeks. The secret lies in its ability to smother weeds while letting water and air reach your plants. It’s not just about laying it down—proper installation and maintenance make all the difference. You’ll see a dramatic drop in weeds within 2-4 weeks, and your plants will thrive without competition. This isn’t a temporary fix—when used right, it lasts 3-5 years, saving you hours of backbreaking work. The best part? It’s reusable, so you won’t waste money on short-term solutions. Whether you’re tackling a vegetable bed, flower garden, or pathway, this fabric is a game-changer. Here’s how to make it work for you without the common pitfalls.
📚 In This Guide
- What you need
- Instructions
- Tips and common mistakes
- Wrapping up and next steps
What you need
- ● Anti-Weed Garden Fabric: 1 roll (typically 10–20 ft. wide, 50–100 ft. long—adjust based on garden size).
- ● Look for UV-stabilized, breathable fabric (e.g., woven polypropylene or landscape fabric).
- ● Landscape Staples or U-Shaped Stakes: 1–2 boxes (50–100 stakes), 6–12 inches long.
- ● Galvanized or plastic-coated for rust resistance.
- ● Heavy-Duty Scissors or Utility Knife: For precise cuts without fraying.
- ● Measuring Tape: 25+ ft. for accurate fabric sizing.
- ○ Gloves (Optional but Recommended): To protect hands from sharp edges or prickly soil.
- ○ Mulch or Edging Stones (Optional):strong> To secure fabric edges and prevent shifting.
- ● Prerequisites: A level, weed-free garden bed (remove existing weeds first!).
- ● Sunny or partially sunny location (fabric works best with direct sunlight).
How to install anti-weed fabric for a weed-free garden
This light-blocking fabric smothers weeds in weeks—here’s how to use it effectively.
🌱 Step 1: Prepare the Garden Bed
Clear the area of existing weeds and debris first. Use a garden fork or shovel to loosen compacted soil—this helps the fabric settle naturally and prevents air pockets that weeds exploit. I like to rake the surface smooth afterward so the fabric lies flat. Uneven spots create gaps where weeds can push through.
If your soil has large rocks or roots, remove them now. The fabric should sit directly on the soil, not buried or propped up—this ensures maximum light blockage. For raised beds or slopes, secure the edges with landscape staples or bricks to prevent shifting from wind or water.
🪴 Step 2: Lay the Fabric Evenly
Unroll the fabric over the prepared bed, allowing a 2-inch overhang on all sides. This extra coverage prevents weeds from creeping in along the edges. For large areas, overlap sections by 4-6 inches to block light completely at seams. I’ve seen weeds pop up through tiny gaps where fabric edges didn’t meet.
Smooth out wrinkles as you go—the fabric should lie taut but not stretched tight. If you’re covering an existing lawn, cut a hole in the fabric for any plants you want to preserve, like ornamental grasses or clover. Mark the hole with a stake before cutting to avoid mistakes.
☀️ Step 3: Secure the Edges and Add Mulch
Use landscape staples or galvanized pins to anchor the fabric’s edges, driving them into the soil every 12-18 inches. For decorative borders, bury the edges under 2-3 inches of mulch—this keeps the fabric in place while adding a finished look. Avoid heavy rocks as anchors; they can shift and tear the fabric over time.
Top the fabric with 2-3 inches of mulch (like straw or wood chips) to weigh it down and improve its weed-blocking performance. This also helps regulate soil temperature and retains moisture. I’ve found that mulch prevents the fabric from blowing away in windy conditions, which is especially important in exposed garden areas.
✂️ Step 4: Cut Holes for Plants (If Needed)
If you’re planting through the fabric, use a utility knife or scissors to cut X-shaped slits (about 6 inches wide) over the planting holes. This prevents the fabric from tearing when you dig. For each plant, gently pull back the fabric flaps and plant as usual—roots will grow through the slits naturally.
Water the soil thoroughly before planting to help roots establish quickly. The fabric blocks weeds but doesn’t affect soil moisture or nutrients, so your plants will grow just as they would without it. I’ve seen tomatoes, peppers, and flowers thrive with this method—just avoid burying the fabric too deep near plant stems.
⏰ Step 5: Maintain and Monitor
Check the fabric periodically for tears or gaps, especially after heavy rain or wind. Repair any damage immediately by overlapping new fabric and securing with staples. Weeds can sprout through even small holes, so act fast—most weeds die within 2-3 weeks of complete light blockage.
For long-term use, replace the fabric every 3-5 years or when it degrades. Over time, it breaks down from UV exposure and becomes less effective. If you notice sunlight peeking through, it’s time to refresh the barrier. This method works year-round, but in hot climates, add a 1-inch layer of mulch in summer to protect soil moisture.
Tips & tricks for perfect anti-weed garden fabric installation
These game-changing strategies will help you get the most out of your weed-blocking fabric—no more stubborn weeds creeping through!
Soil Preparation Secret: Before laying the fabric, I recommend adding a thin layer of compost (about ½ inch) over the prepared soil in Step 1. This small step improves soil fertility while keeping the fabric in direct contact with the soil—critical for blocking light completely. The compost also helps the fabric settle more evenly, preventing those frustrating air pockets that weeds exploit. Think of it as a preemptive strike against future weed growth.
Overlap Strategy: When you're working with large areas in Step 2, pay special attention to those seams where fabric sections meet. The instructions mention a 4-6 inch overlap, but I've found that 6 inches is the magic number for complete light blockage. I've seen weeds pop up through smaller overlaps after heavy rain, so don't skimp—especially in sunny climates where weeds grow aggressively. A little extra fabric now saves you hours of weeding later.
Edge Security: For the landscape staples in Step 3, I always use galvanized staples with rubber grommets—they grip the fabric more securely and won't rust over time. Drive them in at a 45-degree angle for maximum hold, especially along wind-exposed edges. I've had fabric shift after storms when staples were driven straight down, so this angled approach makes all the difference in maintaining that crucial 2-inch overhang.
Planting Through Fabric: When cutting those X-shaped slits in Step 4, make them slightly larger than needed—about 7 inches instead of 6. This gives you room to adjust as you plant, preventing the fabric from tearing when you dig. I've seen gardeners struggle when the hole was too tight, so this extra inch of wiggle room makes planting through fabric much more forgiving. The roots will find their way through naturally, and you'll avoid that frustrating fabric-tearing scenario.
Pro Tips for Anti Weed Garden Fabric
- These game-changing strategies will help you get the most out of your weed-blocking fabric—no more stubborn weeds cre...
- Soil Preparation Secret: Before laying the fabric, I recommend adding a thin layer of compost (about ½ inch) over the...
- Overlap Strategy: When you're working with large areas in Step 2, pay special attention to those seams where fabric s...
Frequently asked questions
Got questions about anti-weed garden fabric?
You’re not alone! Here are answers to the most common concerns—so you can tackle weeds like a pro without the guesswork.
How long does it take for anti-weed fabric to kill weeds?
Most weeds die within 4–6 weeks of full coverage, especially in hot, sunny conditions. The fabric blocks sunlight, starving weeds of energy. For stubborn perennials, extend the time to 8–12 weeks or till the area afterward for faster results.
When is the best time to install anti-weed fabric?
Spring or early fall are ideal! Install it before weeds sprout (late winter/early spring) or after summer’s peak heat. Avoid placing it over active weeds—till or hand-pull them first. Pro tip: Water the soil before laying the fabric to help it settle and block light effectively.
Can I reuse anti-weed fabric, or should I replace it?
You can reuse it 2–3 times if it’s still intact, but replace it if it’s torn, degraded, or letting weeds poke through. Over time, UV rays and soil microbes break it down. For long-term beds, consider landscape fabric with a longer lifespan (5+ years) or pair it with mulch.
Does anti-weed fabric work in shady areas?
Yes, but less effectively. Weeds need sunlight to grow, so fabric works best in full sun**. In shade, combine it with thick mulch (3–4 inches) or a double layer of fabric to smother weeds. Monitor shaded areas more often—weeds may still sneak through gaps.
What do I do if weeds keep growing through the fabric?
Check for gaps or tears—patch them with duct tape or overlapping fabric. If weeds persist, they might be sprouting from buried seeds or roots. Try:
- Adding a 1–2 inch layer of mulch on top.
- Tilling the area and reapplying fresh fabric.
- Using a herbicide-safe fabric (like woven landscape fabric) for tough spots.
Wrapping up and next steps
Transforming your garden into a weed-free paradise is easier than ever with anti-weed garden fabric—a simple, effective solution that saves time and effort while protecting your plants. By blocking light and smothering unwanted growth, this lightweight barrier lets you focus on what truly matters: nurturing your garden’s potential. 🌱
Ready to take the next step? Measure your garden, gather your supplies, and lay down your fabric today! Your future self—and your plants—will thank you. Happy gardening! 🌿