
Propagation
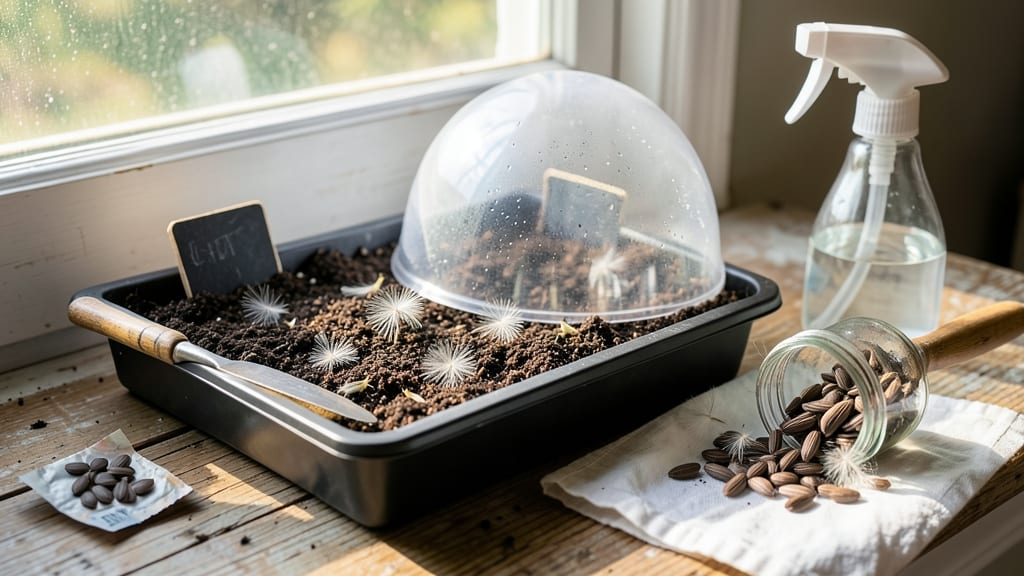
Propagating milkweed seeds isn't just about growing plants—it's about creating a lifeline for monarch butterflies. 🌱 The key to fast germination lies in mimicking nature's timing, and I've cracked the code after years of trial and error with my own patch.
These fluffy seeds need a little help breaking their dormancy before they'll sprout reliably, but once they do, you'll have a thriving host plant for caterpillars in just a few weeks.
Here's the secret: milkweed seeds need 60 days of cold stratification to trigger germination. You can either plant them outdoors in fall and let winter do the work, or simulate it indoors with a simple DIY setup using a plastic bag and your fridge.
The soil should stay consistently moist but never soggy—think of it like a damp sponge. Most gardeners overwater at this stage, which actually drowns the tiny seeds before they get a chance to sprout.
By the time spring arrives, you'll see those first green shoots pushing through the soil, ready to establish themselves into strong plants. The real magic happens when monarchs discover your garden—you'll watch caterpillars munching away on fresh leaves, knowing you've provided a critical food source for their survival.
This method works for both common milkweed (Asclepias syriaca) and butterfly weed (Asclepias tuberosa), giving you flexibility in your pollinator garden.
The best part? These plants spread easily once established, creating a self-sustaining ecosystem. Start your seeds now, and by next summer, you'll have a monarch magnet that keeps coming back year after year. The payoff isn't just beautiful flowers—it's helping save an entire species, one seed at a time.
📚 In This Guide
- What you need
- Instructions
- Tips and common mistakes
- Wrapping up and next steps
What you need
- ● Milkweed seeds: Fresh or store-bought (check for Asclepias species like Asclepias tuberosa or Asclepias syriaca). Aim for 50–100 seeds for a small patch.
- ● Scarification tool: Sandpaper (medium-grit, 100–150 grit) or
- ● A file or nail clipper (for manual seed nicking).
- ● Planting containers: Seed trays with drainage holes or
- ● Small pots (3–4 inches deep) or even paper towels (for cold stratification).
- ● Potting mix: Well-draining, seed-starting mix (avoid garden soil—it’s too dense!).
- ● Plastic wrap or humidity dome: To retain moisture during germination.
- ● Spray bottle: For gentle watering (avoid over-saturating!).
- ● Refrigerator or cold stratification setup: Plastic bag + moist paper towels or
- ● A cooler with ice packs (if outdoors isn’t an option).
- ● Grow lights or sunny windowsill: A south-facing window or LED grow lights (12–16 hours/day) for seedlings.
- ● Seedling heat mat: Speeds up germination in cooler climates (70–80°F ideal).
- ● Fungicide (like neem oil or hydrogen peroxide): Prevents damping-off disease in damp setups.
- ● Label markers: To track seed varieties (especially if testing multiple species!).
- ● Transplanting tools: Small trowel or butter knife for delicate seedlings.
- ● Outdoor hardening-off tray: Gradually acclimates seedlings to outdoor conditions.
Step-by-Step instructions for propagating milkweed seeds
Here's how to get those seeds sprouting in record time—monarchs will thank you!
🌱 Step 1: Harvest and Stratify Seeds Properly
Collect seeds from fully mature milkweed pods—wait until they turn brown and split open naturally. The fluffy seed tufts need 60-90 days of cold stratification to break dormancy. I place them in a paper bag with a damp paper towel, then refrigerate for 2 months.
Check the bag weekly to ensure the towel stays moist but not soggy. If you miss the cold period, don't worry—some seeds still germinate with a quick soak in warm water for 24 hours before planting. The key is patience; rushing this step kills germination rates.
💧 Step 2: Prepare Containers and Planting Mix
Use small pots or seed trays with well-draining mix—I blend equal parts potting soil and perlite. Fill containers to 1 inch from the rim and moisten lightly until damp. Milkweed hates soggy roots, so avoid heavy garden soil.
Plant seeds ¼ inch deep, spacing them ½ inch apart since they germinate densely. Cover with a fine layer of sand to prevent fungal issues. Label your trays—milkweed seedlings look identical until they develop their first true leaves.
☀️ Step 3: Provide Warmth and Light for Germination
Keep soil at 70-75°F using a seedling heat mat if needed. Place trays under grow lights or in a sunny window (12+ hours daily). You'll see sprouts in 10-21 days—earlier if stratified properly.
Once seedlings emerge, reduce heat mat use but maintain bright light. Leggy seedlings mean light is insufficient—move them closer. Thin to 2 inches apart when they reach 2 inches tall to prevent competition.
✂️ Step 4: Harden Off and Transplant Young Plants
After 4-6 weeks with 4-6 true leaves, acclimate seedlings outdoors. Start with 1 hour daily in shade, increasing time over 10 days. Transplant on a cloudy day to reduce shock.
Choose a sunny spot with full sun exposure and well-draining soil. Space plants 12-18 inches apart—they'll grow fast once established. Water deeply at the base, avoiding leaves to prevent mildew.
🌿 Step 5: Maintain for Monarch Visits
Keep soil moist but not waterlogged—milkweed tolerates drought once rooted. Fertilize lightly with balanced 10-10-10 at planting and again in spring. Watch for monarch eggs on leaves by mid-summer!
Deadhead spent flowers in fall to encourage new growth, but leave seed pods for next year's butterflies. Your garden will soon become a monarch magnet—just be ready for the caterpillar onslaught!
Tips & tricks for perfect milkweed propagation
Here's what nobody tells you about getting those seeds to sprout like clockwork.
Stratification Secret: The 2-month cold period in Step 1 isn't just about time—it's about consistency. I place my bag of seeds in a zip-top baggie first to contain any moisture leaks, then tuck it into the crisper drawer of my fridge where temps stay steady around 35-40°F. This mimics natural winter conditions better than the main fridge compartments, which can fluctuate wildly.
Seedling Light Hack: When you're waiting for those 10-21 days of germination in Step 3, don't rely solely on windowsills. I've found that placing my trays under a simple LED grow light (just $20 at garden stores) for 14 hours daily gives more consistent results than even the sunniest southern exposure. The light should be within 6 inches of the seedlings—closer than you might think!
Transplant Timing: The 4-6 week mark in Step 4 is your golden window, but don't wait until the last day. I transplant mine when they hit 4 true leaves and are about 3 inches tall—this gives them enough strength to handle the shock. Pro tip: Water the day before transplanting so roots are plump and happy when you move them.
Monarch Magnet Maintenance: After your plants establish in Step 5, here's a trick I learned from butterfly enthusiasts: Sprinkle a thin layer of sand around the base of your milkweed every few months. This mimics natural conditions and helps prevent fungal issues while keeping the soil structure ideal for monarch caterpillars to burrow into.
Pro Tips for Propagate Milkweed Seeds
- Here's what nobody tells you about getting those seeds to sprout like clockwork.
- Stratification Secret: The 2-month cold period in Step 1 isn't just about time—it's about consistency. I place my bag...
- Seedling Light Hack: When you're waiting for those 10-21 days of germination in Step 3, don't rely solely on windowsi...
Frequently asked questions
Got questions about growing milkweed from seeds?
You’re not alone! Here are answers to the most common concerns—from timing to troubleshooting—so you can confidently start your monarch-friendly garden.
When is the best time to plant milkweed seeds?
For fastest germination, plant seeds in late summer or early fall (8–12 weeks before your first frost). This mimics their natural dormancy period. If planting in spring, stratify seeds first (see our step-by-step guide). Cold stratification (40–50°F for 2–4 weeks) breaks dormancy, but patience is key—some seeds may take months to sprout!
Why won’t my milkweed seeds germinate?
Milkweed seeds are tricky—they need a combination of moisture, cold, and time. Common culprits:
- No stratification: Skip the cold treatment, and seeds stay dormant. Fix it by chilling them in a damp paper towel.
- Too warm: Seeds need consistent cool temps (below 60°F). Move pots to a shady spot or basement.
- Poor soil contact: Seeds must touch moist soil. Press them gently into the medium.
Pro tip: Don’t give up! Some seeds lie dormant for years in the wild—your patience might pay off next season.
Can I grow milkweed from store-bought seeds, or do I need wild-collected ones?
Both work! Store-bought seeds (like those from Swamp Milkweed or Butterfly Weed) are pre-stratified or treated for faster germination. Wild-collected seeds may need extra care (like scarification or longer cold treatment), but they’re genetically local, which helps monarchs adapt to your region. Tip: Buy from reputable sellers (e.g., Native American Seed) to ensure viability.
Will milkweed seeds grow if I plant them directly outside in winter?
Yes, but timing matters! Plant seeds in late fall or winter (before snow covers them), and they’ll naturally stratify. Key rules:
- Use a well-draining soil (sandy loam works best).
- Avoid heavy mulch—seeds need air and moisture.
- Mark the spot! Spring rains can wash seeds away.
If your winters are extremely cold (below 0°F), plant in a protected microclimate (e.g., near a south-facing wall).
How do I know if my milkweed seedlings are healthy?
Healthy milkweed seedlings have:
- Two small, oval leaves (not the later “milkweed-shaped” foliage).
- Vibrant green color (no yellowing or wilting).
- Slow, steady growth (no leggy stems—thin seedlings if needed).
Red flags: Blackened stems = rot (too wet); stunted growth = not enough light. Move seedlings to bright, indirect light (like a sunny windowsill) if they’re stretching.
Wrapping up and next steps
Growing milkweed from seeds is a rewarding way to support monarch butterflies and create a thriving garden ecosystem! 🌱 With the right techniques—like stratification, proper soil, and patience—you’ll soon see those first green shoots.
Remember, every seed you plant helps sustain these beautiful pollinators, so don’t hesitate to start small and expand.
Now that you’re armed with the know-how, take the next step: grab your supplies, pick a sunny spot, and begin your milkweed journey today. Happy gardening—and happy monarchs! 🦋