
Tools
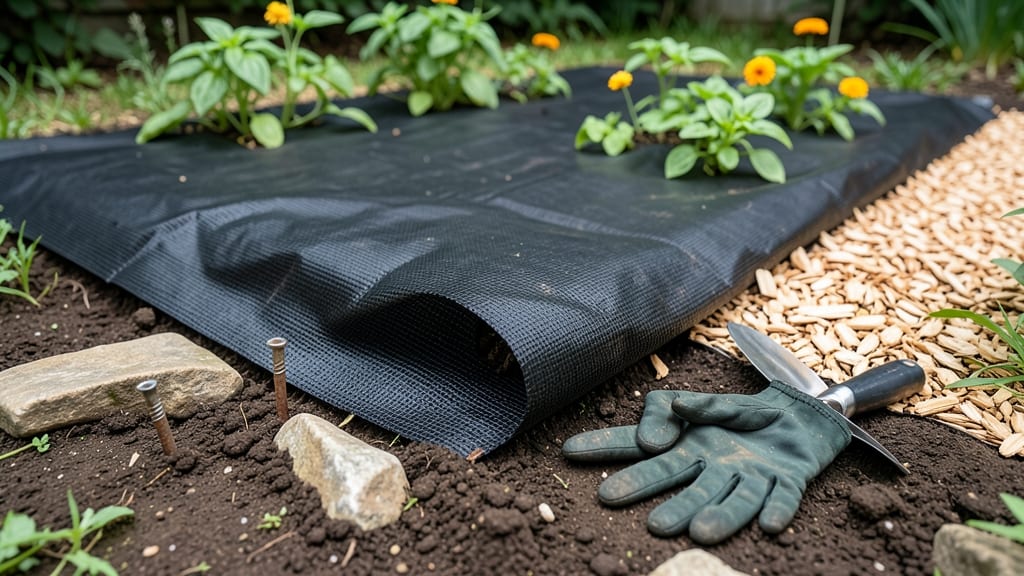
Black weed barrier cloth saved my back—and my garden—after two summers of endless weeding. 🌱 The secret to foolproof weed control isn’t brute force; it’s blocking sunlight where weeds germinate before they start.
This heavy-duty fabric smothers weeds underground while keeping soil warm, moist, and ready for your plants to thrive.
You’ll see results immediately: fewer weeds, less water waste, and soil that stays consistently warm for faster plant growth. The cloth lasts 3-5 years if installed right, making it a one-time investment that pays off every season. No more bending over—just healthier plants and easier maintenance.
📚 In This Guide
- What you need
- Instructions
- Tips and common mistakes
- Wrapping up and next steps
What you need
- ● Black weed barrier cloth: 4–10 mm thick (or heavier for durability), UV-stabilized, and made of polypropylene or landscaping fabric. Measure your garden area to determine the exact size needed—add 1–2 feet extra for overlaps.
- ● Landscape staples or U-shaped nails: Galvanized or stainless steel (1.5–2 inches long) to secure the cloth to the ground. Aim for 1 staple every 12–18 inches along edges and seams.
- ○ Edging material (optional but recommended):strong> Metal, plastic, or stone edging to keep the cloth in place and prevent shifting. Cut to fit the perimeter of your garden bed.
- ● Shovel or spade: For digging trenches (if burying edges) or smoothing the ground before laying the cloth.
- ● Rake: To level the soil and remove rocks or debris before installation.
- ● Measuring tape: To ensure accurate cuts and proper coverage.
- ● Utility knife or scissors: For cleanly cutting the weed barrier cloth to size.
- ● Gloves: Heavy-duty work gloves to protect your hands while handling staples or rough terrain.
- ● Ground cover mulch: Straw, wood chips, or gravel to weigh down the edges and improve aesthetics.
- ● Landscape fabric tape: For sealing seams and preventing light gaps where weeds could sneak through.
- ● Hammer or staple gun: For faster and easier installation of staples.
- ● Soil amendment (compost or fertilizer): To enrich the soil around plants after installing the barrier.
Step-by-Step guide to installing black weed barrier cloth
Here's my foolproof method for suppressing weeds year-round without chemicals or backbreaking weeding.
🌱 Step 1: Prepare the Soil and Choose Your Layout
Clear the area of existing weeds and debris first—this prevents new growth from pushing through the barrier later. I like to work on a dry day when soil is firm but not packed. Use a garden rake to loosen the top 2-3 inches of soil, breaking up any compacted layers that might prevent proper contact with the barrier cloth.
Plan your layout carefully. For garden beds, leave 6-12 inches of bare soil around plant stems to prevent heat buildup that can damage roots. In pathways, overlap sheets by 4-6 inches to create a continuous weed-blocking surface. Mark your layout with stakes if needed—this saves time when you're ready to install.
🪴 Step 2: Lay the Black Weed Barrier Cloth
Unroll the barrier cloth over your prepared area, smoothing it out to eliminate wrinkles. Tight wrinkles create gaps where weeds can grow through. For garden beds, cut X-shaped slits in the cloth where plants will go—this prevents heat stress on stems while still blocking weeds in surrounding soil.
In pathways or ground covers, leave the cloth intact but tuck the edges 2-3 inches under landscape fabric or mulch to secure it. I always overlap sheets by 4-6 inches and tape the seams with landscape-grade tape to prevent light from sneaking through. This ensures a seamless weed barrier that lasts the entire season.
✂️ Step 3: Secure the Edges and Add Mulch
Anchor the edges of the barrier cloth with U-shaped landscape staples or heavy rocks to prevent wind from shifting it. For garden beds, I use galvanized staples spaced every 12-18 inches along the perimeter. In pathways, brick edging or metal landscape pins work best to keep the cloth flat and secure.
Add a 2-3 inch layer of mulch over the cloth in garden beds—this stabilizes the barrier and improves soil temperature regulation. In pathways, use gravel or decomposed granite instead of organic mulch to prevent weed seeds from blowing in. The mulch layer also protects the cloth from UV degradation over time.
☀️ Step 4: Plant Through Pre-Cut Slits and Maintain
For plants already in the ground, gently pull back the soil around the stem and slide the cloth up 1-2 inches from the base. This prevents heat buildup while still blocking weeds. For new plants, use the pre-cut slits you made earlier—just widen them slightly with scissors if needed.
Water deeply after planting to settle the soil around the barrier. Over time, you may need to replenish mulch or secure loose edges as they shift. I check my installations every 4-6 weeks during the growing season to ensure nothing has shifted or torn. With proper installation, this weed barrier lasts 3-5 years before needing replacement.
⏰ Step 5: Extend the Barrier's Lifespan
To maximize the cloth's durability, avoid walking on it—especially in pathways where foot traffic can create tears. In garden beds, place stepping stones or boards to create clear paths. If you notice small tears, patch them immediately with landscape tape or a piece of the same barrier material.
For high-traffic areas, consider adding a thin layer of landscape fabric under the barrier cloth first. This creates a double barrier that lasts even longer. I've seen some installations still effective after 7 years when properly maintained—proof that a little extra care goes a long way.
Tips & tricks for perfect black weed barrier installation
These pro-level strategies will help you create a weed-free zone that lasts for years—without the headaches.
Soil Prep is Everything: When loosening the top 2-3 inches of soil in Step 1, focus on breaking up any compacted layers that could create air pockets under the barrier. I use a garden fork to gently lift the soil rather than digging—this prevents tearing the cloth later when you lay it down. The goal is to create a smooth, level surface where the black weed barrier can make full contact with the soil.
Slit Placement Matters: For garden beds in Step 2, when making those X-shaped slits for plant stems, cut them slightly larger than your plant's diameter. This gives roots room to grow without the cloth constricting them over time. I've seen roots literally push through tight slits, creating gaps where weeds sneak through. A little extra space now saves major headaches later.
Overlap Strategy for Pathways: The 4-6 inch overlap between sheets in pathways isn't just about blocking weeds—it's about preventing light from sneaking through the seams. I've found that using landscape-grade tape on the seams creates a watertight seal that keeps weeds from germinating along the edges. Pro tip: Press the tape firmly with a flat tool to ensure a complete seal.
Mulch Depth Makes the Difference: That 2-3 inch layer of mulch in Step 3 isn't just decorative—it's the secret to long-term success. Organic mulch in garden beds breaks down over time, so I replenish it every 6-12 months to maintain the proper depth. In pathways, I use decomposed granite because it never breaks down and creates a permanent barrier against wind-blown weed seeds.
Pro Tips for Black Weed Barrier Cloth
- These pro-level strategies will help you create a weed-free zone that lasts for years—without the headaches.
- Soil Prep is Everything: When loosening the top 2-3 inches of soil in Step 1, focus on breaking up any compacted laye...
- Slit Placement Matters: For garden beds in Step 2, when making those X-shaped slits for plant stems, cut them slightl...
Frequently asked questions
Got questions about black weed barrier cloth?
You’re not alone! Here are answers to the most common concerns to help you get the best results from this garden game-changer.
What’s the best time of year to install black weed barrier cloth?
The ideal time is early spring before weeds sprout or late fall after the growing season ends. Installing it in dry, sunny weather ensures the soil is workable and maximizes sunlight absorption for weed suppression. Avoid planting during frost or extreme heat—both can stress the soil and reduce effectiveness.
How long does black weed barrier cloth last, and can I reuse it?
High-quality black weed barrier cloth typically lasts 5–10 years if installed correctly. Reuse is possible if the fabric remains intact, free of tears, and still blocks sunlight effectively. Check for UV degradation (brittleness or fading) before reusing—if it’s compromised, replace it to avoid weed regrowth.
Will black weed barrier cloth work under mulch or just on its own?
Yes! While it works well alone, adding mulch on top (like wood chips or straw) enhances weed suppression and retains moisture. The mulch layer also protects the cloth from UV damage over time. Just ensure the mulch isn’t too thick—keep it 2–3 inches deep to avoid suffocating plants or trapping excess moisture.
Can I use black weed barrier cloth in vegetable gardens without hurting plant roots?
Cut X-shaped slits in the cloth where plants will grow, then fold the flaps back to create a “pocket” for roots. This lets plants thrive while still blocking weeds. For perennials or established plants, lift the cloth gently and tuck it around the base—just avoid burying it too deep to prevent rot.
My black weed barrier cloth is tearing—what’s the best way to repair it?
Patch small tears with landscape fabric tape or overlap a fresh piece of cloth secured with landscape staples or heavy-duty staples. For larger holes, reinforce with a piece of hardware cloth (to deter burrowing pests) before covering with mulch. Avoid plastic tape—it degrades quickly and can trap moisture.
Pro Tip: Stagger seams when installing multiple sheets to prevent gaps where weeds can sneak through. And if you’re planting in rows, leave 6–12 inches of bare soil around plants to reduce heat buildup under the cloth!
Wrapping up and next steps
Black weed barrier cloth is your ultimate ally in the battle against stubborn weeds—offering a low-maintenance, long-lasting solution that protects your garden, lawn, or pathways year-round. Whether you're a seasoned gardener or just starting, this simple tool can transform your outdoor space with minimal effort. 🌱
Ready to reclaim your garden? Take the next step: Measure your area, grab your barrier cloth, and start laying the foundation for a weed-free paradise. Your future self (and your plants!) will thank you.