
How To
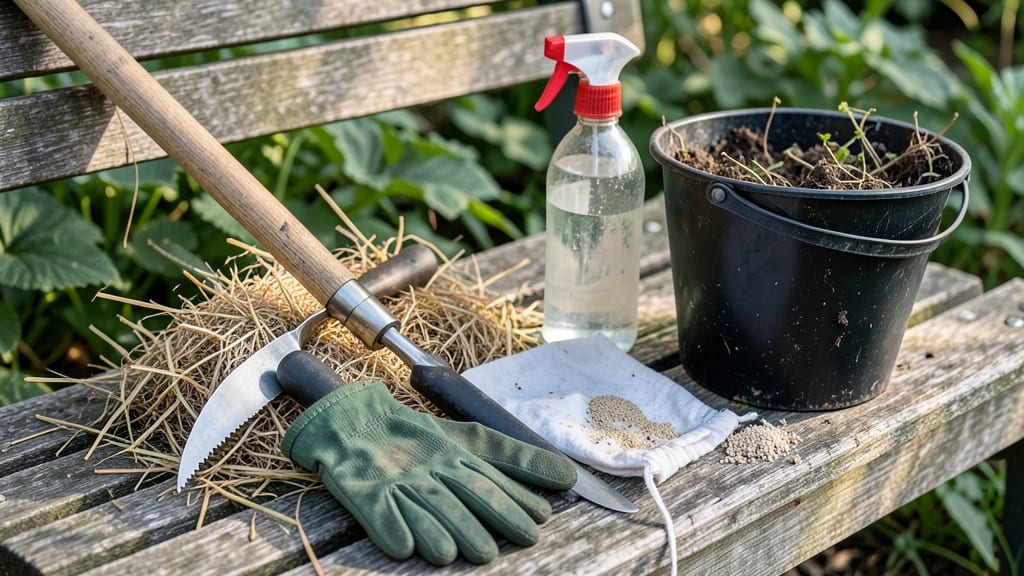
Buckwheat weed removal methods feel like a losing battle until you try this cardboard smothering trick—it works where pulling fails. 🌱 I used to spend hours yanking stubborn buckwheat only to see it regrow within weeks.
Cardboard barriers block sunlight, starve roots, and break down naturally, giving you a chemical-free win.
The secret is timing: tackle buckwheat before it flowers (late summer to early fall) when roots are shallow. Lay flattened cardboard over the area, weigh it down with rocks or mulch, and wait 4-6 weeks for the plant to die back completely. This method also prevents new seeds from sprouting.
What you’ll end up with is a weed-free patch ready for planting—no more battling regrowth or disturbed soil. Plus, the decomposed cardboard adds organic matter to your garden beds over time.
For stubborn patches, repeat the process once more if needed. This works best in full-sun areas where buckwheat thrives, and it’s perfect for organic gardeners who refuse to use herbicides.
📚 In This Guide
- What you need
- Instructions
- Tips and common mistakes
- Wrapping up and next steps
What you need
- ● Cardboard: 1–2 large, sturdy boxes (preferably unbleached and free of tape/inks). Aim for at least 3–4 layers per section to block sunlight effectively.
- ● Mulch or compost: 2–3 inches of organic mulch (straw, wood chips, or shredded leaves) to top the cardboard and retain moisture.
- ● Garden shears or scissors: For cutting cardboard to fit snugly around plants or garden edges.
- ○ Gloves (optional but recommended): Heavy-duty gardening gloves to protect your hands from prickly stems and debris.
- ● Watering can or hose: To dampen the cardboard before layering (helps it stick together and decompose faster).
- ● Shovel or spade: For clearing existing weeds and loosening soil before laying down barriers.
- ● Ruler or measuring tape: To ensure even cardboard layering (aim for overlapping edges to prevent gaps).
- ● Biodegradable landscape fabric: 1 roll (if you want extra weed suppression under the cardboard).
- ● Rocks or bricks: A few heavy items to weigh down cardboard in windy areas.
- ● Plant markers: If you’re smothering weeds around desirable plants, label them to avoid accidental damage.
- ● Compost activator: A sprinkle to speed up decomposition if you’re reusing the space soon.
Step-by-Step guide to smothering buckwheat with cardboard barriers
Here's my battle-tested method for choking out buckwheat without toxic chemicals or hours of digging.
🌱 Step 1: Identify and Clear the Area
Start by removing any visible buckwheat plants and their root systems. Use a garden fork to loosen stubborn roots—don't just pull, or you'll leave fragments that regrow. I like to work in small sections (about 2 feet by 2 feet) to avoid missing any hidden growth. Look for the characteristic triangular seed heads and dig until the soil feels free of resistance.
Once the area is cleared, rake the soil surface to break up any remaining roots or seed heads. This prevents new sprouts from emerging through the cardboard later. Pay extra attention to edges where buckwheat often spreads aggressively. A thorough clearing now means less maintenance later.
📄 Step 2: Prepare Cardboard Barriers
Use only plain, non-glossy cardboard—no tape, staples, or colored printing. Cut pieces to fit your cleared sections with about 6 inches of overlap between pieces. I like to use flattened boxes from appliances or moving supplies, as they're thick enough to block light effectively. Tear away any plastic windows or tape that might prevent decomposition.
Lay the cardboard flat and wet it thoroughly with a hose. The goal is to make it heavy and pliable so it stays put when you place it over the soil. If you skip this step, wind will blow it away, and you'll have to start over. For extra security, I weigh down the edges with small rocks or bricks in windy areas.
✂️ Step 3: Install the Barrier System
Place the wet cardboard directly over the cleared area, pressing edges firmly into the soil to eliminate gaps. Overlap pieces by at least 4 inches to prevent light from sneaking through. I like to use a garden roller or even a heavy board to press the cardboard into the soil—this ensures it stays in place and blocks all light to the roots below.
Leave the edges slightly raised (about 1 inch) to allow rainwater to penetrate. If you flatten everything completely, water will pool on top and create a soggy mess. Check after heavy rain to ensure no sections have lifted—adjust as needed to maintain full coverage.
🌿 Step 4: Maintain and Monitor Progress
Keep the cardboard in place for at least 4-6 months, or until you see no new buckwheat sprouts emerging. I check monthly by gently lifting an edge to peek at the soil. If you see any green shoots, press the cardboard back down firmly and leave it longer. The roots will decompose over time, but the light blockage is what kills the plant.
After the initial period, you can remove the cardboard and replace it with mulch or plant directly into the area. The decomposed cardboard will enrich the soil naturally. If buckwheat persists in some spots, repeat the process—this method works best with patience and consistency.
⏰ Step 5: Prevent Regrowth Long-Term
Once the area is clear, maintain it with a thick layer of organic mulch (about 3-4 inches deep) to prevent new buckwheat seeds from germinating. I use wood chips or straw, which also suppress weeds naturally. Water regularly to keep the mulch moist—dry mulch loses its effectiveness quickly.
Consider planting competitive ground covers like clover or creeping thyme in the cleared area. These plants outcompete buckwheat for resources and create a living barrier. If buckwheat starts to creep back at the edges, simply extend your cardboard barrier by another 6 inches and leave it for another 2-3 months.
Tips & tricks for effective buckwheat suppression
This method works best when you pay attention to details that make all the difference between temporary control and permanent eradication.
Step 1 Precision: When clearing buckwheat in Step 1, focus on the soil's texture rather than just visible plants. Stubborn roots often hide just below the surface—dig until your garden fork meets solid resistance. I've found that working in the early morning, when soil is moist but not saturated, makes root extraction easier without creating muddy conditions. The key is thoroughness: even small root fragments can regrow into full plants.
Cardboard Selection Strategy: For Step 2, prioritize corrugated cardboard over flat sheets—the ridges create air pockets that improve decomposition while still blocking light. Avoid any cardboard with glossy finishes or plastic coatings, as these can prevent proper breakdown. I've had success using appliance boxes from stores like Home Depot, which are typically thick and free of contaminants. Remember, the goal is complete light deprivation for the roots below.
Installation Technique: During Step 3 installation, pay special attention to the overlap seams. I've learned the hard way that even a small gap can let sunlight through, allowing buckwheat sprouts to emerge. Use a straightedge tool to create clean, precise overlaps, and consider adding a second layer of cardboard over seams for extra protection in high-light areas. The slight 1-inch edge elevation you create isn't just for drainage—it also helps maintain consistent pressure on the barrier.
Monitoring System: For Step 4's monthly checks, I've developed a simple visual tracking method: mark each cardboard section with a small flag or stake at installation, then number them sequentially. This creates a permanent record of which areas need attention. If you see any sprouts during your check, don't just press the cardboard down—dig to confirm if it's a new seedling or an emerging root fragment. This distinction determines whether you need to extend the treatment period.
Pro Tips for Buckwheat Weed Removal Methods
- This method works best when you pay attention to details that make all the difference between temporary control and p...
- Step 1 Precision: When clearing buckwheat in Step 1, focus on the soil's texture rather than just visible plants. Stu...
- Cardboard Selection Strategy: For Step 2, prioritize corrugated cardboard over flat sheets—the ridges create air pock...
Frequently asked questions
about buckwheat weed removal—because even the best-laid plans need a little troubleshooting! Here’s what you’ve been wondering:When is the best time to smother buckwheat with cardboard?
Spring or early summer is ideal! Buckwheat thrives in warm weather, so smothering it before it seeds (late spring) prevents regrowth. If you’re dealing with established weeds, tackle removal in dry conditions for easier pulling. Just avoid smothering in frost—cardboard breaks down too fast!
How long does it take for cardboard to kill buckwheat roots?
With consistent moisture, cardboard blocks sunlight and suffocates roots in 4–6 weeks. Check progress by lifting a corner—if weeds are still green, re-wet the cardboard or add a layer. Patience pays off, but don’t let it decompose completely before new plants sprout!
What if buckwheat keeps growing back after removal?
Persistent buckwheat? It’s likely spreading from deep roots or seeds. Try these fixes:
- Hand-pull any regrowth immediately (don’t let it seed!).
- Apply mulch or landscape fabric after cardboard decomposes.
- Use a vinegar spray (20% acetic acid) for stubborn patches.
Can I reuse cardboard from deliveries for smothering?
Just ensure it’s untreated, flat, and free of tape/glue (ink is fine). Avoid glossy or wax-coated cardboard—it repels water. Cut to fit your garden beds, overlap edges, and weigh it down with rocks or soil. Pro tip: Use both sides to maximize sunlight blockage!
Are there chemical-free alternatives to cardboard for buckwheat?
Yes! Try these organic smothering methods:
- Newspaper (black-and-white, no gloss)—cheap and effective!
- Thick mulch (straw, wood chips, or leaves) to starve roots.
- Biodegradable landscape fabric (3–4 layers for dense coverage).
- Living mulch: Plant ground covers like clover or creeping thyme.
Will smothering buckwheat harm my plants nearby?
Not if you’re precise! Cardboard should only cover the buckwheat (and bare soil). Leave 1–2 inches of space around desired plants to prevent moisture buildup or root competition. For delicate plants, use edging (like bricks or metal) to create a barrier.
Wrapping up and next steps
Removing buckwheat weed doesn’t have to be a battle—with the right tools and a little patience, you can reclaim your garden naturally! Whether you choose cardboard smothering, manual pulling, or vinegar solutions, each method offers a chemical-free way to restore your space.
The key is consistency and persistence, so don’t hesitate to try what works best for your yard.
Ready to take action? Start small—clear a section today and watch your progress grow! 🌱 For extra help, explore organic mulching or preventative planting tips to keep weeds at bay long-term.