
Pests
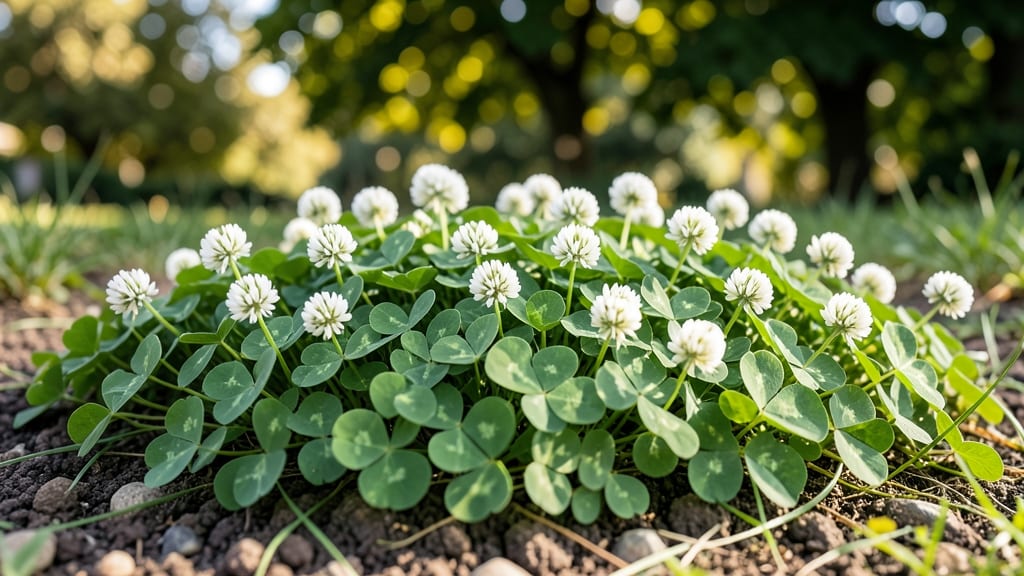
That clover-looking weed creeping into your lawn or garden is probably white clover, black medic, or yellow suckling clover—and boiling water is the fastest way to kill it without chemicals. 🌱 I’ve spent hours pulling these stubborn invaders only to see them back within weeks, until I discovered this 5-minute method that actually works.
The trick is timing: apply boiling water on a warm, sunny day when the weeds are actively growing. A simple pot of boiling water poured directly on the leaves and stems kills the plant instantly, while the heat also disrupts the roots.
You’ll see the leaves wilt within minutes, and the entire plant will die back in 24-48 hours. What’s great is that this method is zero-waste—no harsh chemicals, no waiting for slow-acting herbicides.
Plus, it’s perfect for tight spots like cracks in pavement or between patio stones where digging isn’t an option. Just be careful not to scald nearby plants or grass.
Some of these "weeds" actually have benefits—like white clover fixing nitrogen in the soil—but if you’re dealing with black medic or yellow suckling clover, they’re pure nuisances. Here’s how to tell them apart and when to pull them instead of boiling.
📚 In This Guide
- What you need
- Instructions
- Tips and common mistakes
- Wrapping up and next steps
What you need
- ● Boiling water: At least 1–2 gallons per treatment session (adjust based on weed patch size). Use freshly boiled water for maximum effectiveness.
- ● Kettle or large pot: A sturdy, heat-resistant container (minimum 3–5 quart capacity) to boil water. Pro tip: 💡 A dedicated watering can with a spout works great for precision!
- ● Gloves: Heavy-duty garden gloves (waterproof preferred) to protect hands from hot water and sharp stems.
- ○ Eye protection: Safety goggles (optional but recommended) to shield against splashes.
- ● Trash bags or tarp: For collecting dead weeds and debris afterward. A 30–50 gallon bag or a 4x6 ft tarp works well.
- ● Garden tool: A hoe, trowel, or weeding fork to loosen soil and expose roots before treatment.
- ● Boiling water dispenser: A specialized tool (like a weed burner) for larger areas—saves time and effort!
- ● Vinegar or salt: Mix 1 part white vinegar or salt with 3 parts boiling water for extra weed-killing power (use sparingly on soil).
- ● Label or marker: To mark treated areas if you plan to retreat or plant later.
- ● First-aid kit: Just in case—boiling water can cause minor burns!
How to eliminate clover-like weeds with boiling water
This method works fast and leaves your lawn spotless—no chemicals, no waiting.
💧 Step 1: Gather Your Supplies and Check the Weather
You’ll need a large kettle or pot (at least 4 gallons capacity), a long-handled ladle or pouring spout, and a sunny day with temperatures above 60°F. I always check the weather because wind can scatter the boiling water, and you don’t want to burn yourself or nearby plants. If it’s breezy, wait or work in a sheltered spot.
Fill your kettle or pot with fresh water—tap water works fine—until it’s about ¾ full. Place it on a heat source and bring it to a rolling boil. The deeper the water level, the more coverage you’ll get when you pour it. I like to use a kettle with a built-in spout for easier pouring, but a ladle works too.
☀️ Step 2: Identify and Target the Weeds
Walk your lawn and locate the clover-like weeds you want to eliminate. These are often small, three-leafed plants with a slightly fuzzy texture. Look for patches where they’re thriving—these are your priority zones. Avoid pouring boiling water near desirable plants, as it can damage them too.
I like to mark the areas with a small stick or a piece of chalk if the weeds are spread out. This helps me stay organized and ensures I don’t miss any spots. Focus on the roots—boiling water kills the entire plant, including the underground parts, so you won’t have to worry about regrowth from the same spot.
🔥 Step 3: Pour the Boiling Water Directly
Carefully carry your kettle or pot to the first targeted area. Pour the boiling water slowly and steadily over the weeds, making sure to cover the entire plant, including the base where the roots are. You’ll see the leaves wilt almost instantly—this is a good sign that the treatment is working. For stubborn patches, you may need to pour two rounds to ensure the roots are fully saturated.
Work in small sections to avoid spilling or losing heat. If you’re using a ladle, dip it into the boiling water and pour it directly onto the weeds. Be cautious—boiling water can cause burns, so wear gloves if you’re sensitive to heat. Once you’ve treated an area, move on to the next section before the water cools.
🌱 Step 4: Monitor and Retreat if Needed
After pouring, wait 24 hours to see how the weeds respond. Healthy weeds will turn brown and crispy, indicating they’re dead. If you notice any green leaves remaining, the roots might still be alive. In this case, repeat the process—boiling water is safe to use multiple times on the same spot.
I usually check the treated areas every few days for the first week. If new weeds sprout in the same location, it means the roots weren’t fully killed the first time. Don’t worry—just pour boiling water again. Over time, your lawn will look cleaner and more uniform. This method is especially effective for weeds that look like clover, as they have shallow roots that boiling water can easily penetrate.
⏰ Step 5: Maintain Your Lawn for Long-Term Results
Once the weeds are gone, keep your lawn healthy to prevent new ones from taking over. Mow regularly to encourage thick grass growth, which naturally crowds out weeds. Water deeply but infrequently—1 inch per week—to promote strong root development in your grass.
If you notice clover-like weeds creeping back, address them early before they spread. Boiling water is a quick fix, but consistent lawn care is the best way to keep your yard weed-free. I’ve used this method for years, and it’s saved me from buying expensive herbicides while keeping my lawn looking great.
Tips & tricks for effective weed elimination with boiling water
Here's what nobody tells you about making this method work perfectly the first time.
Timing Secret: The 24-hour waiting period is crucial—don't rush it! I've seen people check too soon and think the weeds are dead when they're not. The roots need that full day to fully absorb the heat. If you're short on time, you can check at 12 hours, but be prepared to retreat stubborn patches.
Equipment Upgrade: While any large pot works, I've found that a kettle with a built-in spout makes pouring much more precise. If you don't have one, a ladle with a long handle works just as well—just be extra careful not to splash boiling water on yourself. A small funnel can help direct the water flow to exactly where you need it.
Weather Watch: The instructions mention temperatures above 60°F, but I've learned that humidity matters too. On humid days, the boiling water will cool faster when poured, so you might need to use slightly more water to ensure full coverage. If it's particularly windy, work in the early morning when winds are typically calmer.
Visual Cues: When pouring, look for the leaves to immediately wilt and turn a dull gray-green color—that's your confirmation the treatment is working. For stubborn weeds, you'll notice they might perk back up slightly after the first pour, which is why the second round is sometimes necessary. The roots need complete saturation to die off permanently.
Pro Tips for Clover Looking Weed
- Here's what nobody tells you about making this method work perfectly the first time.
- Timing Secret: The 24-hour waiting period is crucial—don't rush it! I've seen people check too soon and think the wee...
- Equipment Upgrade: While any large pot works, I've found that a kettle with a built-in spout makes pouring much more ...
Frequently asked questions
Got questions about tackling that clover-looking weed with boiling water? You’re not alone! Here are some common concerns—and straightforward answers—to help you crush those stubborn invaders for good.
Why does this weed look like clover but isn’t?
Great observation! Many weeds mimic clover’s trifoliate leaves, but true clover has rounded leaflets and a white vein pattern. Clover-looking weeds (often oxalis or creeping charlie) have pointed tips or jagged edges. The key? Pull one up—clover has a deep taproot, while weeds often have shallow, fibrous roots. Double-check before treating!
How long until the weeds are gone for good?
Boiling water kills weeds on contact, but regrowth depends on the root system. For shallow-rooted weeds, you’ll see results in 24–48 hours. Stubborn roots (like creeping charlie) may need 2–3 treatments, spaced 1–2 weeks apart. Pro tip: Water the area first to soften the soil—this helps the boiling water penetrate deeper.
Is boiling water safe for my lawn or garden?
Yes, but with caution! Boiling water is selective—it targets weeds without harming grass or plants if applied carefully. Avoid spraying near desirable plants (use a shield or pour slowly). For thick grass, dilute the water slightly (1:1 with hot tap water) to reduce risk. Test a small area first!
What if the weeds keep coming back?
Persistent weeds often mean hidden roots or seeds. Try these fixes:
- Reapply boiling water to the same spot weekly for 2 weeks.
- Hand-pull any remaining roots (wear gloves!).
- Smother the area with cardboard/mulch for 4+ weeks to block sunlight.
- Use vinegar (20% acetic acid) as a follow-up treatment for tough patches.
If the problem persists, the soil may need pre-emergent herbicide (apply in early spring).
Are there non-boiling-water alternatives?
Try these eco-friendly methods:
Method
Effectiveness
Effort Level
Salt spray (1:1 water/salt)
(kills weeds but harms soil long-term)
Low
Corn gluten meal (pre-emergent)
(best for prevention, not existing weeds)
Moderate
Manual removal (digging)
(labor-intensive but chemical-free)
High
Boiling water + vinegar mix
(enhances weed-killing power)
Moderate
Pro tip: For extra potency, mix boiling water with 1 cup vinegar per gallon—this doubles the burn!
Wrapping up and next steps
Identifying and tackling clover-looking weeds doesn’t have to be a battle—especially with the boiling water blitz method! This eco-friendly approach targets stubborn roots while keeping your yard chemical-free. Remember, consistency is key, so stay vigilant and repeat treatments as needed.
Ready to reclaim your lawn? Grab your supplies, suit up, and take action today! Start small—test a patch first—then expand your efforts. With patience and persistence, you’ll see those pesky weeds retreat for good. 🌱✨