
Pests
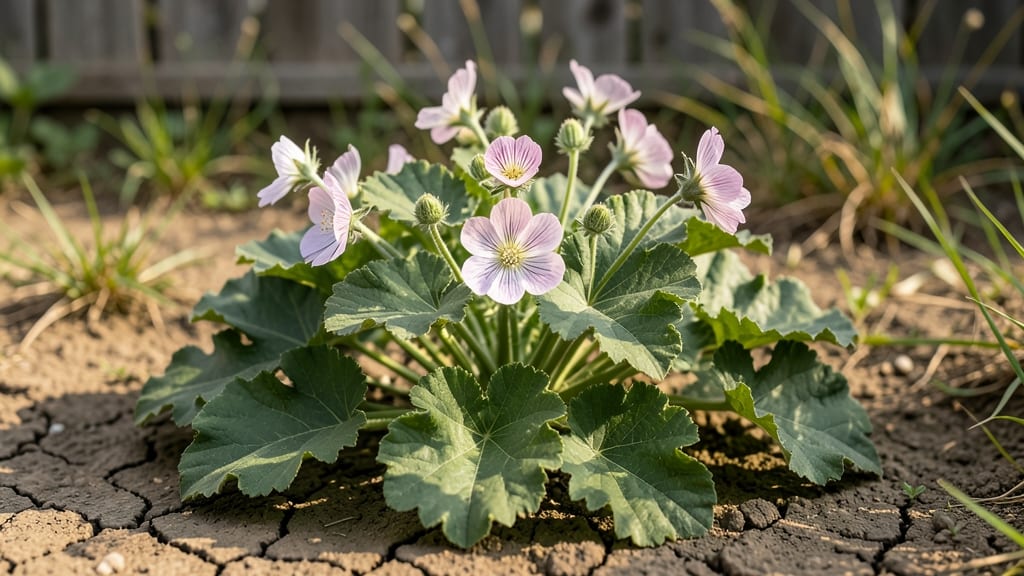
Common mallow weed is the garden thief you can’t ignore—it steals nutrients, space, and your patience with its stubborn roots. 🌱 I’ve wrestled with this invasive plant for years, and the twist-and-remove method finally gave me the upper hand.
It’s not just about pulling; it’s about breaking those deep taproots without leaving scraps behind to regrow. The secret lies in timing and technique: grab the plant at the base, twist sharply, and yank upward while wiggling the roots free.
A sturdy pair of gloves and a sharp spade are your best tools—no fancy equipment needed. You’ll be surprised how much easier it is once you know the trick, and your garden will thank you with fewer weeds and more room for what you want to grow.
By the end, your soil will feel lighter, and your plants will show it—healthier stems, brighter blooms, and fewer battles with regrowth. The key is persistence: check for new shoots weekly, and you’ll keep this weed from staging a comeback. Works for lawns, flower beds, or vegetable patches.
Here’s how to make it work for your space—no more losing the war against common mallow.
📚 In This Guide
- What you need
- Instructions
- Tips and common mistakes
- Wrapping up and next steps
What you need
- ● Gloves – Heavy-duty, chemical-resistant gloves (e.g., nitrile or rubber) to protect your hands from thorns and sap.
- ● Weed Puller or Digger – A sturdy garden fork or weed puller (with a wide, serrated head) to pry out deep roots.
- ● Pruning Shears – Sharp, bypass pruners (for cutting thick stems at the base).
- ● Garden Hoe – A stirrup hoe or dandelion digger to loosen soil around roots.
- ● Bucket or Wheelbarrow – For hauling out weeds and debris (5-gallon capacity recommended).
- ● Shovel – A flat-edged spade (for larger patches or compacted soil).
- ● Vinegar or Herbicide – White vinegar (20-30% acetic acid) or a glyphosate-based herbicide (for stubborn regrowth; follow label instructions).
- ○ Plastic Sheeting – Heavy-duty (4-6 mil) to smother regrowth (optional but helpful for large areas).
- ● Root Killer Spray – A natural option like boiling water or salt vinegar mix (1 part salt to 1 part vinegar).
- ● Compost or Mulch – To replenish soil after removal (straw or wood chips work well).
- ● Knee Pads – For comfort during long digging sessions.
- ● Trash Bags – Biodegradable or thick-duty for easy disposal.
- ● Sunscreen & Hat – If working in direct sunlight for extended periods!
Step-by-Step instructions for eradicating common mallow weed
Here's the foolproof method I use to yank out mallow's stubborn roots without leaving a trace.
✂️ Step 1: Identify and Prepare the Weed
First, confirm you're dealing with mallow—look for its classic heart-shaped leaves with jagged edges and fuzzy stems. Mallow thrives in disturbed soil, so you'll often find it popping up after gardening or construction. Grab a pair of sturdy garden gloves to protect your hands from the prickly stems.
Water the area thoroughly the day before removal. This softens the soil and makes the roots easier to pull, especially in dry conditions. You'll know it's ready when the soil feels damp about 2 inches deep. Avoid working when the ground is waterlogged, as that makes roots slippery and harder to grip.
🪴 Step 2: Use the Twist-and-Pull Technique
Stand at the base of the mallow plant and grip the stem firmly about 2 inches above the soil line. Twist the stem counterclockwise while pulling upward with steady pressure. The key is to keep twisting as you pull—this breaks the root taproot cleanly rather than snapping it off underground. You'll feel resistance at first, but once the root starts to loosen, it should come out in one piece.
If the root breaks off, don't panic—just dig around with your fingers or a trowel to remove as much of the remaining root as possible. Mallow roots can regrow from even tiny fragments left in the soil, so thoroughness is critical. I always check the hole for any remaining root pieces before moving on.
🌱 Step 3: Inspect and Repeat for Stubborn Spots
Examine each pulled root closely. Healthy mallow roots are thick and white, while brown or shriveled roots are already dead. Discard the entire plant—roots, stems, and leaves—into a sealed trash bag or compost pile designated for weeds only. Never compost mallow, as it can regrow from composted material.
Scan the surrounding area for any additional mallow plants. They often grow in clusters, so check 12 inches around each pulled plant. If you find more, repeat the twist-and-pull method immediately. The more you remove at once, the less chance they have to spread seeds or regrow.
💧 Step 4: Prevent Regrowth with Soil Treatment
After removal, cover the empty soil with a thick layer of cardboard or landscape fabric to block sunlight and prevent new seeds from germinating. This smothering technique works best in areas where you plan to plant other vegetation soon. If you're not planting there, consider applying a corn gluten meal (about 20 pounds per 100 square feet) to inhibit weed seed germination naturally.
Water the area lightly after treatment to help settle the fabric or activate the corn gluten. Avoid heavy watering, which can shift the fabric or wash away the corn gluten. Check the area weekly for any new sprouts, as mallow seeds can remain dormant for years and may germinate later.
☀️ Step 5: Monitor and Maintain the Area
For the next 3-4 weeks, keep an eye on the treated area. Mallow plants that escape removal will grow quickly, so early detection is key. If you spot any new growth, pull it immediately using the same twist-and-pull method before it establishes deep roots.
Once the area is clear, consider planting ground covers like clover or creeping thyme to outcompete weeds naturally. These plants form dense mats that block sunlight and make it difficult for mallow seeds to establish. If you're planting vegetables or flowers, use mulch at least 3 inches thick to suppress future weed growth.
Tips & tricks for perfectly removing stubborn mallow weed
Here's what nobody tells you about conquering mallow's tenacious roots—these tricks have saved me countless hours of frustration.
Timing is Everything: The day before you pull, water the area until the soil is damp about 2 inches deep. This softens the soil and makes those stubborn roots far easier to extract. I've tried pulling dry soil, and it's like trying to yank a rope out of concrete—just don't do it. The roots will snap off, leaving fragments behind that regrow like weeds on steroids.
Grip and Twist Like a Pro: When you're at the 2-inch mark above the soil line in Step 2, grip the stem firmly and twist counterclockwise while pulling upward. This isn't just about brute force—it's about leverage. The twist breaks the taproot cleanly, so you're not left digging around like an archaeologist. If you feel resistance, keep twisting; that's the root fighting back. I once spent 20 minutes trying to pull one without twisting, only to find half the root still buried.
Inspection is Non-Negotiable: After pulling, examine the hole where the root was. Use your fingers to check for any remaining root fragments—even a tiny piece can regrow into a full plant. I've seen mallow sprout from what looked like a 1-inch root piece. If you're unsure, dig a little deeper with a trowel. Better to spend 30 seconds checking than 30 minutes pulling regrowth later.
Prevention Pays Off: The smothering technique in Step 4 is your best friend. Cardboard or landscape fabric blocks sunlight, and mallow seeds need light to germinate. If you're not planting anything, corn gluten meal is a game-changer—it inhibits germination naturally. Just remember, light watering after application is key. Heavy watering can wash it away, and you'll be back to square one.
Pro Tips for Common Mallow Weed
- Here's what nobody tells you about conquering mallow's tenacious roots—these tricks have saved me countless hours of frustration.
- Timing is Everything: The day before you pull, water the area until the soil is damp about 2 inches deep.
- Grip and Twist Like a Pro: When you're at the 2-inch mark above the soil line in Step 2, grip the stem firmly and twist counterclockwise while pulling upward.
Frequently asked questions
Got questions about tackling common mallow weed? You’re not alone!
Here are answers to the most pressing concerns—from quick fixes to long-term strategies—so you can reclaim your garden with confidence.
What’s the best time of year to pull common mallow weed?
Target common mallow in early spring or late summer when the soil is moist but workable. Avoid peak heat—roots are easier to extract when the plant isn’t stressed. Pro tip: Pull on a cloudy day to reduce shock to the plant (and your back!).
Will vinegar or boiling water kill common mallow weed permanently?
Vinegar (20-30% acetic acid) or boiling water can kill the top growth, but common mallow’s deep roots often regrow. For stubborn patches, reapply every 3–5 days or use a twist-and-remove hack to yank roots fully. Warning: Vinegar may harm nearby plants—test first!
Why does common mallow keep coming back after I pull it?
This weed spreads via underground runners and seeds. If you leave even a 1-inch root fragment, it’ll regrow. Always twist to break roots and inspect soil for hidden shoots. For heavy infestations, smother with cardboard + mulch for 3 months. Patience is key!
Are there natural alternatives to chemical herbicides for common mallow?
Yes! Try these non-toxic methods:
- Salt + dish soap spray (mix 1 gallon water + 1 cup salt + 1 tbsp soap; spray directly on leaves).
- Corn gluten meal (pre-emergent for seeds; apply in early spring).
- Duckweed or barley straw (natural allelopathic suppressants for water gardens).
For best results, combine methods (e.g., pull + smother + spray).
Can I till common mallow into the soil to kill it?
Tilling buries the weed but can spread seeds and roots deeper, making it worse. If you must till, do it in dry conditions and repeat weekly for 2–3 weeks to starve remaining roots. Better options: manual removal or solarization (clear plastic sheets in summer sun). Speed matters—act fast!
Wrapping up and next steps
Dealing with common mallow weed doesn’t have to be a battle—just a strategic twist and pull! 🌱 With the right tools and techniques, you can tackle those stubborn roots like a pro. Remember, consistency is key, and soon your garden will be weed-free and thriving.
Ready to reclaim your space? Grab your supplies, follow the steps, and take action today—your garden will thank you! 🌿 For extra tips, check out our FAQ section or explore more pest control hacks.