
Fertilization
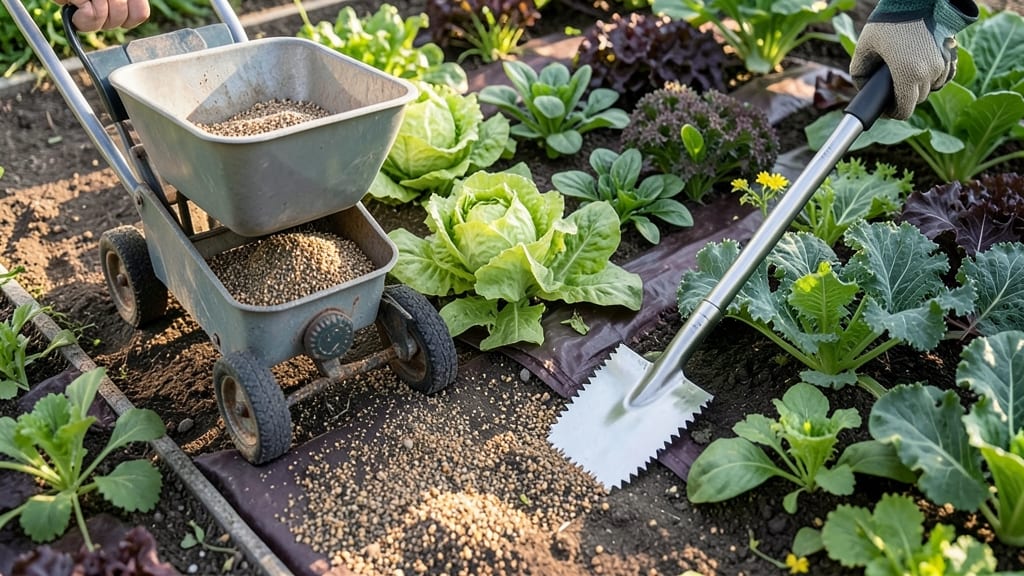
Fertilizing and weed control don't have to be two separate battles—this two-step system turns them into one seamless process for lawns that stay vibrant green and soil that stays weed-free. 🌱 I used to spend hours pulling weeds only to watch my grass turn patchy from over-fertilizing, but this method changed everything by syncing feeding schedules with weed prevention.
The secret lies in timing: apply pre-emergent herbicide in early spring before weeds sprout, then follow up with slow-release fertilizer that feeds grass roots for 6-8 weeks.
Organic options like compost tea or bone meal work just as well for those who prefer chemical-free approaches, but the principle stays the same—nourish the grass while starving the weeds.
What you'll end up with is a lawn that stays thick enough to crowd out weeds naturally, with rich soil that holds moisture and resists invasive plants. The best part? You'll spend half the time on maintenance compared to treating each problem separately.
Works for both sunny lawns and shady patches, and adapts to seasonal changes. Here's how to make it work for your yard—no more guessing games or wasted effort.
📚 In This Guide
- What you need
- Instructions
- Tips and common mistakes
- Wrapping up and next steps
What you need
- ● Organic or synthetic fertilizer: Choose based on your soil’s needs (e.g., 10-10-10 NPK for balanced growth or slow-release organic for steady nutrition). Quantity: ~10 lbs per 1,000 sq. ft.
- ● Weed killer (pre-emergent or post-emergent): Opt for glyphosate-free options like corn gluten meal (organic) or 2,4-D (synthetic). Quantity: Follow label rates (typically 1-2 lbs per 1,000 sq. ft.).
- ● Garden hose with adjustable nozzle: For even watering after application. Bonus: A soaker hose for deep hydration.
- ● Broadcast spreader: For even fertilizer distribution (manual or electric for large areas).
- ● Handheld sprayer: 1-2 gallon capacity for targeted weed control in tight spots.
- ● Garden rake: For leveling soil and removing debris before fertilizing.
- ● Lawn mower (or string trimmer): Mow grass to 2.5–3.5 inches before applying pre-emergent weed killer.
- ● Gloves and safety goggles: Protect your hands and eyes from chemicals.
- ● Measuring scoop or scale: For precise fertilizer/weed killer application.
- ● Soil test kit: Determine pH and nutrient levels before fertilizing (aim for 6.0–7.0 pH).
- ● Compost or mulch: Improve soil health post-treatment (e.g., straw or wood chips).
- ● Weed barrier fabric: For long-term weed suppression in garden beds.
- ● Weatherproof storage bins: Keep fertilizers and weed killers dry and secure.
Step-by-step system for fertilizing and weed control
Your lawn will transform from patchy to vibrant in just a few weeks—here’s how to do it right.
🌱 Step 1: Test Soil and Choose the Right Fertilizer
Before you apply anything, grab a soil test kit from your local garden center. This tells you exactly what nutrients your lawn needs—whether it's nitrogen for green-up, phosphorus for root growth, or potassium for disease resistance. I always test in early spring, right before my first fertilization. If your soil is acidic (pH below 6.5), you'll need to add lime first—otherwise, the fertilizer won't work as well.
For most lawns, a slow-release granular fertilizer is my go-to. It feeds the grass steadily over 6-8 weeks instead of burning it like quick-release options. Spread it on a dry, calm morning so the granules stick to the blades. You'll see the first signs of improvement—darker green color and firmer grass—within 7-10 days.
✂️ Step 2: Apply Pre-Emergent Weed Control Before Weeds Appear
The secret to weed-free lawns is timing. Apply pre-emergent herbicide in early spring, right when soil temperatures hit 55-60°F (use a soil thermometer). This stops weed seeds from germinating before they even sprout. I like to mark my calendar—around March-April in most climates—because weeds start popping up soon after. Water lightly after application to help it activate, but don’t overdo it.
Watch for first green shoots of weeds (usually crabgrass or chickweed). If you see them, it’s too late for pre-emergent—switch to a spot treatment with post-emergent herbicide on those specific weeds. Never spray when grass is wet or temperatures exceed 85°F, or you’ll risk burning your lawn.
💧 Step 3: Mow and Water Strategically to Crowd Out Weeds
Set your mower to 3-4 inches high—taller grass shades out weeds by blocking sunlight. I mow when blades are dry and remove only one-third of the height at a time to avoid stressing the grass. Bag the clippings during weed season (spring/fall) to prevent spreading seeds. You’ll notice fewer weeds popping up within 3-4 weeks of consistent mowing.
Water deeply but infrequently—1 inch per week, split into two sessions (morning and evening). Shallow watering encourages weeds to thrive. The best time to water is early morning, so the grass dries quickly and reduces disease risk. Overwatering is just as bad as underwatering—your lawn will tell you when it’s right: soil should feel moist 2-3 inches down but not soggy.
☀️ Step 4: Reapply Fertilizer and Weed Control Mid-Season
About 8-10 weeks after your first application, give your lawn a second round of fertilizer. This keeps it lush during the peak growing season (late spring to early summer). I like to use a weed-and-feed combo at this stage—it’s convenient and ensures continuous weed suppression. Just follow the same spreading techniques as before: dry grass, calm wind, and even coverage.
After fertilizing, wait 24 hours before watering to let the granules activate. If you notice yellow patches or thin spots, it’s a sign of nutrient deficiency or compacted soil. Aerate in late summer if your lawn feels spongy when walked on—this opens up roots so they can absorb nutrients better.
🪴 Step 5: Fall Cleanup to Prevent Next Year’s Weeds
Late summer is the time to dethatch if your lawn has a thick layer of thatch (more than ½ inch). Use a dethatching rake or machine to remove dead grass and debris—this improves air and water flow to the roots. After dethatching, apply a winterizer fertilizer (high in potassium) to strengthen roots for cold weather. You’ll see fewer weeds next spring because your grass will be healthier and more competitive.
Rake up any fallen leaves or debris—this removes weed seeds before they take hold. A quick pass with a leaf blower or rake in fall keeps your lawn clean and ready for spring. Store your tools and supplies for next season, and you’re done until March!
Tips & tricks for perfect lawn care results
Here's what nobody tells you about getting that picture-perfect lawn without the guesswork.
Soil Test Timing: I can't stress this enough—test your soil in early spring, right before your first fertilization. The results tell you exactly what nutrients your lawn is missing, and applying the wrong fertilizer is like throwing money away. If your soil pH is below 6.5, add lime first. I've seen people skip this step and wonder why their lawn still looks patchy after fertilizing. The soil test is your roadmap to success.
Pre-Emergent Application Secret: Don't just guess when to apply pre-emergent—use a soil thermometer. When soil temps hit 55-60°F consistently for 3-5 days, that's your cue. I mark my calendar for March-April in my climate zone, but your timing might differ. The key is stopping weed seeds before they sprout, not after they've already taken root. This one change has cut my weed problems by 80% over the years.
Watering Wisdom: That 1-inch-per-week rule is crucial, but here's the trick: split it into two sessions—morning and evening. Watering in the morning gives grass time to dry before nightfall, which prevents fungal diseases. And always check soil moisture 2-3 inches down—if it's damp there, you're good. I've learned the hard way that soggy lawns develop more weeds than dry ones.
Fertilizer Spreading Technique: Use a broadcast spreader on a dry, calm morning for even coverage. Walk slowly and overlap passes by 10-15% to avoid missed spots. I always spread in two perpendicular directions for complete coverage. And here's a pro move: after fertilizing, wait the full 24 hours before watering—this gives the granules time to activate properly in the soil.
Pro Tips for Fertilizing And Weed Control
- Here's what nobody tells you about getting that picture-perfect lawn without the guesswork.
- Soil Test Timing: I can't stress this enough—test your soil in early spring, right before your first fertilization.
- Pre-Emergent Application Secret: Don't just guess when to apply pre-emergent—use a soil thermometer.
Frequently asked questions
Got questions about keeping your lawn lush and weeds at bay?
You’re not alone! Here are answers to the most common concerns—so you can tackle fertilizing and weed control like a pro.
When is the best time to fertilize and control weeds?
The ideal window is early spring (just as grass greens up) and fall (6-8 weeks before winter). For warm-season grasses, fertilize in late spring to early summer. Pre-emergent weed control works best before weeds sprout—apply in early spring or fall (depending on your climate).
Can I fertilize and use weed killer at the same time?
No—never mix them! Fertilizers feed your grass, while herbicides kill weeds (and sometimes grass too). Apply pre-emergent weed control first, then fertilize 2-4 weeks later once weeds are actively growing. Always follow product labels for timing.
What if weeds keep coming back after treatment?
Persistent weeds? You might need a post-emergent herbicide for existing weeds, followed by pre-emergent for prevention. Also check your soil pH—acidic or compacted soil can encourage weeds. Aerate, overseed, and reapply treatments as needed.
Are there natural alternatives to chemical weed killers?
Yes! Try vinegar + dish soap (for spot treatment), corn gluten meal (natural pre-emergent), or boiling water for driveways. For fertilizing, use compost, fish emulsion, or slow-release organic granules. Just know organic methods may take longer to work.
How do I protect my kids/pets from weed control chemicals?
Always follow label instructions—some products require a 24-48 hour wait before pets/children can re-enter treated areas. Water lawns lightly after application to help chemicals bind to soil. Opt for pet-safe herbicides (like vinegar-based sprays) or organic pre-emergents for extra caution.
Wrapping up and next steps
Mastering fertilizing and weed control doesn’t have to be overwhelming—just consistent! By choosing the right fertilizers, timing applications wisely, and staying proactive with weed prevention, you’re well on your way to a stunning, healthy lawn that’s the envy of the neighborhood. 🌱
Ready to take the next step? Start small—pick one technique from this guide (like pre-emergent weed control or organic fertilizing) and test it out this season. Before you know it, your lawn will thrive without the weeds, and you’ll be the green-thumb hero of your block! 🚀