
Flowers
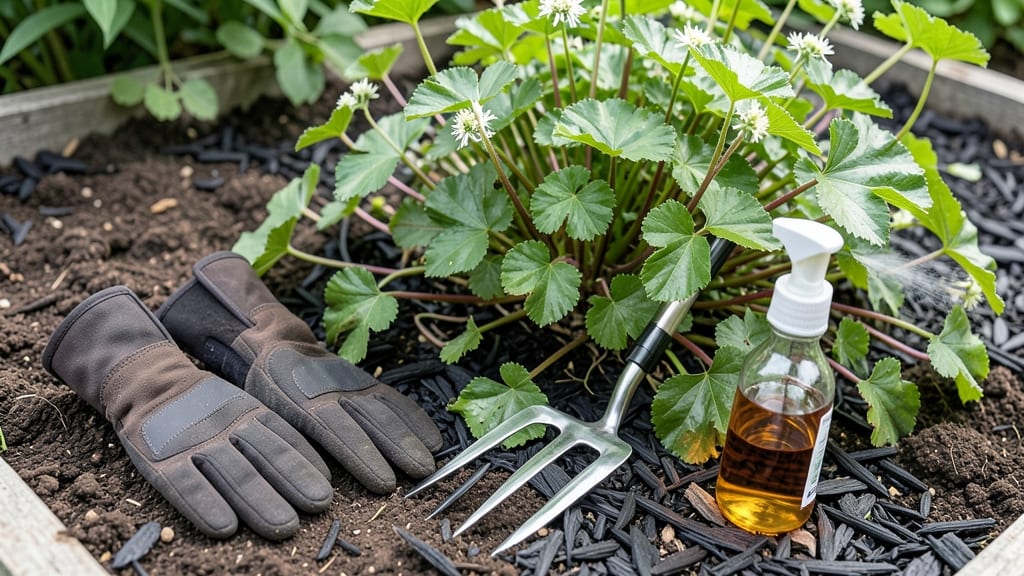
Ground elder weed spreads faster than you can pull it—and that's saying something after my first battle with it. 🌱 This invasive ground cover smothers perennials, clogs lawns, and returns from what feels like every root fragment, but there's a way to outsmart it: the twist-out method.
Unlike traditional digging, this technique targets the deep, fibrous roots that make ground elder so relentless.
The secret lies in timing and leverage. When the soil is moist (spring or fall), you can twist out entire root systems in seconds without leaving behind regrowth triggers.
Most gardeners give up after a few pulls, but this method works because it removes the plant's entire energy reserve—no tiny root pieces to sprout back. You'll need a sturdy trowel, gloves, and patience, but the results are worth it.
Within a month, you'll see bare soil where ground elder once ruled, and your perennials will breathe again. The twist-out method isn't just faster—it's more thorough than herbicides or smothering, and it leaves your garden chemical-free. Plus, you'll save money by avoiding repeated treatments that never fully work.
Works best in small sections at a time, but consistency is key. Reapply the method every few weeks until the area stays clear. For large infestations, tackle one square foot per day to avoid exhaustion.
The payoff? A garden where you're in control, not fighting a losing battle against tenacious weeds.
📚 In This Guide
- What you need
- Instructions
- Tips and common mistakes
- Wrapping up and next steps
What you need
- ● Garden gloves (1 pair) – Heavy-duty, chemical-resistant gloves (e.g., nitrile-coated for grip and protection).
- ● Weed puller or fork (1) – A sturdy, wide-bladed dandelion fork (6–8 inches) or a weed wrench with a long handle for leverage.
- ● Garden trowel (1) – A sharp, stainless-steel trowel (6–8 inches) for precision digging.
- ○ Garden kneeler or pad (optional) – For comfort during long sessions.
- ● Bucket or trash bag (1–2) – For disposing of pulled weeds and roots.
- ● Hose with nozzle (1) – To wet the soil before pulling (aim for a gentle stream, not a pressure washer!).
- ● Vinegar spray (5% acetic acid) – 1 gallon vinegar + 1 oz dish soap in a spray bottle to kill regrowth.
- ● Mulch (cardboard or landscape fabric) – To smother remaining roots post-pull.
- ● Root knife or hori-hori – For slicing through thick root clusters if needed.
- ● Sunny day + patience – Ground elder thrives in shade; tackle it on a bright, dry day for best results!
How to remove ground elder with the twist-out method
This proven technique works faster than digging and leaves no stubborn roots behind.
🌱 Step 1: Identify and Loosen the Weed
Ground elder thrives by spreading through underground runners, so start by locating the main plant—look for the largest, most established leaves. Grab the base of a stem between your thumb and forefinger, about 1 inch above the soil line. Twist firmly while pulling upward in a quick, decisive motion. You'll feel resistance at first, but the roots should break cleanly if you apply steady pressure.
Don't yank—twisting separates the root ball without snapping stems. If the weed resists, step back and loosen the soil around the base with a garden fork first. This method works best when the ground is slightly moist; if the soil is bone-dry, water the area lightly the day before pulling.
✂️ Step 2: Extract the Root System
Once the top breaks free, the underground runners will follow. Grab the exposed root mass with both hands and pull upward with a twisting motion. You'll see long, white rhizomes—these are the weed's lifeline. The goal is to remove at least 80% of the root system in one pull; any fragments left behind will regrow.
Check for remaining root pieces by running your fingers over the soil surface. Even tiny fragments can sprout new plants, so remove every visible piece. If you miss some, mark the spot with a garden flag and return in a week to check for regrowth.
💧 Step 3: Prevent Regrowth with Soil Treatment
After removal, fill the hole with a 3-inch layer of cardboard or thick newspaper, then top with 2-3 inches of mulch (use the wood chips or straw you set aside). This blocks sunlight, which ground elder needs to regenerate. For stubborn patches, apply a vinegar-based herbicide (5% acetic acid) directly to the soil where roots were pulled, then water lightly to activate.
Mulching also suppresses future weeds by creating a physical barrier. Replenish the mulch layer every 3-4 weeks to maintain coverage. Avoid using plastic sheeting—it traps moisture and can encourage other weeds to thrive.
☀️ Step 4: Monitor and Repeat as Needed
Inspect the treated area weekly for the first 6-8 weeks. New shoots will appear pale and weak—these are regrowths from missed roots. Pull them immediately using the same twist-out method. Ground elder is persistent, so expect to repeat this process 2-3 times per season until the patch is fully eradicated.
For large infestations, divide the area into sections and treat one section at a time. This keeps the workload manageable and ensures you don't miss any roots in the rush. Once the site is clear, plant competitive ground covers like clover or creeping thyme to outcompete any remaining rhizomes.
Tips & tricks for perfect ground elder removal
Real talk: Ground elder is sneaky—those roots will come back if you're not careful. Here's how to make sure it stays gone for good.
Timing is Everything: The twist-out method works best when the soil is slightly moist, not bone-dry. If your garden bed feels hard, water it lightly the day before pulling. I learned this the hard way after struggling with stubborn roots in dry soil—now I always check moisture first. The right soil condition makes all the difference between success and frustration.
The Technique That Changed Everything: When you twist that stem, imagine you're unscrewing a jar lid—slow and steady wins. I used to yank too hard and snap the stems, leaving roots behind. Now I focus on that twisting motion at the base, about 1 inch above soil level. The roots will come up like magic if you're patient. For extra stubborn patches, I loosen the soil with a garden fork first—this gives the roots more room to break free cleanly.
Preventing Regrowth: After pulling, I fill the hole with a 3-inch layer of cardboard or newspaper topped with 2-3 inches of mulch. This blocks sunlight, which ground elder needs to regenerate. I've found that replenishing the mulch every 3-4 weeks keeps new shoots from appearing. And here's a pro move: use wood chips or straw you already have on hand—no need to buy anything special.
Pro Tips for Ground Elder Weed
- Real talk: Ground elder is sneaky—those roots will come back if you're not careful.
- Timing is Everything: The twist-out method works best when the soil is slightly moist, not bone-dry.
- The Technique That Changed Everything: When you twist that stem, imagine you're unscrewing a jar lid—slow and steady wins.
Frequently asked questions
Got questions about tackling ground elder weed? You’re not alone!
This tenacious plant can be tricky, but with the right know-how, you’ll banish it for good. Here are answers to the most common concerns—plus a few pro tips to make the job easier.
How do I know if I’ve fully removed ground elder roots?
Ground elder roots can regrow from even tiny fragments left behind. After pulling, check the soil for white, stringy roots—these are the plant’s sneaky regrowth triggers. If you spot any, dig deeper (6–8 inches) and repeat the process. For stubborn patches, use the twist-out method to break the root system cleanly.
When is the best time of year to tackle ground elder?
The ideal window is early spring or late fall, when the soil is moist but not waterlogged. The plant’s energy is focused on roots, making it easier to yank out. Avoid summer—ground elder thrives then and spreads faster! For persistent patches, attack in cool, cloudy days to reduce stress on the plant.
What’s a natural alternative to herbicides for ground elder?
Skip the chemicals! Try these eco-friendly methods:
- Vinegar + dish soap: Mix 1 gallon white vinegar + 1 tbsp soap, spray directly on leaves (reapply weekly).
- Cardboard mulch: Smother the area with thick cardboard to block sunlight and starve roots.
- Duckweed: Plant this fast-growing aquatic weed in containers over ground elder—it outcompetes and suffocates it.
For large areas, combine mulching with the twist-out method for best results.
Why does ground elder keep coming back after I pull it?
Ground elder reproduces via rhizomes (underground stems) and seed. If you miss even a small root fragment, it’ll regrow. Pro tip: After pulling, soak the area in boiling water or cover with black plastic for 2 weeks to kill lingering roots. Repeat treatments every 2–3 weeks until the soil stays clear.
Will ground elder grow back if I just mow it?
Mowing won’t kill ground elder—it actually encourages it to spread! The plant redirects energy to its roots and produces more seeds. If you must mow, do it short and often to weaken the plant, but pair it with manual removal or mulching for long-term control. For best results, combine mowing with the twist-out method in spring.
Still stuck? Drop your ground elder horror stories below—we’ve got solutions!
Wrapping up and next steps
Ground elder weed might seem like a stubborn foe, but with the right tools and techniques—like the twist-out method—you can reclaim your garden in no time! 🌱✨ Remember, consistency is key, and protecting your soil afterward will keep those pesky roots from creeping back.
Now that you’re armed with knowledge, grab your gloves and get ready to transform that overgrown patch into a thriving, weed-free space.
Ready to take action? Start small—pick a section of your garden and tackle it today! Your future self (and your plants) will thank you. 🌿💪