
Pests and Diseases
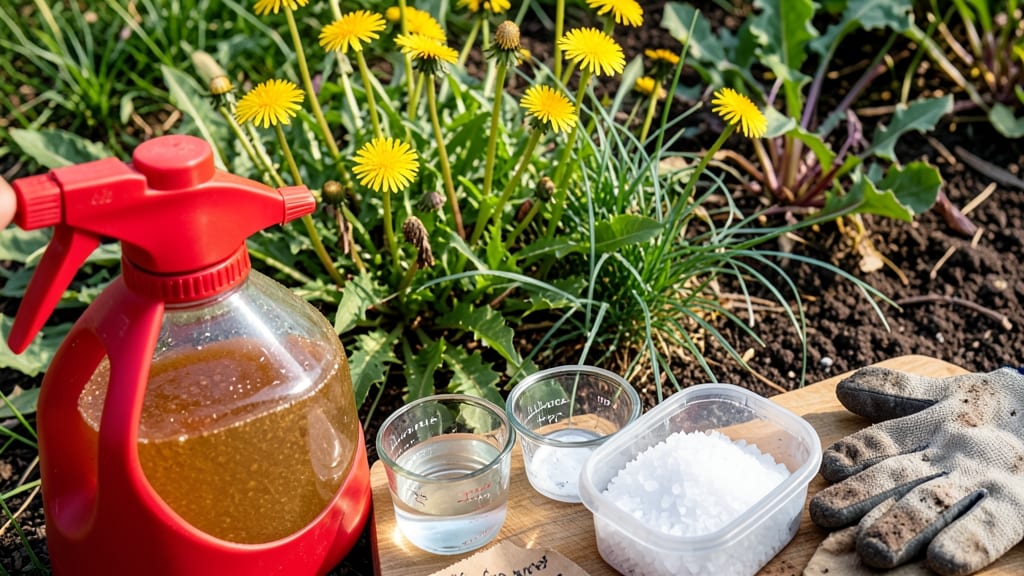
That homemade weed killer with vinegar and salt in your pantry could be your new secret weapon against stubborn weeds. 🌱 I’ve used this mix for years—it’s saved my garden from creeping charlie and cracked concrete cracks without breaking the bank or harming the planet.
The key is precision: this isn’t a blanket spray, but a targeted burn that works fast on young weeds and tough invaders alike.
You’ll need one gallon white vinegar, two cups coarse salt, and a spray bottle—no fancy equipment. Mix them the night before so the salt dissolves completely, then apply on a dry, sunny day when weeds are actively growing.
The vinegar kills by dehydration, while the salt adds a little extra oomph for deep-rooted pests. Just avoid spraying near desirable plants, as the salt can linger and damage roots over time.
Within 24-48 hours, you’ll see weeds wilting and turning crispy brown—no digging required. It’s especially effective on broadleaf weeds like dandelions and clover, though tough grasses might need a second round. The best part? No harsh chemicals, just a simple, eco-friendly solution that leaves your soil (and conscience) clean.
For edible gardens or sensitive plants, spot-test first and consider mulching or hand-pulling as safer alternatives. This mix works best as a maintenance tool, not a cure-all—think of it as the gardener’s equivalent of a targeted laser, not a sledgehammer. Ready to reclaim your garden without the guilt?
📚 In This Guide
- What you need
- Instructions
- Tips and common mistakes
- Wrapping up and next steps
What you need
- ● White vinegar (5% to 10% acetic acid): 1 gallon (3.8 liters) – The star ingredient that burns weeds on contact.
- ● Salt (non-iodized): 1 cup (200 grams) – Boosts the weed-killing power and prevents regrowth.
- ○ Dish soap (optional but recommended): 1 tablespoon (15 mL) – Acts as a surfactant to help the solution stick to weeds.
- ● Spray bottle or garden sprayer: At least 1-quart (1-liter) capacity – For even application.
- ● Measuring cups and spoons – For precise mixing.
- ○ Gloves (optional but wise!) – Protects your hands from vinegar and salt.
- ● Sunny day (or at least a few hours of direct sunlight) – Best time to apply for maximum effectiveness.
- ○ Label or marker – To mark treated areas (optional but helpful).
Step-by-Step instructions for making a vinegar-salt weed killer
Here's my go-to formula for a fast-acting, chemical-free solution that targets weeds without harming your soil or plants.
🌱 Step 1: Mix the Base Solution
Combine 1 gallon of white vinegar with 2 cups of table salt in a clean, non-reactive container. I use a 5-gallon bucket because it gives me enough solution to treat multiple areas without frequent mixing. Stir thoroughly until the salt fully dissolves—this ensures even distribution of both ingredients.
The vinegar provides the acetic acid that burns weed foliage, while the salt acts as a drying agent that pulls moisture from their roots. Real talk: don't use colored vinegar—the dye can stain surfaces and isn't as effective. White vinegar with 5% acidity works best for this application.
💧 Step 2: Apply on a Dry, Sunny Day
Wait until mid-morning on a dry, sunny day to apply the solution. Weeds need to be actively growing and fully exposed—avoid treating after rain or when dew is present. I like to spray just before a heatwave because the combination of sun and vinegar creates a stronger burning effect.
Use a spray bottle with a fine mist nozzle for small areas or a pump sprayer for larger patches. Keep the nozzle 6-8 inches away from weeds to avoid overspray onto desirable plants. Lightly coat the entire weed surface (top and bottom of leaves) until you see moisture clinging to the foliage.
✂️ Step 3: Watch for Immediate Results
You'll notice visible wilting within hours—the vinegar starts breaking down the cell walls immediately. By 24-48 hours, weeds should turn brown and crispy. The salt helps prevent regrowth by dehydrating the roots, but don't expect it to kill weed seeds in the soil.
Reapply every 3-5 days for stubborn weeds until they're completely dead. I know it seems tedious, but consistency is key. The solution works best on young weeds—mature weeds with thick stems may require multiple applications. Always spot-test on a small area first to ensure it won't damage nearby plants.
☀️ Step 4: Prevent Future Growth
After weeds die, remove the debris completely to prevent seeds from spreading. I use a small hand rake to pull up dead weeds and their roots. For bare soil areas, apply a thin layer of mulch (like straw or wood chips) to block sunlight and prevent new weeds from sprouting.
This solution won't prevent weeds from growing back indefinitely, but regular applications (every 2-4 weeks) keep most annual weeds under control. For perennial weeds like dandelions, you may need to repeat the process 2-3 times to fully eradicate them from the root system.
Tips & tricks for effective weed elimination
Here's what I learned after perfecting this solution over years of yard battles—these little tweaks make all the difference.
Solution Strength: The 1-gallon-to-2-cups ratio is perfect for most weeds, but for tougher invaders like dandelions, you can boost effectiveness by adding 1 tablespoon of dish soap (clearly marked "Optional:") to help the solution cling better to leaves. The soap breaks surface tension, allowing the vinegar-salt combo to work more efficiently. Just be cautious with delicate plants nearby.
Timing Secret: Those 24-48 hours for visible results are critical—don't rush it! The vinegar needs time to penetrate the cell walls, and the salt requires hours to dehydrate the roots properly. I've seen people give up too soon after just a few hours, only to watch weeds bounce back. Patience here means fewer repeat applications later.
Application Technique: When you're coating those weed surfaces in Step 2, focus on the undersides of leaves first—they're more vulnerable. Use a gentle back-and-forth motion with your sprayer to ensure even coverage. I like to work in small sections (about 3 feet by 3 feet) to avoid missing spots. For thick weeds, you might need to apply twice—once on each side.
Weather Watch: The instructions mention sunny days, but I'll add this: avoid applying when temperatures are forecasted to drop below 70°F in the next 24 hours. The vinegar works best in warm conditions—below 65°F, the chemical reaction slows significantly, reducing effectiveness. A sunny afternoon with temps in the 80s is ideal for maximum burn.
Pro Tips for Homemade Weed Killer With Vinegar And Salt
- Here's what I learned after perfecting this solution over years of yard battles—these little tweaks make all the diff...
- Solution Strength: The 1-gallon-to-2-cups ratio is perfect for most weeds, but for tougher invaders like dandelions, ...
- Timing Secret: Those 24-48 hours for visible results are critical—don't rush it! The vinegar needs time to penetrate ...
Frequently asked questions
Got questions about tackling weeds with vinegar and salt? You’re not alone! Here are some of the most common queries—and straightforward answers—to help you get the best results.
How long does it take for vinegar and salt to kill weeds?
Most weeds start wilting within 24 hours and die within 3–7 days, depending on the weed type and weather. Hot, sunny days speed up the process, while rain can dilute the solution. For stubborn weeds, reapply after a few days if needed.
Will vinegar and salt harm my grass or plants?
Yes—this combo is not selective. Avoid spraying near desirable plants, as vinegar (especially white vinegar) and salt can burn grass, flowers, or veggies. Use a targeted sprayer or apply only to weed roots in cracks (like driveways). For lawns, opt for a gentler method.
When is the best time to apply this weed killer?
The ideal time is on a warm, sunny day (70°F+ or 21°C+), when weeds are actively growing. Apply in the early morning or late afternoon to avoid rapid evaporation. Avoid windy days—drift can spread the solution to unintended areas.
Can I reuse the vinegar and salt solution?
No, the solution loses effectiveness after one use. Vinegar breaks down quickly, and salt can clump or lose potency. Mix a fresh batch each time for maximum weed-killing power. Store unused vinegar in a sealed container for future batches.
What if the weeds don’t die after applying?
Try these fixes:
- Check coverage: Ensure the solution soaks the entire weed, including leaves and roots.
- Use a higher vinegar concentration: Try 1 gallon vinegar + 1 cup salt for tough weeds.
- Add dish soap: 1 tsp per gallon helps the mix stick to weeds.
- Reapply: Wait 3–5 days and treat again if weeds persist.
Are there safer alternatives for garden beds?
For edible gardens or delicate plants, try:
- Boiling water: Pour directly on weeds (great for cracks in pavement).
- Citrus peel tea: Steep peels in water, strain, and spray (gentler but slower).
- Corn gluten meal: Prevents weed seeds from sprouting (best as a preemptive measure).
- Flame weeding: Use a propane torch for stubborn weeds (safely!).
Wrapping up and next steps
Making your own vinegar and salt weed killer is a budget-friendly, eco-conscious way to tackle unwanted weeds without harsh chemicals. This simple solution leverages common household ingredients to deliver fast, effective results—perfect for sidewalks, driveways, and cracks where weeds thrive. 🌱
Ready to reclaim your space? Grab your supplies, follow the steps, and enjoy a weed-free yard in just days! For extra stubborn weeds, consider repeating the treatment or exploring other natural methods like boiling water or corn gluten meal. Happy gardening! 🌿