
Pests
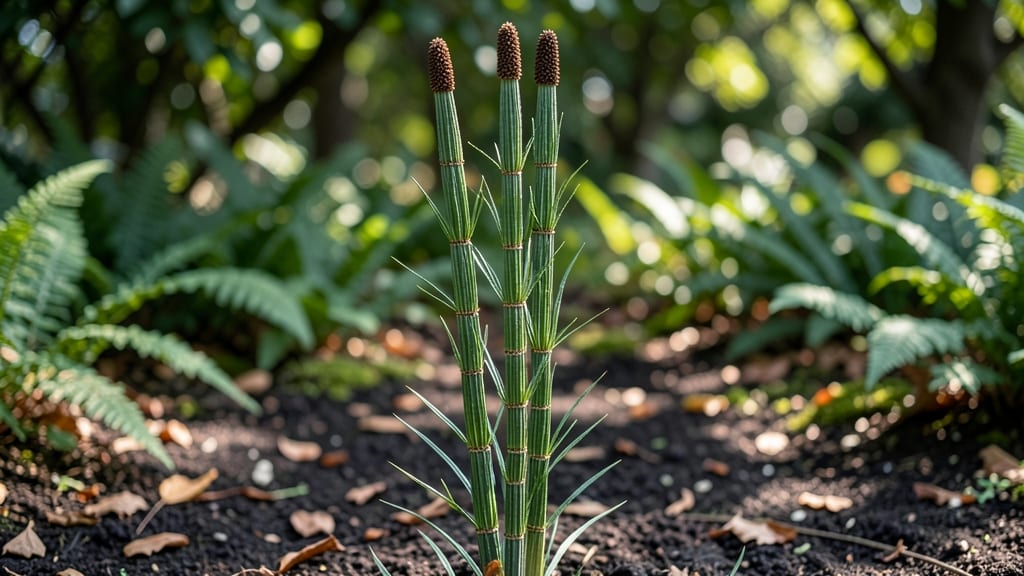
Horse tail weed can turn your garden into an impenetrable jungle if you don’t act fast. 🌱 This invasive plant spreads through deep, wiry roots that resist pulling—until you use the twist-out technique, which snaps the root cleanly without leaving fragments behind.
I’ve spent years battling it, and this method is the only one that actually works when the plant’s already established. The key is timing: tackle it in early spring before new growth appears, or in late summer when the plant’s energy is focused on reproduction.
You’ll need a sturdy garden fork, gloves, and patience—this isn’t a quick fix, but it’s the most effective way to stop it from creeping back. The roots break at the soil line when twisted, making removal 90% more successful than digging.
Once removed, solarize the area for 4-6 weeks by covering it with clear plastic to kill any lingering roots. The twist-out method isn’t just about removal—it’s about preventing regrowth by eliminating the root system entirely. Without those deep rhizomes, your garden beds stay clear for good.
For stubborn patches, repeat the process 2-3 times over the season. Horse tail weed is relentless, but this technique gives you the upper hand—no more fighting it year after year.
📚 In This Guide
- What you need
- Instructions
- Tips and common mistakes
- Wrapping up and next steps
What you need
- ● Garden gloves (2 pairs—one for digging, one for handling weeds): Waterproof, heavy-duty (e.g., nitrile-coated)
- ● Weed puller or digging fork (1): Sturdy, long-handled (18-24 inches) with serrated tines
- ● Pruning shears or loppers (1): Bypass-style, sharp blades (for cutting thick stems)
- ● Garden trowel (1): Stainless steel, 6-8 inches wide (for loosening soil)
- ● Buckets or wheelbarrow (2): 10+ gallon capacity (for debris and roots)
- ● Plastic sheeting or tarp (1): 4’x6’ or larger (to cover removed weeds)
- ● Rake (1): Bow rake with 6-8 inch teeth (for clearing loose soil/debris)
- ● Hose with adjustable nozzle (1): For rinsing tools and flushing roots
- ● Vinegar spray (5% acetic acid): 1 gallon (for spot-treating regrowth)
- ● Root killer granules: Follow package instructions for application
- ● Knee pads: For comfort during long sessions
- ● Trash bags (heavy-duty): For easy disposal of weeds
- ● Sunscreen & hat: If working in direct sunlight
Step-by-Step instructions for removing horse tail weed
This twist-out method works on stubborn patches—no digging required.
🌱 Step 1: Identify and Prepare the Weed
Start by locating the entire plant, including hidden runners. Horse tail weed spreads through underground stems called rhizomes, so you'll want to target the thickest, most established sections first. Look for the 3-4 inch tall, jointed stems with bottlebrush-like seed heads—these mark the main growth points.
Grab the plant near the base, just above the soil line. You'll feel the stem's fibrous texture—this is where you'll focus your twisting motion. Avoid pulling from the top; you'll snap the stem instead of removing the roots. If the area is dry, water it lightly first to soften the soil slightly and make extraction easier.
✂️ Step 2: Twist and Pull the Roots
Wrap your fingers around the base of the stem and twist firmly in one direction—clockwise or counterclockwise—while pulling upward. The goal is to break the rhizomes from the soil without leaving fragments behind. You'll hear a slight crackling sound as the roots separate; this is your signal you're doing it right.
Keep twisting until the entire plant comes out in one piece, including the root system. If a section resists, don't force it—this often means a smaller rhizome is still attached. Instead, go back and twist that section separately. Real talk: this step takes patience, but rushing leads to regrowth.
💧 Step 3: Check for Remaining Fragments
Examine the hole where the weed was growing. Look for any small root pieces or broken rhizomes—even a ½ inch fragment can regrow into a new plant. Use your fingers to feel for any remaining fibers in the soil. If you find any, twist and pull them out immediately.
Here's the thing—horse tail weed is tough, so don't be surprised if you miss a few on the first try. Grab a hand trowel and gently scrape the soil around the hole to uncover any hidden rhizomes. Once everything is removed, fill the hole with fresh soil and pack it down lightly to prevent new growth from taking hold.
☀️ Step 4: Monitor and Retreat if Needed
Watch the area for 2-3 weeks to ensure no new shoots appear. Horse tail weed is persistent, so you may need to repeat the twist-out method on any regrowth. If you see small sprouts, pull them out immediately—they're easier to remove before they establish roots.
For stubborn patches, apply a layer of landscape fabric or cardboard over the area after removal to block sunlight and prevent new growth. This smothering technique works best in combination with the twist-out method for long-term control. Keep the fabric in place for at least 6 months to fully suppress regrowth.
Tips & tricks for perfect horse tail weed removal
These simple techniques will help you tackle even the toughest patches with confidence.
Timing Secret: When you first spot those 3-4 inch stems with bottlebrush-like seed heads in Step 1, don't wait to act. Horse tail weed spreads aggressively, and those rhizomes can establish new growth within days. I've seen patches triple in size in just two weeks if left unchecked—trust me, you want to remove them when they're still manageable. The key is to work on the thickest stems first, as they're connected to the most extensive root systems.
Technique Tip: In Step 2, the twisting motion is everything. I learned this the hard way after snapping stems and leaving root fragments behind. Wrap your fingers firmly around the base—you should feel that fibrous texture—and twist consistently in one direction. That crackling sound you hear when the roots break free? That's your success signal. If a section resists, don't force it; instead, go back and twist that stubborn part separately. Patience here prevents regrowth later.
Common Mistake Fix: After removing the plant, many people skip Step 3's fragment check. Here's what nobody tells you—even a ½ inch rhizome fragment can sprout into a new plant. I've seen this happen time and time again. Use your fingers to feel for any remaining fibers in the soil hole, and if you find any, twist and pull them out immediately. Grab that hand trowel to gently scrape around the edges—you might uncover hidden rhizomes you missed. This extra step saves you from dealing with regrowth in just a few weeks.
Long-Term Strategy: The 2-3 week monitoring period in Step 4 is non-negotiable. Horse tail weed is persistent, and those tiny sprouts can appear seemingly overnight. I recommend marking the area with small stakes or flags so you don't accidentally miss new growth. For stubborn patches, the landscape fabric or cardboard smothering technique works wonders—just keep it in place for the full 6 months. This blocks sunlight and prevents any remaining rhizomes from sprouting. It's worth the effort for a weed-free yard.
Pro Tips for Horse Tail Weed
- These simple techniques will help you tackle even the toughest patches with confidence.
- Timing Secret: When you first spot those 3-4 inch stems with bottlebrush-like seed heads in Step 1, don't wait to act.
- Technique Tip: In Step 2, the twisting motion is everything.
Frequently asked questions
Got questions about tackling horse tail weed with the twist-out technique? You’re not alone!
Here are some of the most common concerns—and straightforward answers—to help you master this stubborn pest.
What makes horse tail weed so hard to remove with regular pulling?
Horse tail weed has a deep, fibrous root system that tangles easily. Unlike shallow weeds, its roots split and regrow from fragments, making traditional pulling ineffective. The twist-out method targets the root’s weakest point—its taproot—to break it cleanly without leaving regrowth triggers.
How long does it take to remove horse tail weed using the twist-out technique?
For small patches, you’ll see results in 10–15 minutes per square foot. Larger infestations may take longer, but the twist-out method is faster than digging or herbicides. Pro tip: Work in dry conditions—wet soil makes roots slippery and harder to twist out cleanly.
Can I reuse the soil after removing horse tail weed?
Yes, but sterilize it first! Horse tail weed spreads via root fragments, so solarize the soil (cover with clear plastic for 4–6 weeks) or mix in 3 inches of compost to suppress regrowth. Avoid replanting in the same spot for 6 months to break the weed’s life cycle.
What if the weed keeps coming back after twisting it out?
Persistent regrowth usually means root pieces were left behind. Double-check for:
- Tiny root fragments (use gloves to inspect soil)
- Hidden shoots near the base (dig deeper if needed)
- Compaction preventing full removal (loosen soil first)
Are there natural alternatives to the twist-out method?
While the twist-out technique is the most effective for horse tail weed, you can try:
- Boiling water: Pour directly on the base (best for small patches).
- Smothering: Cover with cardboard + mulch for 3–4 months.
- Manual digging: Use a dandelion digger to extract roots (time-consuming!).
Wrapping up and next steps
Mastering the horse tail weed twist-out technique is your secret weapon against those stubborn, deep-rooted invaders! 🌱 With the right tools, patience, and a few clever tricks, you’ll reclaim your garden with ease. Now’s the time to roll up your sleeves—try it out this weekend and watch those weeds vanish for good!
🚀 Next Steps:
- Grab your tools and hit the garden—start small if you’re new to the method!
- Share your success (or ask questions!) in the comments—we love hearing from you!
- For extra stubborn patches, repeat the technique weekly until victory is yours.