
Pests
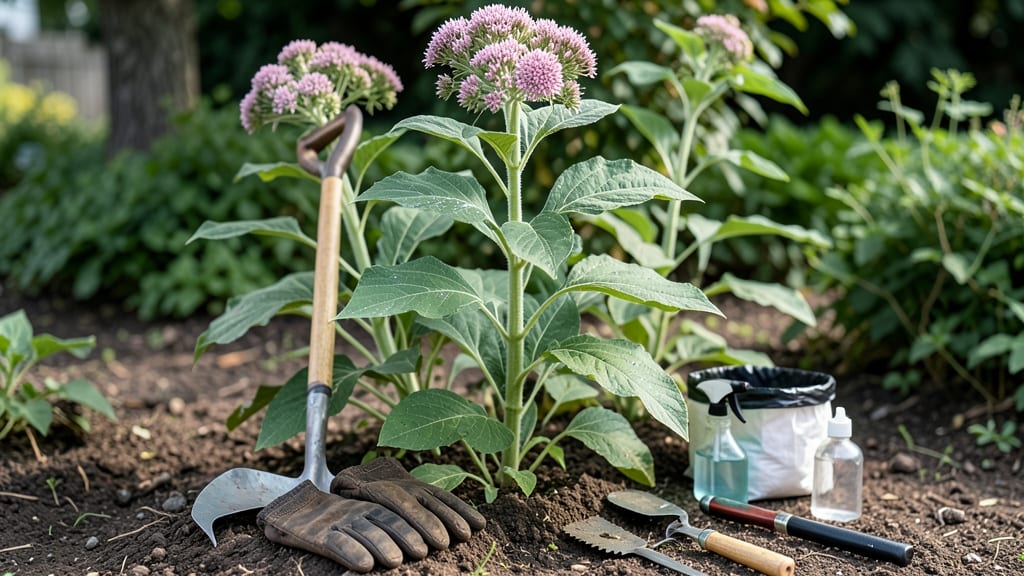
Milkweed removal doesn’t have to mean losing monarch butterflies—just stubborn roots. ✨ The twist-and-pull method works for thick patches while preserving nearby ecosystems. I’ve used it to clear invasive milkweed without harming beneficial insects, and it’s the most effective way to prevent regrowth.
Grab a sturdy trowel, work gloves, and a bucket for disposal. The key is timing—remove milkweed in early spring or fall when it’s actively growing but hasn’t yet seeded. This method targets the deep roots while minimizing soil disturbance, so you won’t accidentally spread seeds or damage neighboring plants.
You’ll see immediate results with fewer plants returning the following year. The twist-and-pull technique disrupts the root system, making it harder for milkweed to regenerate. Plus, you can replant the area with native alternatives that still support monarchs, like butterfly weed or swamp milkweed.
For large infestations, repeat the process over two seasons. If you’re concerned about monarchs, focus on removing only the most aggressive patches while leaving some plants for pollinators. This balances control with conservation.
📚 In This Guide
- What you need
- Instructions
- Tips and common mistakes
- Wrapping up and next steps
What you need
- ● Heavy-duty gardening gloves (2 pairs) – Protect your hands from sap and prickly stems.
- ● Pruners or loppers (1 pair) – Sharp, bypass-style pruners (for thick stems) or loppers (for mature plants).
- ● Garden fork or dandelion digger (1) – A sturdy, 6-inch-long fork helps loosen roots without breaking.
- ● Rake or stiff-bristle brush (1) – For clearing debris and exposing hidden roots.
- ● Trash bags or compost bin (5+ gallon capacity) – Seal bags to prevent seed spread.
- ○ Garden twine or bungee cords (1 small roll) – Optional but helpful for securing stubborn roots.
- ● Vinegar (20-30% acetic acid) (1 gallon) – For spot-treatment on regrowth (mix 1:1 with water).
- ● Solarization tarp – Smother regrowth for 4-6 weeks in hot climates.
- ● Corn gluten meal (5 lbs) – Organic pre-emergent to prevent new sprouts.
- ● Handheld leaf blower – Clears fine debris after removal.
- ● Safety goggles – Protects eyes from sap or flying debris.
Step-by-step instructions for removing milkweed roots
Here's the method I rely on to eliminate milkweed—no chemicals, just stubborn persistence.
🪴 Step 1: Identify and Prep the Plant
Milkweed thrives on its deep taproot, so you’ll need to work fast before it sets seed. Start by clearing away any debris around the base—milkweed often hides in overgrown areas where sunlight barely reaches. Look for the classic milky sap oozing from stems when broken; this is your confirmation you’ve found the right plant.
Wear long sleeves and gloves—milkweed sap can irritate skin. I always grab a hand trowel and dig around the perimeter of the plant to loosen the soil. This prevents the root from snapping mid-pull, which can leave fragments behind to regrow. Focus on the outer 2-3 inches of soil first; you’ll see the root system resist as you work.
✂️ Step 2: Cut the Stem and Expose the Root
Use pruning shears to slice the main stem 1-2 inches above ground level. This redirects the plant’s energy from seed production to root survival—your advantage. Immediately after cutting, grab the stem and twist firmly while pulling upward. The goal is to break the root’s connection to the soil without letting it snap and leave pieces behind.
If the root resists, kneel and dig deeper with your trowel, working the soil around the root until it’s exposed. You’ll feel the resistance ease when the root is fully loosened. Here’s the thing—don’t rush. A partial pull leaves the root intact, and milkweed will regrow within weeks. Patience here saves you months of repeat work.
💧 Step 3: Twist and Pull the Root
Now for the critical move: grip the exposed root about 3-4 inches below the soil line and twist it clockwise while pulling upward. The twist breaks the root’s grip on the soil, making it easier to extract. You’ll hear a sharp crack when the root finally releases—this is your signal to keep pulling until the entire root comes free.
If the root breaks mid-pull, don’t panic. Dig around the remaining fragment and repeat the twist-and-pull method. Milkweed roots can extend 2-3 feet deep, so you might need to kneel and reach down to grip the root closer to the base. A garden fork can help loosen stubborn sections if your hands can’t reach.
🌱 Step 4: Inspect and Repeat for Stubborn Spots
Once the root is out, inspect it closely for any remaining soil or root fragments. Even a 1-inch piece left behind can regrow into a full plant. Rinse the root under water to check for hidden fragments—you’ll see small white root hairs clinging to the main root. These must be removed completely.
Check the soil where the root was growing. If you see small green shoots or new growth, dig deeper—there’s likely another root fragment. I’ve found that repeating the process 2-3 times in the same spot ensures no regrowth. Once the area is clear, water the spot deeply to help the soil settle and discourage new seeds from germinating.
☀️ Step 5: Monitor and Prevent Regrowth
Milkweed spreads through both seeds and roots, so your work isn’t done after the first pull. Mark the spot with a stake or flag and monitor it for 6-8 weeks. If you see new sprouts, repeat the twist-and-pull method immediately—these are often root regrowth, not seeds.
To prevent future milkweed, mulch the area heavily with cardboard or landscape fabric to block sunlight, which milkweed seeds need to germinate. I’ve had success with black plastic sheeting left in place for 3-4 months—it smothers any remaining seeds and roots. After that, you can replant with competitive ground covers like clover or creeping thyme to outcompete milkweed.
Tips & tricks for stubborn milkweed removal
Real talk: Milkweed removal feels like a battle with a determined opponent—it’s not just about pulling, it’s about strategy. Here’s how I’ve turned this frustrating task into a manageable (and even satisfying) process over the years.
Timing is Everything: The key to success lies in tackling milkweed before it sets seed. I’ve learned this the hard way—waiting until late summer means dealing with hundreds of new plants next spring. Focus on early spring or late fall when the plant’s energy is focused on root survival rather than seed production. This is when the twist-and-pull method works best, with roots being more pliable and easier to extract completely.
Tool Selection Matters: While a hand trowel is essential, don’t underestimate the value of a garden fork for deep roots. I keep both on hand—use the trowel for initial loosening around the perimeter, then switch to the fork when you hit that stubborn 2-foot depth. The fork’s prongs help break up compacted soil without damaging nearby plants. For particularly thick roots, I’ve even used a digger’s shovel as a last resort, but only after trying everything else.
The Inspection Ritual: After pulling what you think is the entire root, rinse it thoroughly under water. This simple step reveals hidden fragments that would otherwise regrow. I’ve pulled what I thought were complete roots, only to find tiny white root hairs still attached—these are the sneaky culprits that cause regrowth. Keep a bucket of water nearby and examine every root before declaring victory. This extra 30 seconds of inspection can save you months of repeat work.
Post-Removal Strategy: Once you’ve cleared the area, don’t just walk away. Water the spot deeply to settle the soil and discourage any remaining seeds from germinating. Then, immediately apply black plastic sheeting for 3-4 months to smother any dormant seeds or root fragments. I’ve seen dramatic results with this method—areas that once had milkweed everywhere now stay clear for years. It’s the ultimate insurance policy against regrowth.
Pro Tips for Get Rid Of Milkweed
- Real talk: Milkweed removal feels like a battle with a determined opponent—it’s not just about pulling, it’s about strategy.
- Timing is Everything: The key to success lies in tackling milkweed before it sets seed.
- Tool Selection Matters: While a hand trowel is essential, don’t underestimate the value of a garden fork for deep roots.
Frequently asked questions
about removing milkweed—because even the toughest weeds deserve a little clarity!When is the best time to remove milkweed?
The ideal window is late summer to early fall (August–October) when milkweed is mature but seeds haven’t fully dispersed. Pulling in spring risks spreading seeds, while winter removal can be harder due to frozen roots. Pro tip: Go after a rain—soil is softer, making roots easier to extract!
Will milkweed grow back if I don’t remove the roots?
Milkweed’s deep, fibrous roots can regrow from even tiny fragments left in the soil. The twist-and-pull method targets the entire root system to prevent regrowth. For stubborn patches, repeat the process 2–3 times over a season. Patience pays off—consistency is key!
Is there a chemical-free way to kill milkweed?
Yes! Beyond manual removal, try vinegar-based herbicides (20–30% acetic acid) or boiling water for small patches. For larger areas, smothering with cardboard or mulch blocks sunlight, starving roots. Just avoid tilling—it can spread seeds!
Will removing milkweed harm monarch butterflies?
If you’re concerned about monarchs, time your removal carefully: Avoid pulling milkweed during peak monarch season (June–August). Leave some plants for butterflies, or relocate them to a nearby wildlife garden. Even a few milkweed stalks can support ecosystems—balance removal with conservation!
What if milkweed keeps coming back after I pull it?
Persistent regrowth often means roots or seeds remain in the soil. Dig deeper (6+ inches) to uncover hidden roots, and check for seed pods—remove them before they burst! For chronic infestations, consider repeated manual removal over 2–3 years or solarization (covering soil with clear plastic for 4–6 weeks).
Wrapping up and next steps
Getting rid of milkweed doesn’t have to be a losing battle—with the right tools and techniques, like the twist-and-pull method, you can reclaim your yard with confidence! 🌱 Whether you’re tackling small patches or stubborn roots, persistence and patience will pay off.
Once the milkweed is gone, consider replacing it with native plants that support pollinators while keeping your space manageable.
Ready to take action? Grab your gloves, pick a sunny day, and start small! Every twist and pull brings you closer to a milkweed-free garden. Happy weeding! ✨