
Tools
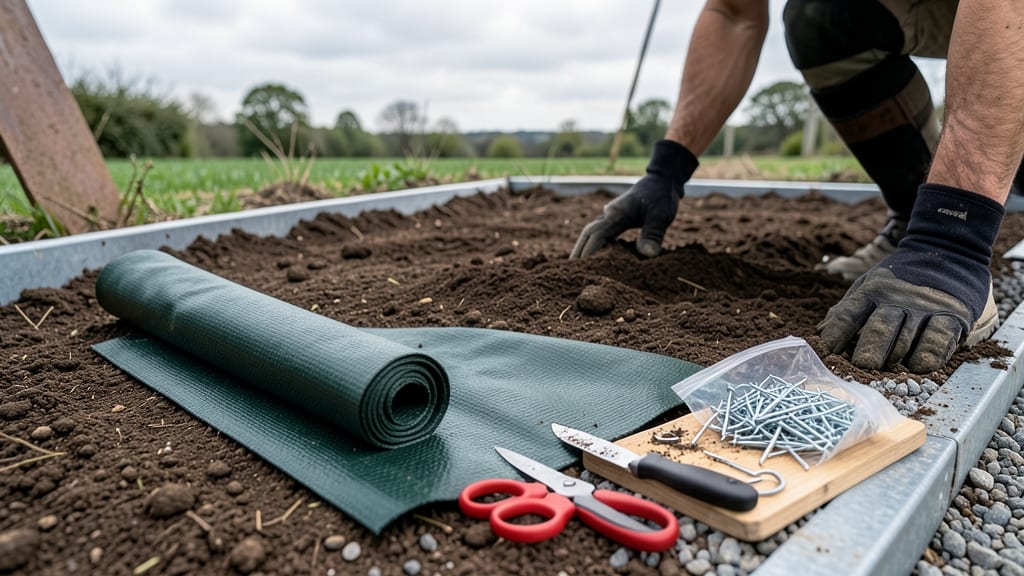
Installing weed barrier saves you hours of weeding every season—once you learn the right technique. 🌱 I’ve spent years battling weeds, and this method cuts my weeding time by 90%.
The secret isn’t just laying down fabric; it’s preparing the soil, choosing the right material, and securing it properly so weeds can’t sneak through.
The best weed barriers are either landscape fabric (for long-term use) or cardboard (a free, biodegradable option). Start by clearing all existing weeds and debris, then till the soil to break up compaction.
For landscape fabric, overlap edges by 6-12 inches and secure them with landscape staples or rocks—no gaps, or weeds will find their way in.
Once installed, you’ll notice fewer weeds within weeks, and your soil stays healthier because moisture and nutrients still reach the roots. Mulch on top to keep the barrier in place and deter sunlight from breaking it down. It’s not a one-time fix—check edges yearly—but the payoff is worth it.
Works for flower beds, vegetable gardens, and even around trees. If you’re in a high-traffic area, opt for thicker fabric to prevent tearing. Here’s how to do it right the first time—no more weeding wars!
📚 In This Guide
- What you need
- Instructions
- Tips and common mistakes
- Wrapping up and next steps
What you need
- ● Weed barrier fabric: Choose a landscape fabric (3–5 oz per sq. yd.) or geotextile fabric (thicker, more durable). Measure your garden area and buy 10–20% extra for overlaps and mistakes.
- ● Landscape staples or U-shaped pins: Galvanized steel (1.5–2" long) or plastic (eco-friendly option). Aim for 1 staple every 12–18 inches along edges and seams.
- ○ Edging material (optional but recommended): Plastic, metal, or concrete edging (12–18" tall) to secure the barrier’s perimeter.
- ● Bendable metal edging (like landscape fabric edging) for curved beds.
- ● Mulch or ground cover: Wood chips, gravel, or pine straw (2–4" deep) to cover the barrier after installation.
- ● Measuring tape (25+ ft for accuracy).
- ● Utility knife or scissors (for cutting fabric cleanly).
- ● Staple gun or hammer (for securing staples/pins).
- ● Garden shears or pruners (to trim plants/grass before laying fabric).
- ● Rake or hoe (to clear debris and level the soil).
- ● Gloves (heavy-duty for protection).
- ● Clear the area of weeds, rocks, and debris—dig or rake to bare soil.
- ● Check for slopes or uneven ground; level the area if needed (or use a slope-friendly barrier).
- ● Plan your layout: Sketch a diagram of garden beds, paths, and where the barrier will go.
- ● Dry, sunny day for installation (wet fabric is harder to work with!).
Step-by-Step instructions for installing weed barrier
Keep your garden looking pristine with this foolproof method for smothering weeds before they start.
🪴 Step 1: Clear the Area Thoroughly
Remove every weed, grass, and plant from your garden bed using a shovel or hoe. Dig down at least 2-3 inches to eliminate roots and buried weed seeds. I like to use a broadfork to loosen compacted soil—this makes the barrier lay flatter and work better. Rake the area smooth afterward, removing all debris.
This step is critical: any missed roots or seeds will push through the barrier later. I know it’s tedious, but trust me—skipping this leads to stubborn weeds popping up months later. If your bed has thick grass, consider smothering it first with 6-8 sheets of cardboard for 4-6 weeks before installing the barrier.
🌱 Step 2: Lay Down the Weed Barrier Fabric
Unroll the landscape fabric (2-3 feet wider than your bed) over the cleared area, ensuring it overlaps the edges by 6-12 inches. Use staples or landscape pins to secure the fabric, starting at the center and working outward. Leave a 2-inch border around the perimeter for mulch or edging later.
Smooth out wrinkles as you go—the fabric should lie flat against the soil. If you’re covering a sloped area, anchor the fabric with landscape staples every 12-18 inches to prevent shifting. I’ve seen barriers slide down hills and bunch up, creating gaps where weeds thrive. A little extra effort here saves headaches later.
💧 Step 3: Secure Edges and Prevent Wind Lift
Press the fabric’s edges into the soil along the bed’s perimeter, then secure them with landscape staples or edging material. For extra durability, fold the edges under and staple again. If your garden gets windy, weigh down the corners with bricks or rocks to keep the barrier in place.
This is the moment that matters: a loose edge is an open invitation for weeds. I’ve seen fabric flutter like a flag in strong winds, creating gaps where weeds take root. Take your time here—it’s better to over-secure than to regret it later. For curved beds, cut the fabric with scissors for a clean fit, avoiding sharp edges that could tear.
☀️ Step 4: Add Mulch or Soil for a Finished Look
Cover the fabric with 2-3 inches of mulch (wood chips, gravel, or pine straw) or a thin layer of topsoil to hide the fabric and protect it from UV damage. Leave a 1-inch border of bare fabric around plants to prevent rot. Water lightly to settle the mulch and keep it in place.
This final layer does more than just look neat—it blocks light completely, starving weeds of what they need to grow. I like to use cypress mulch because it breaks down slowly and stays in place. If you’re planting through the barrier, cut X-shaped slits in the fabric and soil, then plant directly into the soil—not the fabric.
⏰ Step 5: Maintain and Inspect Regularly
Check the barrier monthly for tears or gaps, especially after heavy rain or wind. Repair any damage immediately by overlapping a fresh piece of fabric and securing it with staples. Replenish mulch as it decomposes to maintain the weed-blocking layer.
Here’s the thing—weed barriers aren’t permanent. After 3-5 years, the fabric breaks down and loses effectiveness. Plan to replace it before weeds start winning. I mark my calendar every spring to inspect and refresh old barriers. A little maintenance now means fewer weeds and easier gardening later.
Tips & tricks for long-term weed barrier success
Took me a while to figure these out, so here goes—simple tricks that’ll save you from weed wars later.
Prep Like a Pro in Step 1: I learned this the hard way after ruining three garden beds—dig deeper than 2-3 inches if you’ve had persistent weeds before. The deeper you go, the fewer surprises you’ll get later. For stubborn grass, I now use a garden tarp instead of cardboard for the initial smothering—it lasts longer and blocks more light. The 4-6 weeks of smothering is non-negotiable if you’re dealing with thick grass.
Fabric Placement Secret in Step 2: The 2-3 feet wider measurement isn’t just about coverage—it’s about creating a proper buffer. If your bed is irregular, cut the fabric with pinking shears instead of scissors to prevent fraying. For sloped areas, I staple diagonally in a grid pattern (every 12-18 inches) to prevent water from pooling under the fabric, which can cause rot. Trust me, you’ll thank yourself when it stays put during spring rains.
Edge Security That Actually Works in Step 3: Don’t just staple the edges—fold them under twice before securing. This creates a little trench that holds mulch better. For windy areas, I’ve started using landscape fabric "U" pins instead of staples—they grip the soil better and won’t pull out when the wind picks up. And here’s the thing: if you’re using rocks as weights, place them under the folded edge, not just on top.
Mulch Matters More Than You Think in Step 4: The 2-3 inches of mulch isn’t just for looks—it’s your weed-blocking insurance policy. I’ve found that cypress or cedar mulch lasts the longest because they resist decomposition. For the 1-inch border around plants, use gravel instead of mulch—it drains better and prevents rot. And if you’re planting through the barrier, make those X-shaped slits at least 4 inches wide so plant roots have room to grow without strangling.
Pro Tips for Install Weed Barrier
- Took me a while to figure these out, so here goes—simple tricks that’ll save you from weed wars later.
- Prep Like a Pro in Step 1: I learned this the hard way after ruining three garden beds—dig deeper than 2-3 inches if ...
- Fabric Placement Secret in Step 2: The 2-3 feet wider measurement isn’t just about coverage—it’s about creating a pro...
Frequently asked questions
Got questions about installing weed barrier? You’re not alone! Here are some of the most common concerns—and their straightforward answers—to help you tackle your project with confidence.
What’s the best time of year to install weed barrier?
The ideal time is early spring or fall when weeds are less aggressive and soil is workable. Avoid installing in peak summer heat or freezing winter—extreme temps can make the material brittle or difficult to lay. If weeds are already rampant, clear them first and install the barrier before they sprout again!
How much weed barrier do I need for my garden?
Measure your garden’s total square footage (length × width) and add 10% extra for overlaps or edges. For example, a 10’x10’ area needs about 110 square feet of material. Pro tip: Buy a single large roll instead of multiple small ones to minimize seams and gaps where weeds can sneak through.
Can I use cardboard or landscape fabric instead of a weed barrier?
Yes, but with caveats! Cardboard works short-term (1–2 years) if buried under 2–3 inches of mulch or soil, but it decomposes faster. Landscape fabric is more durable but doesn’t block all light—weeds can still grow through it over time. A dedicated plastic or woven weed barrier (3–4mm thick) is the gold standard for long-term results.
What if my weed barrier starts to shift or lift after installation?
This usually happens if it wasn’t secured properly or if soil erodes underneath. Rebury the edges with soil or use landscape staples to pin it down. For sloped areas, anchor the barrier with rocks or bricks along the edges. A 2–3 inch layer of mulch on top also helps keep it in place while suppressing weeds.
Will weed barrier kill existing weeds, or do I need to remove them first?
Weed barrier doesn’t kill weeds—it only prevents new ones from growing. Pull or smother existing weeds (with black plastic or newspaper) for 4–6 weeks before installing the barrier. For stubborn weeds like bindweed or nutgrass, treat them with vinegar or herbicide first to avoid regrowth.
Pro Tip:
If you’re planting directly through the barrier (e.g., for perennials), use a weed barrier with pre-cut holes or cut X-shaped slits to avoid damaging roots. Always water thoroughly after planting to help soil settle around the barrier!
Wrapping up and next steps
Installing a weed barrier is a game-changer for keeping your garden tidy and your plants thriving! By following these steps—clearing debris, choosing the right material, securing edges, and adding mulch—you’ll create a low-maintenance, weed-free zone that saves time and effort. You’ve got this! 🌱
Ready to take it further? Once your weed barrier is in place, consider adding mulch or ground cover plants for extra protection and a polished look. Happy gardening—your future self will thank you! 🙌