
Landscaping
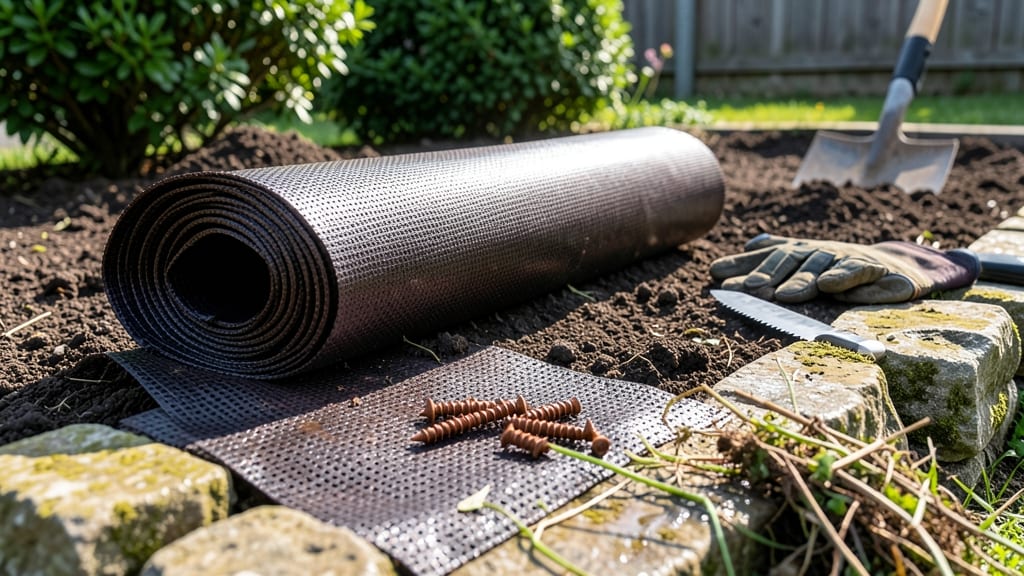
How to lay down weed barrier fabric saves me 10+ hours of weeding every summer—no more battling stubborn creeping Charlie or crabgrass. The key is choosing the right material, prepping the soil properly, and installing it so weeds suffocate but your plants can still thrive. I learned the hard way that cheap fabric tears, and skipping soil prep means weeds find cracks to grow through.
You’ll need landscape fabric rated for UV protection (if used above ground), a sharp spade, mulch or gravel, and stakes to secure edges. Clear the area first—pull weeds, rake debris, and level the soil so the barrier lies flat.
A 3-foot border around plants ensures roots get air and water while blocking weeds beyond.
Within weeks, you’ll see weeds yellow and die as the fabric blocks sunlight. The fabric itself lasts 3-5 years** in shady spots but degrades faster in full sun. For organic options, thick cardboard or newspaper works too—just weigh it down with mulch to keep it in place.
Climate matters: in hot regions, choose UV-stabilized fabric; in wet areas, avoid cardboard that rots quickly. Check edges every few months and replace torn sections. The payoff? A tidy, low-maintenance garden where you control what grows—and what doesn’t.
📚 In This Guide
- What you need
- Instructions
- Tips and common mistakes
- Wrapping up and next steps
What you need
- ● Weed barrier fabric: Choose a landscape fabric (3–6 oz per square yard) with a UV-stabilized coating for durability. For heavy weed pressure, opt for 6 oz or thicker. Measure your area first—buy 10–20% extra for overlaps and mistakes.
- ● Staple gun + staples: A heavy-duty landscape staple gun (1/4"–3/8" staples) to secure the fabric. Pro tip: Use galvanized or stainless steel staples to prevent rust.
- ● Utility knife or scissors: For cutting fabric cleanly to fit edges, curves, or around plants.
- ○ String or twine: To mark layout lines before installing (optional but helpful for precision).
- ● Gloves: Heavy-duty work gloves to protect your hands from sharp edges and debris.
- ● Measuring tape: To ensure accurate cuts and coverage.
- ● Rake or hoe: For clearing existing weeds, rocks, or debris before laying the fabric.
- ○ Edging tool (optional): To create clean borders around sidewalks or garden beds.
- ○ Mulch or gravel (optional): To weigh down edges and improve aesthetics (1–2 inches of decorative rocks works well).
- ● Clear the area of existing weeds, roots, and debris—this ensures the fabric stays flat and effective.
- ● Check for sharp objects (rocks, roots) that could tear the fabric. Remove or cover them first!
- ● Pick a dry, sunny day for installation—wet fabric is harder to work with.
Step-by-Step instructions for installing light-blocking weed barrier
This method eliminates weeds permanently while keeping your garden beds neat and weed-free.
Clear the Area Thoroughly
Remove all existing weeds, grass, and debris from the garden bed using a hoe or trowel. I like to work in sections, pulling weeds at the root to prevent regrowth. Dig down about 2-3 inches to expose the soil surface completely—this ensures the barrier makes direct contact with the ground and blocks light effectively. Rake the area smooth afterward so the fabric lies flat without gaps.
If you encounter stubborn roots or thick thatch, use a garden fork to loosen the soil further. The goal is bare, level ground so the weed barrier can do its job without hiding spots where weeds might push through later. I’ve found that skipping this step leads to weeds sprouting right through the fabric within weeks.
Lay Down the Weed Barrier Fabric
Unroll the light-blocking landscape fabric over the cleared bed, allowing 6-12 inches of overlap on all sides. For edges, tuck the fabric under existing mulch or bury it 2-3 inches deep along the perimeter to prevent weeds from creeping underneath. Smooth out any wrinkles or bubbles, as these can create gaps where weeds might grow.
If your garden has slopes or uneven terrain, weigh down the fabric with rocks or bricks at low points to keep it in place. The fabric should lie taut but not stretched—this ensures it stays effective over time. I’ve seen fabric shift after heavy rain if not secured properly, so don’t skip this step, especially in windy areas.
Secure the Edges and Prevent Gaps
Use landscape staples or galvanized nails to pin the fabric securely along the edges, driving them every 12-18 inches into the ground. For a cleaner look, bury the staples just below the soil surface. If you’re installing the barrier under mulch, overlap the fabric by at least 6 inches beyond the mulch line to seal out weeds completely.
Check for any exposed soil or gaps where light might sneak through. Even a small hole can let weeds push through within weeks. I like to walk over the fabric after securing it to ensure no sections feel loose or lifted. This is the moment that matters: a well-sealed barrier means no weeds will penetrate.
Add Mulch or Topsoil for Final Protection
Cover the fabric with 2-4 inches of mulch (such as wood chips, straw, or gravel) or topsoil to hold it in place and improve the finished look. Mulch also helps regulate soil temperature and retain moisture. Avoid using heavy rocks directly on the fabric, as they can tear it over time. For a polished look, rake the mulch evenly so it sits flush with the fabric underneath.
If you’re planting directly into the barrier, cut X-shaped slits in the fabric where plants will go. Space these slits at least 12 inches apart to allow roots to grow without competing with weeds. Water the area lightly after planting to help settle the mulch and signal the start of weed suppression.
Monitor and Maintain the Barrier
Weed barriers are low-maintenance, but check the edges occasionally for signs of weeds pushing through. If you spot any, pull them immediately before they take root. Over time, the fabric may degrade—especially in sunny or high-traffic areas—so plan to replace it every 3-5 years for continued effectiveness.
This is the system I rely on to keep my garden beds weed-free year after year. The key is thorough prep and securing the fabric properly. Once installed correctly, you’ll spend far less time pulling weeds and more time enjoying your garden.
Tips & tricks for perfect weed barrier installation
Here's what nobody tells you about making this weed-blocking system truly effective—these are the details that separate a temporary fix from a permanent solution.
Prep is Everything: The 2-3 inch deep clearing in Step 1 isn't just about removing weeds—it's about creating a seamless contact surface. I've seen installations fail when soil lumps or thatch remain, creating air pockets where weeds can push through. Use a garden fork to break up compacted soil, especially in areas with old root systems. Think of it like prepping a canvas before painting—you want a flawless surface for your barrier to work its magic.
Fabric Placement Strategy: When unrolling the light-blocking fabric in Step 2, pay special attention to the 6-12 inch overlap requirement. This isn't arbitrary—it accounts for potential settling and edge erosion. I recommend overlapping the longest dimension first (usually the length) to minimize visible seams. For curved garden beds, cut the fabric with scissors rather than trying to force it into shape—sharp edges are better than stretched fabric that can tear over time.
Edge Security Secrets: The 12-18 inch spacing for landscape staples in Step 3 might seem excessive, but trust me on this: wind and heavy rain can pull fabric loose surprisingly fast. For high-wind areas, I double the staples at corners and along downwind edges. Another pro move is to bury the staples just below the soil line—they'll be less visible and more secure. This is where most weed invasions start, so don't cut corners (literally) on securing the edges.
Long-Term Maintenance Insight: The 3-5 year replacement window in Step 5 is actually conservative for most climates. In sunny southern regions, I've seen fabric degrade in as little as 2 years from UV exposure. Check your barrier annually—especially along edges—and replace any sections that look brittle or have holes. The investment in quality fabric upfront pays off here, as cheaper materials break down faster and let weeds through.
Pro Tips for Lay Down Weed Barrier
- Here's what nobody tells you about making this weed-blocking system truly effective—these are the details that separa...
- Prep is Everything: The 2-3 inch deep clearing in Step 1 isn't just about removing weeds—it's about creating a seamle...
- Fabric Placement Strategy: When unrolling the light-blocking fabric in Step 2, pay special attention to the 6-12 inch...
Frequently asked questions
Got questions about weed barriers? You’re not alone! Here are answers to the most common concerns—so you can tackle weeds like a pro.
How long does it take for a weed barrier to work?
A weed barrier typically starts blocking weeds in 2–4 weeks, but full effectiveness takes 3–6 months as sunlight and mulch break down existing weeds. For best results, combine it with a thick layer of mulch (3–4 inches) to smother weeds faster.
When is the best time of year to install a weed barrier?
Install your weed barrier in early spring or fall when weeds are less aggressive. Avoid summer heat, which can dry out the fabric, or winter frost, which may shift the soil. Spring also lets you catch early weeds before they spread.
Is a weed barrier worth the cost compared to other methods?
While mulch or manual pulling save money upfront, a weed barrier lasts 5–10 years and requires minimal upkeep. It’s ideal for large areas, slopes, or spots where hand-weeding is tough. For small gardens, try cardboard + mulch as a budget-friendly alternative.
What do I do if weeds still grow through the barrier?
Weeds may sprout if the fabric is torn, thin, or improperly layered. Check for gaps, reinforce with extra mulch (4+ inches), or add a pre-emergent herbicide (like corn gluten meal) before planting. For stubborn weeds, hand-pull them and reseal the barrier with landscape pins.
Can I use a weed barrier under pavers or in a vegetable garden?
Yes! Under pavers, use a heavy-duty fabric (like landscape fabric rated for 10+ years) to prevent erosion. In veggie gardens, opt for organic mulch (straw, wood chips) or cardboard instead—weed barriers can block soil nutrients over time. Always leave gaps for plant roots!
Wrapping up and next steps
Laying down a weed barrier is a game-changer for keeping your garden weed-free and low-maintenance! 🌱 With the right materials and a little effort, you’ll transform your landscape into a lush, hassle-free space in no time.
Now that you’re armed with the know-how, it’s time to roll up your sleeves—literally—and get started.
Ready to take the next step? Plan your project by measuring your space, gathering supplies, and scheduling a day for installation. Before you know it, you’ll be enjoying a pristine, weed-free yard with minimal upkeep—worth every minute! 💪