
Planting
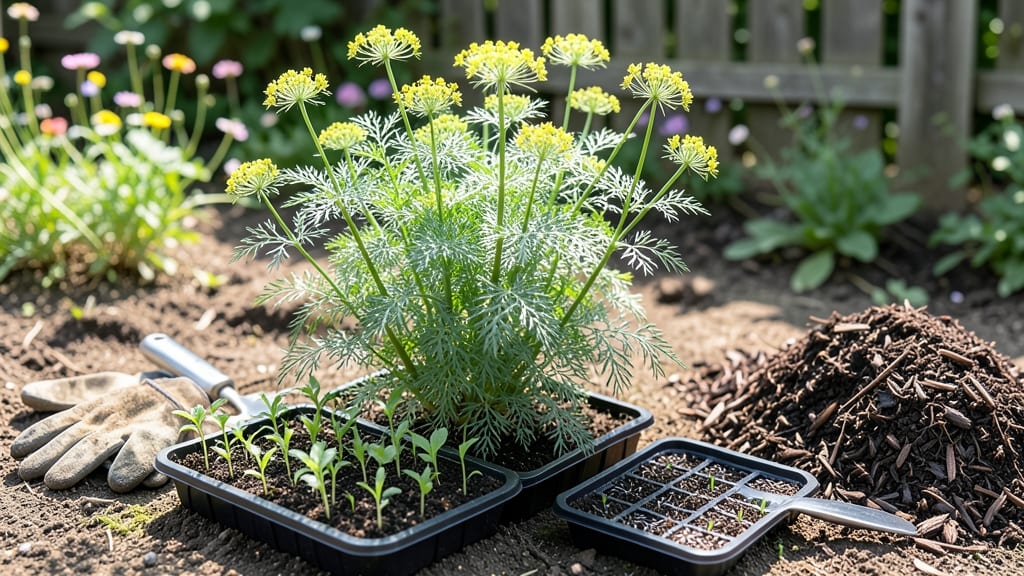
Planting dill weed is easier than you think—just a sunny spot and a few simple steps separate you from fresh, fragrant herbs for soups, pickles, and salads. 🌿 I’ve grown dill in containers for years, and the secret is treating it like the sun-loving annual it is: give it space, good drainage, and plenty of light, and it’ll reward you with feathery foliage all season long.
You’ll need a pot at least 12 inches wide (dill gets bushy), well-draining potting mix, and seeds planted ¼ inch deep—no fancy soil science required.
The key is spacing: plant seeds 1 inch apart in rows 12 inches apart (or just scatter them if you’re growing in a larger container). Dill thrives in full sun (6+ hours daily), but even a half-day of sunlight will produce edible leaves, just slower.
Once planted, keep the soil consistently moist but not soggy—dill hates wet feet. Within 3-4 weeks, you’ll see those familiar lacy leaves, and by 6-8 weeks, you’ll have tall stems perfect for drying or attracting pollinators.
The flavor peaks when flowers appear, so harvest leaves regularly to encourage more growth. This herb is foolproof for beginners—it self-seeds like crazy, meaning you’ll likely get volunteers next year. Use it fresh in dishes or dry the seeds for pickling; either way, you’ll never buy dill again.
📚 In This Guide
- What you need
- Instructions
- Tips and common mistakes
- Wrapping up and next steps
What you need
- ● Dill seeds or seedlings: Choose Anethum graveolens (common dill) or Anethum sowa (Indian dill). Use 1-2 tbsp of seeds (about 50-100 seeds) or 2-3 healthy seedlings for a small container.
- ● Containers: Opt for pots with drainage holes and at least 6-8 inches in diameter (deeper for larger plants). Pro tip: 💡 Use fabric grow bags for better aeration!
- ● Potting soil: A well-draining, nutrient-rich mix (e.g., 60% potting soil + 40% perlite or compost). Avoid garden soil—it compacts too easily!
- ● Watering can or spray bottle: Dill hates soggy roots, so a gentle watering tool helps prevent overwatering.
- ● Seed-starting kit: Includes seed trays, soil, and domes for germinating seeds indoors (if starting early).
- ● Fertilizer: A balanced, water-soluble fertilizer (e.g., 10-10-10) or compost tea for a natural boost.
- ● Mulch or straw: Helps retain moisture and suppress weeds (especially useful in hot climates).
- ● Support stakes or cages: Dill grows tall (up to 4-5 feet!)—add bamboo stakes or tomato cages for stability.
- ● Pruning shears: For harvesting leaves or shaping the plant as it grows.
Step-by-Step instructions for planting dill weed in containers
Dill's feathery foliage and delicate blooms reward patience—here's how to grow it lush and productive.
🌱 Step 1: Choose the Right Container and Soil Mix
Select a container with drainage holes that's at least 12 inches deep and 10 inches wide—dill has a deep taproot and needs room to establish. I use terra cotta pots because they wick away excess moisture, which prevents the root rot that often kills container-grown dill. Fill the bottom third with gravelfor drainage, then add a high-quality potting mix blended with 20% perlite for aeration.
Moisten the mix until it feels like a damp sponge—not wet enough to drip, but not dry to the touch. Press the soil down gently to remove air pockets, then create a small mound in the center. This ensures roots spread outward rather than circling the edges, which stunts growth. Dill thrives in well-draining soil, so avoid garden soil or mixes with compost—both compact and suffocate roots.
🌱 Step 2: Plant Seeds at the Correct Depth and Spacing
Dill seeds germinate best when planted ¼ inch deep—any deeper delays sprouting because the seedling struggles to reach light. Space seeds 12-18 inches apart in the mound; dill grows tall and leggy, and crowding invites fungal diseases. I like to plant 2-3 seeds per container, then thin to the strongest seedling after germination to avoid transplant shock.
Cover the seeds lightly with additional soil, then mist the surface with water until evenly damp. Place the container in a warm spot (70-75°F) away from direct light until sprouts appear, which typically takes 10-14 days. Avoid overwatering now—dill seeds rot quickly in soggy soil. Instead, check daily and water only when the top inch feels dry to the touch.
☀️ Step 3: Provide Full Sun and Consistent Moisture
Once seedlings emerge, move the container to a location with 6+ hours of direct sunlight daily. A south-facing window or outdoor spot works best, but dill tolerates partial shade—just expect slower growth and fewer flowers. Rotate the pot a quarter turn weekly so the plant grows upright rather than leaning toward the light.
Water deeply when the top 2 inches of soil feel dry, aiming for 1 inch of water per week. Let the soil dry slightly between waterings—dill hates soggy roots but wilts quickly in dry soil. You'll notice leaves cup upward when thirsty; a quick drink restores their crisp texture. Fertilize lightly with a balanced liquid fertilizer every 4-6 weeks to encourage lush growth.
✂️ Step 4: Prune and Harvest for Continuous Growth
Begin harvesting leaves when plants reach 6-8 inches tall, snipping stems just above a set of leaves to encourage bushier growth. Regular harvesting prevents bolting (the sudden flowering that turns leaves bitter). For flowers, allow some stems to bloom—dill's yellow umbels attract pollinators and self-seed prolifically if left undisturbed.
If your dill bolts prematurely, cut back stems to 4-6 inches tall to stimulate new growth. This works best in early summer before temperatures exceed 85°F, when heat stress accelerates bolting. Deadhead spent flowers to redirect energy into leaf production. With proper care, a single container can yield enough dill for 3-4 harvests per season.
🌿 Step 5: Overwintering (Optional for Year-Round Growth)
Dill is an annual, but you can extend its life by bringing containers indoors before the first frost. Place the pot in a cool (50-60°F), bright spot and reduce watering to every 10-14 days. Expect slower growth, but leaves remain flavorful for 4-6 weeks before the plant declines. For next year, save seeds by allowing some stems to mature—dill seeds dry on the plant and drop easily into a paper bag.
I know it seems counterintuitive to let dill flower, but those seeds are your free starter for next season. Store them in a cool, dry place, and they’ll remain viable for 2-3 years. With this method, you’ll never need to buy dill again—just replant saved seeds each spring.
Tips & tricks for perfect container-grown dill
Growing lush, flavorful dill in containers takes just a few key strategies—here's how to avoid the most common mistakes and maximize your harvest.
Container Selection: While terra cotta pots work beautifully, avoid plastic containers that trap moisture and promote root rot. If you must use plastic, drill additional drainage holes in the bottom. For larger harvests, consider fabric grow bags—they allow roots to breathe while preventing compaction. I've found that containers with a slightly wider than deep shape (like 12" diameter × 10" depth) give dill's deep taproot the best chance to establish without crowding.
Soil Preparation: The 20% perlite blend in Step 1 is crucial for preventing soil compaction, but don't stop there. Before planting, mix in 1 tablespoon of compost per gallon of soil—just enough to provide nutrients without the risk of fungal issues. Dill's shallow roots need aerated soil, so avoid heavy garden soil mixes that can suffocate the plant. I like to add a handful of coarse sand to the perlite mix for even better drainage in containers.
Germination Environment: Those 10-14 days until sprouting can feel like forever, but creating the right conditions makes all the difference. Place your container in a spot where temperatures stay consistently between 70-75°F—a sunny windowsill above a heating vent works perfectly. If your home runs cooler, consider using a seedling heat mat set to 75°F until germination occurs. The key is warmth without direct light during this stage.
Sunlight Management: While dill loves full sun, the transition from indoor germination to outdoor placement requires caution. Harden off seedlings gradually by moving them to outdoor light for just 1 hour on day one, increasing by 1 hour each day until they're in full sun. This prevents shock that can cause leaves to yellow or wilt. Once established, rotate your container every 3-4 days to ensure even growth—dill plants naturally lean toward the light source.
Pro Tips for Plant Dill Weed
- Growing lush, flavorful dill in containers takes just a few key strategies—here's how to avoid the most common mistak...
- Container Selection: While terra cotta pots work beautifully, avoid plastic containers that trap moisture and promote...
- Soil Preparation: The 20% perlite blend in Step 1 is crucial for preventing soil compaction, but don't stop there. Be...
Frequently asked questions
Got questions about growing your own dill? Here are some of the most common concerns—and their answers—to help you cultivate this versatile herb like a pro!
When is the best time to plant dill?
Dill thrives in cool weather, so plant seeds directly in the ground 2–4 weeks before your last frost date in spring. For a fall harvest, sow seeds 8–10 weeks before the first expected frost. Avoid planting in hot summer months—it may bolt (go to seed) prematurely.
Can dill grow in containers?
Dill does well in containers as long as the pot is at least 12 inches deep and has drainage holes. Use a well-draining potting mix, and place the container in full sun (6+ hours daily). Just be prepared to harvest frequently to encourage bushier growth.
How long does it take for dill to grow?
Dill is a fast grower! You’ll see tiny seedlings emerge in 7–14 days, and the plant reaches maturity (ready for harvest) in about 6–8 weeks. For continuous harvests, plant new seeds every 2–3 weeks during the growing season.
Why is my dill attracting bugs or pests?
Dill is a magnet for pests like aphids, spider mites, and swallowtail butterfly caterpillars. To keep them at bay, spray plants with water to dislodge aphids, use neem oil, or introduce beneficial insects like ladybugs. If caterpillars appear, handpick them or use row covers early in the season.
Can I grow dill indoors?
Dill can grow indoors near a sunny window, but it’s tricky! Place it under a grow light (12–16 hours/day) for best results. Use a south-facing window if natural light is your only option. Expect slower growth and smaller plants compared to outdoor conditions.
Pro Tip:
If you’re short on space, try interplanting dill with other herbs like basil or parsley. Its feathery foliage adds height and beauty to your garden while keeping pests away from nearby plants!
Wrapping up and next steps
Planting dill weed is a rewarding journey that brings fresh, flavorful greens right to your doorstep—literally! Whether you’re growing it in containers, garden beds, or even indoors, the key is patience, proper sunlight, and a little love.
Now that you’ve got the know-how, roll up your sleeves and give it a try—your taste buds (and future salads or pickles!) will thank you. Ready for the next step? Harvest your first batch in just a few weeks and savor the satisfaction of homegrown dill! 🌱💚