
Planting
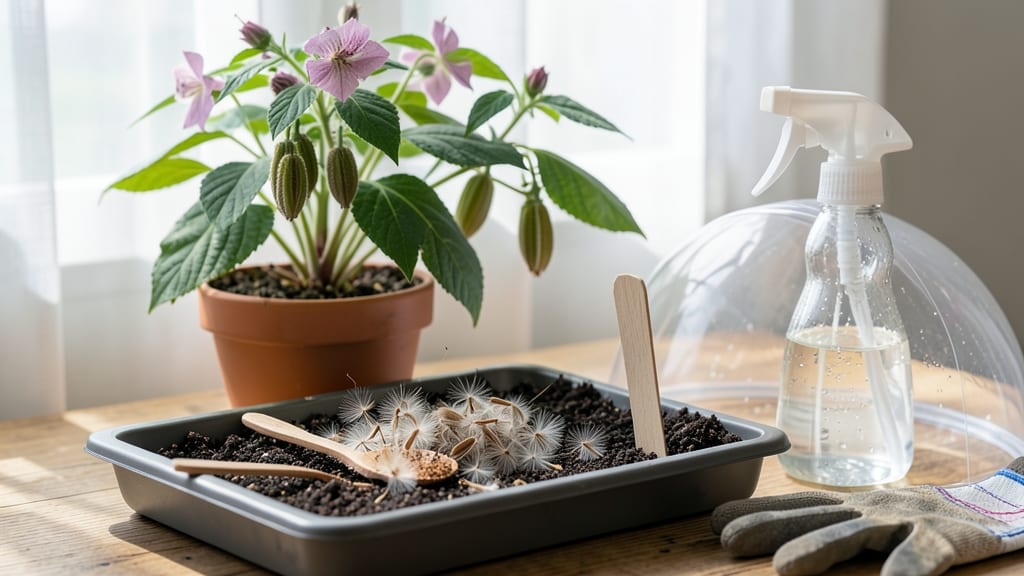
How to sow milkweed seeds cuts germination time from months to weeks—trust me, I’ve waited too long to know the difference. 🌱 The key is mimicking winter’s natural chilling process before planting, which tricks seeds into breaking dormancy and sprouting like clockwork. Without this step, you might stare at your seed tray for months wondering if anything’s happening.
You’ll need a few simple supplies: milkweed seeds (preferably fresh), a plastic bag with a bit of damp potting mix, and patience for 4-8 weeks of cold treatment.
Place the sealed bag in your fridge’s crisper drawer where temps hover around 35-40°F, checking monthly to ensure the mix stays moist but not soggy. This mimics the freeze-thaw cycles seeds experience in nature.
Once stratified, sow seeds ¼-inch deep in well-draining soil under bright, indirect light. Keep the soil consistently moist (not wet) and expect tiny sprouts in 2-4 weeks. The first leaves will look like tiny, wrinkled leaves—don’t mistake them for failure.
Transplant seedlings outdoors after the last frost, and watch them grow into the monarch butterfly magnet you’ve been dreaming of.
This method works for all milkweed varieties, from common milkweed to tropical butterfly weed. The secret? Consistency in moisture and light. Skip the cold treatment, and you’ll likely end up with a tray of stubborn seeds that refuse to cooperate—and that’s a problem no gardener needs.
📚 In This Guide
- What you need
- Instructions
- Tips and common mistakes
- Wrapping up and next steps
What you need
- ● Milkweed seeds: Fresh or store-bought (ensure they’re Asclepias species, like Asclepias tuberosa for butterfly gardens). Aim for 10–20 seeds to start.
- ● Cold stratification supplies: Paper towels or dampened seed-starting mix (peat moss or coconut coir work well).
- ● A ziplock bag or airtight container (like a mason jar with a lid).
- ● A refrigerator (set to 35–40°F for 3–4 weeks).
- ● Planting containers: Small pots (3–4 inches deep) with drainage holes OR seed trays.
- ● High-quality seed-starting mix (lightweight and sterile).
- ● Watering can or spray bottle (gentle watering is key!).
- ● Grow lights or sunny windowsill (south-facing or 12+ hours of light daily).
- ● Seedling heat mat (speeds up germination in cooler homes).
- ● Humidity dome (keeps moisture in during early stages).
- ● Transplanting tools (small trowel, gardening gloves).
- ● Label markers (to track varieties if planting multiple types).
- ● Outdoor garden bed or large container (for transplanting after 4–6 weeks).
Step-by-step instructions for sowing milkweed seeds
Cold stratification is the secret to breaking dormancy—here’s how to do it right for reliable germination.
🌱 Step 1: Collect and Prepare Seeds
Harvest milkweed seed pods when they turn brown and begin splitting open naturally. Inside, you’ll find fluffy seeds attached to silky parachutes—these are ready for sowing. Store them in a paper bag (not plastic) in a cool, dry place until you’re ready to stratify. The seeds need this drying period to mimic their natural cycle.
If you’re working with store-bought seeds, skip the drying step—just move straight to stratification. I always label my seed packets with the harvest date, as freshness matters for germination rates. Milkweed seeds lose viability quickly once removed from the pod, so don’t delay the process.
❄️ Step 2: Cold Stratify for 30-60 Days
Place the seeds in a sealed plastic bag with a damp paper towel. The towel should feel like a wrung-out sponge—moist but not dripping. Add a handful of moistened sand or perlite to the bag to help regulate moisture during stratification. Seal the bag and refrigerate it for 30-60 days.
Check the bag weekly to ensure the paper towel stays damp. If it dries out, add a few drops of water and reseal. This cold treatment mimics winter conditions, breaking the seed’s dormancy. I set a reminder on my phone because forgetting this step means waiting another year for germination.
🌿 Step 3: Sow Stratified Seeds Indoors
Fill small pots with a lightweight seed-starting mix, leaving about ½ inch of space at the top. Scatter the stratified seeds on the soil surface—don’t bury them. Milkweed seeds need light to germinate, so pressing them gently into the top layer is all that’s needed.
Cover the pots with plastic wrap or a humidity dome to retain moisture. Place them in a warm spot (around 70-75°F) with bright, indirect light. Germination can take 10-21 days, so patience is key. I keep the pots in a sunny windowsill but supplement with a grow light if natural light is weak.
☀️ Step 4: Transplant Seedlings Outdoors
Once seedlings develop their first true leaves (not the initial seed leaves), they’re ready for outdoor hardening. Start by placing them in a sheltered spot for 1-2 hours the first day, gradually increasing exposure over 7-10 days. This slow transition prevents shock.
Choose a sunny location with well-draining soil. Milkweed thrives in full sun and tolerates poor soil, but it won’t perform well if waterlogged. Space seedlings 12-18 inches apart to allow room for growth. Water deeply after transplanting to help roots establish.
⏰ Step 5: Maintain and Monitor Growth
Keep the soil consistently moist but not soggy during the first growing season. Milkweed is drought-tolerant once established, but young plants need regular watering. You’ll notice new growth within a few weeks—this is your signal that the plant is adapting well.
Watch for aphids or milkweed beetles, common pests that love tender new growth. A strong spray of water usually deters them, but severe infestations may require neem oil. By late summer, you’ll see the iconic milkweed pods forming—this is when the real magic begins for monarch butterflies.
Tips & tricks for perfect milkweed germination
Real talk: Cold stratification isn't just a step—it's the game-changer that separates successful milkweed growers from those waiting another year. Here's what nobody tells you about making this process foolproof.
Seed Freshness Matters: The 30-60 day stratification window assumes fresh seeds. If you're working with seeds harvested more than 6 months ago, extend the cold treatment to 90 days. I learned this the hard way after struggling with low germination rates—always check your harvest date! The drying period in Step 1 is equally critical for wild-harvested seeds, but skip it completely with store-bought seeds that already have controlled drying.
Stratification Environment: Your refrigerator's crisper drawer is perfect for this process—it maintains consistent 34-40°F temperatures that mimic winter conditions. The damp paper towel should stay moist but never soggy; condensation inside the bag is your friend, not mold. I use a small ziplock bag with a tiny air pocket to prevent excessive moisture buildup. Place the bag on its side in the fridge so seeds don't settle against the cold surface.
Light Requirements: The 70-75°F warm spot in Step 3 needs bright, indirect light—think east-facing window or grow light. Direct sunlight can overheat the soil, while dim light leads to leggy seedlings. I've found that placing pots under a simple LED grow light for 12 hours daily eliminates the need for a sunny windowsill. Watch for seedlings emerging from the soil surface—this is your cue that germination has begun.
Transplant Timing: Those first true leaves signal readiness for outdoor hardening, but don't rush it. The 1-2 hour gradual exposure in Step 4 should increase by 1 hour each day. I've seen seedlings shocked when moved too quickly—start with partial shade and watch for wilting. Milkweed's deep taproot develops quickly, so handle seedlings gently during transplanting to avoid root damage.
Pro Tips for Sow Milkweed Seeds
- Real talk: Cold stratification isn't just a step—it's the game-changer that separates successful milkweed growers fro...
- Seed Freshness Matters: The 30-60 day stratification window assumes fresh seeds. If you're working with seeds harvest...
- Stratification Environment: Your refrigerator's crisper drawer is perfect for this process—it maintains consistent 34...
Frequently asked questions
Got questions about sowing milkweed seeds? You’re not alone!
Here are answers to the most common queries—from timing to troubleshooting—to help you grow thriving milkweed plants with ease.
Do milkweed seeds need cold stratification, and how long should I do it?
Yes! Milkweed seeds require cold stratification to break dormancy. Place them in a moist paper towel or sand in a sealed bag, then refrigerate for 4–6 weeks at 33–41°F (1–5°C). This mimics winter conditions and triggers germination. Pro tip: Check seeds weekly—they’re ready when they sprout or turn slightly green!
When is the best time to plant milkweed seeds outdoors?
Sow seeds outdoors in early spring (after the last frost) or late summer (August–September). Early spring gives seeds time to germinate before summer heat, while late summer planting lets them establish roots before winter. Avoid planting in fall unless your climate has mild winters—seeds may rot if exposed to wet, cold soil.
Can I grow milkweed from seed if I don’t have a refrigerator for stratification?
Try these alternatives:
- Outdoor winter sowing: Plant seeds in late fall in a protected spot (like a nursery pot). Freeze-thaw cycles will naturally stratify them.
- Freezer method: Use a freezer (-4°F/-20°C) for 2–4 weeks if you don’t have a fridge.
- Peat moss trick: Mix seeds with damp peat moss, place in a sealed container, and bury it in snow or a shady garden spot for 6 weeks.
Why aren’t my milkweed seeds germinating, even after stratification?
Don’t worry—common issues include:
- Old seeds: Milkweed seeds lose viability after 1–2 years. Test freshness by cutting a seed open—it should be firm and creamy inside.
- Improper moisture: Keep seeds moist but not soggy during stratification. Use a spray bottle to mist if needed.
- Temperature fluctuations: Avoid placing stratified seeds near heat sources (like ovens) or in direct sunlight.
- Patience: Germination can take 2–6 weeks after stratification. Resist the urge to dig them up!
Can I sow milkweed seeds directly in the ground, or should I start them indoors?
Both work, but direct sowing outdoors is easiest for most gardeners. Start seeds in pots only if your growing season is short or you’re in a cooler climate. If indoor-starting:
- Use small pots with well-draining soil.
- Keep soil warm (70–75°F/21–24°C) with a heat mat if needed.
- Transplant seedlings outdoors after the last frost, when they’re 2–3 inches tall.
Wrapping up and next steps
Sowing milkweed seeds is a rewarding way to support pollinators and create a thriving garden ecosystem! 🌱 By following the cold stratification method, you’ll give these seeds the best chance to sprout quickly and grow strong.
Now that you’re armed with the right techniques, grab those seeds and get planting—your future monarch butterflies will thank you!
Next, watch your garden transform as these hardy plants take root. Need more tips? Check out our guide on caring for young milkweed seedlings to keep them flourishing!