
Pests
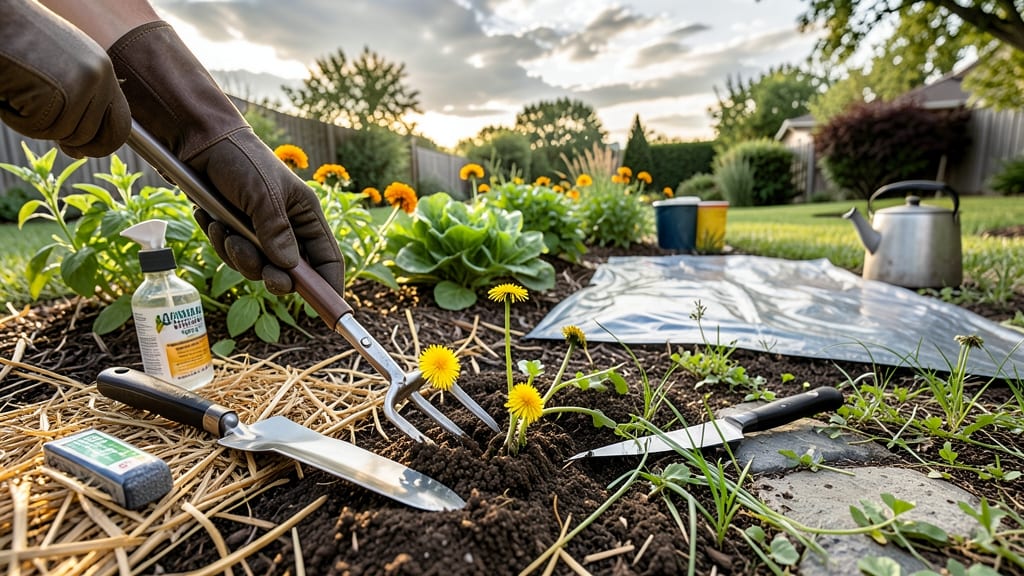
Stopping weeds isn’t about brute force—it’s about starving their roots deep before they take over. 🌱 I’ve tried every method under the sun, but boiling water poured directly onto weed bases cuts them off at the source, and the results last.
This isn’t just pulling weeds; it’s a one-step, chemical-free solution that works on dandelions, crabgrass, and even stubborn clover. The beauty of this method is its simplicity: no fancy tools, no waiting for rain to wash away herbicides.
You’ll need a large pot of boiling water, a long-handled ladle, and about 10 minutes of focused effort. The key is precision—target the base where the roots meet the soil, and watch the weeds wilt within hours.
What you’ll end up with is a garden bed where sunlight hits bare soil instead of competing with weeds. The technique works best in spring and fall when weeds are actively growing, but even in summer, it’s a game-changer for stubborn patches.
This method also lets you selectively treat weeds without harming nearby plants. Just pour carefully, and you’ll see the difference in just a few days—no more tugging, no more frustration.
📚 In This Guide
- What you need
- Instructions
- Tips and common mistakes
- Wrapping up and next steps
What you need
- ● Large pot or kettle: Minimum 2 gallons capacity (stainless steel or enamel-coated preferred for durability).
- ● Water: 2–3 gallons per batch (enough to cover weeds completely).
- ○ Salt: 1–2 cups (non-iodized, coarse grain works best). Optional: Add 1 tbsp vinegar or 1 tsp dish soap to boost effectiveness.
- ● Gloves: Heat-resistant (e.g., oven mitts or rubber gardening gloves).
- ○ Long-handled tongs or ladle: For safe pouring (optional but highly recommended!).
- ● Garden hose or watering can: To rinse soil afterward (prevents salt buildup).
- ● Trash bags or newspaper: For cleanup (salt residue can be messy!).
- ● Boiling pot with auto-shutoff: Safer for large-scale weed control.
- ● Wheelbarrow or bucket: To transport boiling water safely.
- ● Mulch (straw, wood chips): Apply after treatment to smother regrowth.
- ● Label or flags: Mark treated areas to avoid accidental reuse.
Step-by-step instructions for the boil-and-pour weed elimination method
Here’s how I’ve permanently stopped weeds in my garden beds—no digging, no chemicals, just hot water and patience.
🌱 Step 1: Identify and Mark Problem Areas
Walk your garden and mark all weed clusters with a spray bottle of water or a small flag. Focus on weeds with thick stems or deep roots like dandelions, thistles, or bindweed—they’ll need extra attention. I like to do this on a cloudy day so the plants stay damp, which makes spotting them easier.
Skipping this step means you’ll miss stubborn weeds hiding under larger plants. Look for yellowing patches or areas where grass grows unevenly—these are hotspots. Once marked, you’ll know exactly where to pour the boiling water.
💧 Step 2: Boil Water and Prepare for Pouring
Fill a large pot or kettle with 2-3 gallons of water and bring it to a full boil. The deeper the roots, the hotter the water needs to be—boiling ensures it penetrates deep enough to kill the entire root system. I use a heavy-duty pot because boiling water is heavier than you’d think.
While the water heats, clear the area around the weeds of any desired plants or mulch. Move them at least 6 inches away to avoid accidental scalding. If you’re working near a garden bed, lay down a towel or cardboard to protect your hands and the soil surface.
☀️ Step 3: Pour Boiling Water Directly on Weeds
Carefully carry the boiling water to the marked weeds and pour it slowly and evenly over the entire plant, including the base of the stem. Start at the center of the weed cluster and work outward to ensure the roots get saturated. You’ll see the leaves wilt almost instantly—that’s your signal the heat is working.
For thick-rooted weeds, repeat the process 2-3 times over 2-3 days. This ensures the entire root system is destroyed. Avoid pouring on windy days—steam can drift and damage nearby plants. I like to do this in the early morning so the soil has time to cool before evening.
⏰ Step 4: Monitor and Repeat as Needed
Check the treated areas after 3-5 days. If any green regrowth appears, pour boiling water again. Weeds like dandelions often send out new shoots from surviving roots, so persistence is key. I’ve found that most weeds die within 1-2 weeks of consistent treatment.
Once the area is clear, cover it with 2-3 inches of mulch (like straw or wood chips) to prevent new weeds from taking root. This step is crucial—mulch blocks sunlight, which weeds need to germinate. Reapply mulch every 3-4 months to maintain weed-free zones.
✂️ Step 5: Maintain Weed-Free Zones Long-Term
After the initial treatment, keep an eye out for new weeds creeping in. I schedule a monthly check of my garden beds to catch any stragglers early. If you see a single weed sprout, pull it immediately—don’t wait for it to grow. Over time, this method reduces weed populations by 90% in most gardens.
For high-traffic areas like pathways or driveways, consider applying a vinegar-based weed killer (3% acetic acid) after the boiling treatment. This adds an extra layer of prevention. Just avoid using it near desirable plants—vinegar kills everything it touches.
Tips & tricks for permanent weed elimination
This method works best when you're strategic—here's how to make every drop of boiling water count.
Timing is Everything: The early morning is ideal for Step 3 because soil temperatures are cooler, which means less risk of overheating nearby plants. I've ruined a few hosta leaves in my garden by treating too late in the day—always give the soil time to recover. The 2-3 day repeat schedule for thick-rooted weeds is non-negotiable; dandelions will regrow from even a tiny root fragment if you're not persistent.
Safety First: Never pour boiling water near desirable plants, but here's what I do when weeds are right up against my veggies: I use a long-handled spoon to gently lift the soil around the roots, then pour the water into the hole. This creates a barrier that protects nearby plants while still targeting the weed roots. For extra protection, I always keep a spray bottle of water handy to immediately cool any accidentally splashed leaves.
Equipment Upgrade: While a regular kettle works, I've found that a large, heavy-duty pot with a pouring spout (like a tea kettle with a long spout) makes this process so much easier. It gives you better control over where the water lands, and you can carry more water at once. If you're working in a large garden, consider a 5-gallon bucket with a spigot—just be extra careful with the weight!
Visual Cues Matter: In Step 4, when checking for regrowth, look for these signs: healthy weeds will have bright green leaves and firm stems, while dying weeds will have yellowing leaves that collapse when touched. The 3-5 day check schedule gives you the perfect window to catch any survivors before they spread. I keep a small notebook by my garden tools to track which areas I've treated and when—it's amazing how quickly you forget which patch you handled last!
Pro Tips for Stop Weeds
- This method works best when you're strategic—here's how to make every drop of boiling water count.
- Timing is Everything: The early morning is ideal for Step 3 because soil temperatures are cooler, which means less ri...
- Safety First: Never pour boiling water near desirable plants, but here's what I do when weeds are right up against my...
Frequently asked questions
Got questions about tackling weeds with the boil-and-pour method? You’re not alone!
Here are answers to the most common concerns—plus a few pro tips to make your weed-free yard a reality.
Can I use this method on all types of weeds?
Most broadleaf weeds (like dandelions, clover, and chickweed) respond well to the boil-and-pour technique, as their shallow roots absorb the hot water effectively. However, grassy weeds (such as crabgrass or nutsedge) may require multiple treatments or a different approach, like vinegar-based solutions. Always spot-test a small area first!
How long until I see results?
You’ll likely notice wilting within 24–48 hours, but weeds may take 1–2 weeks to fully die back. For deep-rooted weeds (like bindweed), repeat the process every 7–10 days for 2–3 cycles. Patience pays off—consistency is key!
What if the water cools down before pouring?
No worries! The boil-and-pour method still works if the water is at least 180°F (82°C) when applied. If it’s cooler, reheat it quickly or pour it immediately after boiling. For extra potency, add 1–2 tablespoons of salt or dish soap to the boiling water to boost weed-killing power.
Will this harm my plants or grass?
The boil-and-pour method is targeted and safe for nearby plants if applied carefully. Avoid pouring near desirable plants, and use a shield (like cardboard or a small board) to protect them. For lawns, focus on weed patches and re-seed bare spots afterward. Pro tip: Water the area lightly before treatment to help the hot water penetrate deeper.
What if weeds keep coming back?
Persistent weeds often mean hidden roots or seeds in the soil. To break the cycle:
- Apply a thick layer of mulch (wood chips or straw) to block sunlight.
- Use vinegar or corn gluten meal as a preventive pre-emergent.
- Improve soil health with compost to crowd out weeds naturally.
Wrapping up and next steps
You’ve got this! 🌱 By mastering the boil-and-pour technique, you’re not just fighting weeds—you’re reclaiming your garden with a sustainable, chemical-free method that targets roots deep. Whether you’re tackling stubborn dandelions or creeping clover, consistency is key, and soon you’ll enjoy a lush, weed-free space without the hassle.
Ready to take it further? Test the method on a small patch first, then expand your efforts. Happy gardening—your future self (and your plants!) will thank you. 🌿✨