
Lawn
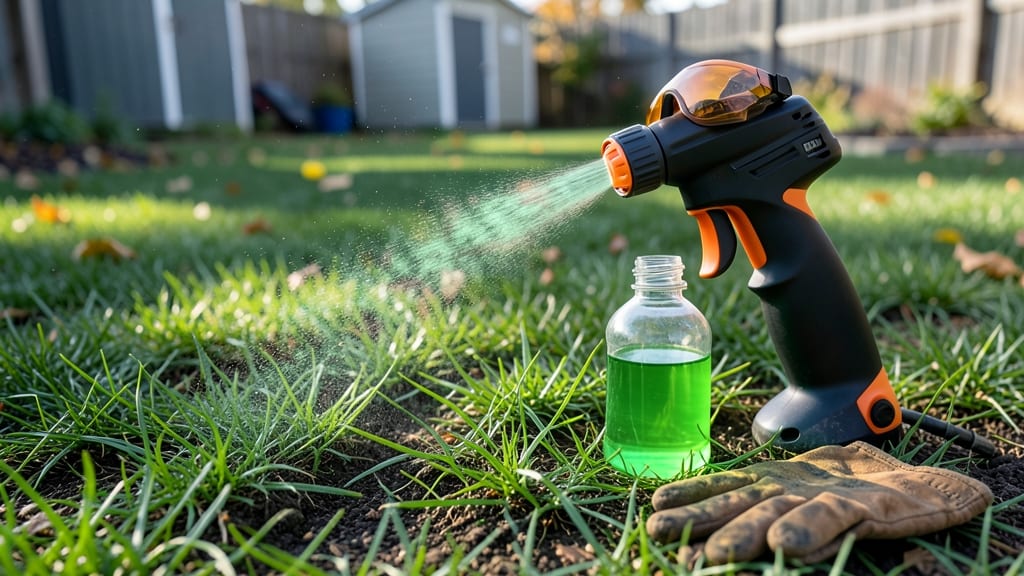
How to use a weed and feed sprayer transforms your lawn from patchy to perfect in just a few hours—if you do it right. ✨ I’ve used mine for five seasons, and the difference between a good job and a great one comes down to prep, timing, and technique. Skip the guesswork, and you’ll end up with a thick, green carpet that chokes out weeds without harming your grass.
Start by checking the weather—calm, overcast days are ideal, as wind can turn your careful application into a mess. Wear long sleeves, gloves, and safety goggles (trust me, you don’t want herbicide on your skin or in your eyes).
Then, calibrate your sprayer: backpack models cover 1,000–2,000 sq ft per tank, while handhelds are better for spot treatments. Always mix the concentrate exactly as the label says—too much can burn your grass, too little won’t work.
Walk the lawn in a crisscross pattern to avoid missed spots, and keep the nozzle 6–12 inches above the grass for even coverage. Focus on the edges and high-traffic areas first, where weeds love to take hold.
After spraying, water lightly if the label says to—this helps the product activate without washing it away. By next week, you’ll see the difference: fewer weeds and a lawn that looks like it belongs in a postcard.
For eco-conscious gardeners, consider spot-treating weeds with vinegar or hand-pulling instead of full lawn applications. And if you’re dealing with clover or broadleaf weeds, a selective herbicide might be kinder to your grass.
Either way, timing matters—spring and fall are the best seasons, when grass is actively growing but not stressed by heat or drought.
📚 In This Guide
- What you need
- Instructions
- Tips and common mistakes
- Wrapping up and next steps
What you need
- ● Weed and feed product: Choose a granular or liquid formula (e.g., Scotts Turf Builder, Ortho Weed B Gon). Follow label instructions for coverage rates (typically 10–20 lbs per 1,000 sq ft for granules).
- ● Sprayer (backpack or pull-behind): Ensure it’s calibrated for your product type (e.g., 1–3 gallons per acre for liquids). Check for leaks or clogs before use!
- ● Protective gear: Nitrile gloves (to avoid skin irritation)
- ● Long sleeves/pants (for sun/chemical protection)
- ● Safety goggles (if spraying near eyes or in windy conditions)
- ● Water source: A hose with a shutoff nozzle (for rinsing the sprayer afterward).
- ● Measuring tools: Measuring cup or scale (for granular products)
- ● Ruler or tape measure (to mark spray patterns)
- ● Spray pattern guide: A chalk line or stakes to mark sections for even coverage.
- ● Wind shield: A tarp or windbreak (if spraying on breezy days).
- ● Sprayer cleaner: Vinegar or a dedicated cleaner (to prevent clogs).
- ● Lawn calculator: An app or chart to determine exact product amounts based on lawn size.
Step-by-Step guide for using a weed and feed sprayer
Mastering this tool transforms your lawn care from a chore into a precise, satisfying routine.
🪴 Step 1: Prepare Your Equipment and Lawn
Start by filling your weed and feed sprayer with the pre-mixed solution—never dilute it yourself unless the label specifically instructs you to. I always double-check the sprayer's capacity (usually marked on the tank) and fill it no more than ¾ full to prevent spills during mixing or application. This prevents overfilling errors that can lead to messy spills or even equipment damage.
Next, inspect your lawn for target areas—focus on patches where weeds are dense or where grass appears thin. Clear any debris, toys, or pet waste from the area to ensure even coverage. I like to walk the lawn first, noting sunny vs. shady spots, since some weed and feed formulas work better in direct sunlight. This prep step ensures you’re not wasting product or risking damage to non-target plants.
💧 Step 2: Calibrate Sprayer Settings for Even Coverage
Before you start spraying, adjust the nozzle pressure to match your lawn’s needs. Most sprayers have a pressure gauge or dial—set it to the manufacturer’s recommended PSI (pounds per square inch), usually between 20-40 PSI depending on the sprayer model. Too high, and you’ll waste product; too low, and you’ll miss spots.
Test the spray pattern on a small, inconspicuous area like a sidewalk or driveway. Hold the sprayer 12-18 inches above the ground and move it at a steady walking pace. You’re aiming for uniform droplets that look like a fine mist, not heavy streams. If you see streaks or dry patches, adjust the nozzle or slow your pace. This calibration step is where perfection begins.
☀️ Step 3: Apply Weed and Feed in Overlapping Passes
Begin spraying at one edge of the lawn and work in straight, parallel lines to ensure full coverage. I like to imagine gridlines—like mowing in rows—to keep my passes consistent. Overlap each pass by about 50% to avoid missed spots. You’ll know you’re doing it right when the lawn looks evenly dampened, not patchy.
Pay extra attention to edges, driveways, and sidewalks, where weeds often thrive. Use a slow, controlled motion near these areas to avoid overspray. If you’re working in hot, sunny conditions, apply the sprayer in the early morning or late afternoon to prevent the product from drying too quickly or burning the grass. This method guarantees no missed weeds and no wasted product—the hallmark of a pro.
✂️ Step 4: Clean and Store Equipment Properly
After finishing, rinse the sprayer thoroughly with water to remove any leftover weed and feed residue. I fill the tank with water, run it through the nozzle for at least 2 minutes, and then disassemble any removable parts (like nozzles or hoses) for a deeper clean. Leaving residue can clog the system or degrade the sprayer over time.
Store the sprayer in a cool, dry place, preferably with the tank empty or filled with a 50/50 water and vinegar mix to prevent rust or mold. I always check the O-ring seals for wear and lubricate them lightly with silicone spray if needed. Proper storage extends the life of your equipment and keeps it ready for next time.
⏰ Step 5: Monitor Results and Adjust Future Applications
Give the lawn 7-10 days to absorb the weed and feed before watering deeply. Watch for weed die-off (brown, crispy leaves) and healthier grass (deeper green, more resilient). If you notice uneven results, like weeds surviving in certain spots, you may need to adjust your sprayer settings or application technique next time.
For best results, reapply weed and feed every 6-8 weeks during the growing season, or as recommended on the product label. Keep a lawn care calendar to track applications—this ensures consistent results and prevents overuse, which can harm your grass. With each application, you’ll refine your technique and achieve that flawless, professional-looking lawn you’ve been dreaming of.
Tips & tricks for perfect weed and feed application
Transforming your lawn from patchy to pristine starts with these precision-focused tips that take your sprayer skills to the next level.
Precision Filling: When filling your sprayer to no more than ¾ full in Step 1, I always use a funnel—it prevents spills and ensures you don't accidentally overfill. The pre-mixed solution is designed for specific dilution ratios, so never guess at measurements. If your sprayer has measurement markings, use them as your guide. For extra safety, I like to fill it indoors first, then transfer it outdoors to avoid accidental spills on your lawn or driveway.
Target Area Strategy: In Step 1, don't just spray everywhere—focus on the high-impact zones first. I prioritize areas with dense weeds or thin grass, then work outward. This approach ensures you're using the product where it's needed most. Pro tip: Use a garden flag or small stake to mark areas you've already treated to avoid double application, which can waste product and potentially harm your grass.
Nozzle Calibration Secret: The 20-40 PSI range in Step 2 is your sweet spot, but don't just guess—check your sprayer's manual for the exact recommendation. I've found that most consumer models perform best around 30 PSI for a fine, even mist. If you're struggling to get the right pattern, try adjusting the nozzle height slightly (15-20 inches) while keeping the same PSI. The goal is to see droplets that look like tiny rain clouds, not heavy drops that create puddles.
Edge Treatment Technique: When applying in Step 3, edges and sidewalks deserve special attention. I like to use a slow, side-to-side motion along these areas, almost like painting a fence. This ensures you catch weeds growing along the edges without overspraying onto walkways. For extra precision, consider using a shield or guard designed for edges—many sprayers come with these accessories, and they make all the difference for a professional finish.
Pro Tips for Use Weed And Feed Sprayer
- Transforming your lawn from patchy to pristine starts with these precision-focused tips that take your sprayer skills to the next level.
- Precision Filling: When filling your sprayer to no more than ¾ full in Step 1, I always use a funnel—it prevents spills and ensures you don't accidentally overfill.
- Target Area Strategy: In Step 1, don't just spray everywhere—focus on the high-impact zones first.
Frequently asked questions
about using a weed and feed sprayer can help you avoid common mistakes and get the best results for your lawn. Here are some of the most common queries:How often should I apply weed and feed?
Most weed and feed products are designed for every 6-8 weeks during the growing season (spring through fall). Always check the label for specific instructions—some fertilizers may recommend monthly applications, while others suggest waiting longer. Avoid overapplying, as it can harm your grass and the environment.
Can I use weed and feed on newly seeded or sodded lawns?
No, wait at least 3-4 weeks after seeding or sodding before applying weed and feed. New grass is vulnerable to chemical burns, and the product can disrupt root establishment. Instead, use a pre-emergent herbicide or spot-treat weeds manually until the lawn is fully established.
What’s the best weather for applying weed and feed?
Apply on a calm, dry day with temperatures between 60°F and 85°F. Avoid spraying if rain is forecasted within 24-48 hours, as it can wash away the product. Early morning applications are ideal to prevent evaporation and reduce stress on your grass.
Can I switch between liquid and granular weed and feed?
Yes, but follow the product’s guidelines for timing and application rates. Liquid formulations act faster and are easier to spot-treat, while granules provide slow-release nutrients. If switching, start with the new product’s recommended schedule—don’t double up. Always water after applying granules to activate them.
What should I do if my lawn turns brown after applying weed and feed?
Brown patches could mean overapplication, drought, or chemical burn. Stop using the product immediately and water deeply to help recovery. If the damage persists, test your soil pH and consider using a milder fertilizer or organic alternatives next time. Avoid reapplying until the lawn shows signs of regrowth.
Are there organic alternatives to weed and feed?
Yes! Organic options like corn gluten meal, vinegar-based herbicides, or compost tea can suppress weeds while feeding your lawn naturally. While they may take longer to work, they’re safer for pets, kids, and the environment. Look for products labeled OMRI-listed for certified organic solutions.
Wrapping up and next steps
Mastering your weed and feed sprayer is the first step to a lush, healthy lawn—no green thumb required! 🌱 By following these steps, you’ll tackle weeds while nourishing your grass, saving time and effort. Remember, consistency is key, so schedule regular applications for the best results.
Ready to transform your yard? Grab your sprayer, check the weather, and get started today! For extra tips, explore our lawn care resources or watch a quick tutorial to refine your technique. Your dream lawn awaits!