
Neem Oil
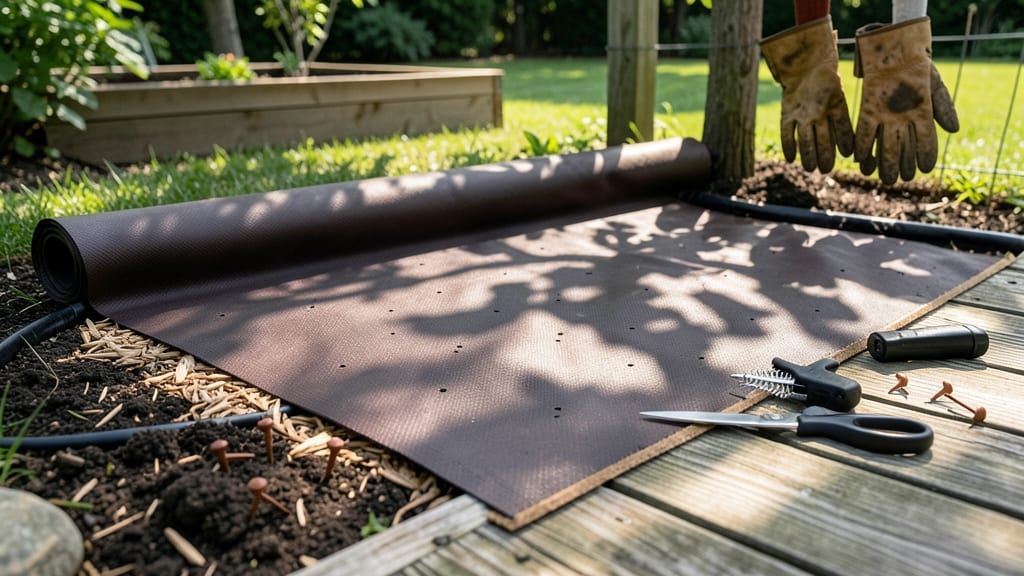
How to use weed barrier fabric saves you from pulling weeds for years—no more backaches or wasted time. 🌱 The secret lies in proper installation: lay it down before planting, cut holes for your crops, and secure the edges so wind doesn’t shift it. I’ve used this trick in my vegetable beds and flower gardens, and the difference is night and day—fewer weeds, healthier soil, and plants that thrive without competition.
You’ll need a roll of weed barrier fabric (heavyweight for long-term use), scissors, landscape staples or rocks to weigh it down, and gloves for messy prep. The fabric blocks sunlight from reaching weed seeds, which means no sprouts to pull later.
My 10-foot x 10-foot vegetable bed now stays weed-free for 3-5 years with just one installation—saving me hundreds of hours over time.
Start by clearing the area of existing weeds and debris, then lay the fabric flat over bare soil. Cut X-shaped holes for plants and tuck the fabric edges under rocks or mulch to keep it in place.
For flower gardens, you can even layer it under mulch for extra weed control. The best part? Your plants grow stronger because they’re not competing for water or nutrients.
Over time, the fabric breaks down—usually after 5-7 years—but by then, your garden’s soil is so healthy, weeds struggle to take hold anyway. For raised beds, opt for a lighter fabric that lets roots penetrate, while in-ground gardens benefit from the heavier, long-lasting type.
Once you try it, you’ll wonder how you ever gardened without it.
📚 In This Guide
- What you need
- Instructions
- Tips and common mistakes
- Wrapping up and next steps
What you need
- ● Weed barrier fabric: Choose a landscape fabric rated for outdoor use (e.g., 10-15 oz. polyester or 3-5 oz. polypropylene). Calculate 20-30% extra for overlaps and edges. Pro tip: Look for UV-stabilized fabric to prevent degradation! 💡
- ○ Staple gun + staples: A heavy-duty landscape stapler (e.g., 1/4" or 3/8" staples) to secure the fabric. Optional: Use fabric pins for temporary holds.
- ● Utility knife or scissors: For cutting fabric to size. A serrated blade works best for clean edges.
- ● Measuring tape (25+ ft): To measure garden beds, slopes, or irregular areas accurately.
- ● Gloves (gardening or work gloves): Protect your hands from prickly plants and rough fabric.
- ○ Edging material (optional but recommended): Plastic, metal, or stone edging: To define borders and prevent fabric from shifting.
- ● Landscape fabric anchors: U-shaped metal stakes for securing edges in windy areas.
- ● Mulch or soil (for top layer): Organic mulch: Wood chips, straw, or pine bark (2-4 inches deep).
- ● Inorganic mulch: Gravel or pebbles (if desired for a low-maintenance look).
- ● Landscape fabric tape: Waterproof tape to seal seams and prevent tears.
- ● Ground cloth or cardboard: Lay under the fabric in high-weed areas for extra protection.
- ● Hose with spray nozzle: To wet the fabric slightly before laying it down (reduces wrinkles!).
- ● Wheelbarrow or tarp: For hauling fabric and mulch efficiently.
- ● Knee pads: Because crawling in mulch or dirt is not fun for long! 😅
Step-by-Step guide to installing weed barrier fabric
Here’s how to block weeds permanently—no more pulling or spraying. This method keeps your garden neat and your plants thriving.
🪴 Step 1: Clear and Level Your Garden Beds
Start by removing all existing weeds, grass, and debris from the area where you’ll install the fabric. I like to use a garden fork to loosen the soil first—this makes it easier to work with later. Rake the surface smooth and level, removing any rocks or roots larger than 1 inch in diameter. Uneven spots will create gaps where weeds can sneak through.
Next, spread a 2-3 inch layer of coarse sand or small gravel over the entire bed. This layer is critical—it prevents the fabric from sinking into the soil and keeps it stable. Press it down lightly with a board or your hands to create a firm base. If you’re working in a sloped area, add extra sand to the lower sections to maintain an even surface.
🌱 Step 2: Lay the Weed Barrier Fabric
Unroll the weed barrier fabric over the prepared bed, allowing it to overlap edges by at least 6 inches. This overlap ensures no weeds can grow between seams. Smooth out any wrinkles by gently pulling the fabric taut—wrinkles create pockets where weeds can take root. If you’re covering a large area, use stakes or landscape pins to secure the fabric temporarily while you adjust it.
For extra security, especially in windy areas, anchor the fabric with U-shaped landscape staples or heavy rocks along the edges. I avoid nails or screws—they can tear the fabric over time. If you’re layering mulch later, the weight will keep everything in place, but securing the edges now prevents shifting.
✂️ Step 3: Cut and Shape Around Plants and Edges
Use a utility knife or sharp scissors to cut openings for existing plants, shrubs, or trees. Measure carefully—leave at least 2 inches of fabric around the base of each plant to prevent weeds from creeping up. For curved edges, like garden borders, follow the natural shape of the bed. If you’re installing the fabric under mulch, leave a 1-inch border around the perimeter to tuck the edges neatly.
Here’s the thing—don’t skimp on precision. Ragged edges or gaps will become weed magnets. If you’re unsure about a cut, fold the fabric neatly and trim again. A little extra effort now saves hours of weeding later. For pathways or borders, fold the fabric under itself at the edges to create a clean finish.
💧 Step 4: Add Mulch or Soil for Final Coverage
Once the fabric is perfectly laid and secured, cover it completely with a 3-4 inch layer of mulch, such as wood chips, straw, or gravel. Mulch blocks sunlight from reaching the fabric, preventing it from breaking down over time. For flower beds or vegetable gardens, top the fabric with 2-3 inches of fresh potting soil or compost, then plant directly into the soil. This keeps the fabric hidden while allowing roots to grow freely.
If you’re using organic mulch, like bark or leaves, refresh it annually to maintain the weed-blocking effect. Inorganic mulch, such as gravel, lasts longer but may require occasional top-ups. Avoid piling mulch too thickly—more than 4 inches can suffocate plants by preventing water and air from reaching the soil below.
☀️ Step 5: Monitor and Maintain for Long-Term Results
After installation, check the fabric periodically for gaps or shifts, especially after heavy rain or wind. Weeds can sprout along edges if the fabric isn’t fully covered. If you notice any exposed areas, add more mulch or secure loose sections immediately. In the first few weeks, you might see a few weeds pop up—this is normal. They’re just the last stragglers giving up.
Once established, your weed barrier will last 5-10 years, depending on the material. If you notice the fabric degrading or sunlight breaking through, it’s time to replace it. The key to long-term success is keeping it covered and checking it once a season. With this setup, you’ll spend less time weeding and more time enjoying your garden.
Tips & tricks for perfect weed barrier installation
These simple tricks will help you create a weed-free garden that stays beautiful for years to come.
Preparation is Key: I can't stress enough how important that 2-3 inch layer of coarse sand or gravel is in Step 1. This isn't just filler—it creates a stable foundation that prevents the fabric from sinking or shifting over time. I've seen many people skip this step, and within weeks, their fabric gets buried by soil movements. Take the extra 10 minutes to press it down firmly with a board. This single step makes all the difference in long-term performance.
Overlap Matters: When you're laying the fabric in Step 2, those 6 inches of overlap aren't just recommended—they're essential. I learned this the hard way when I cut corners on a large garden bed. Weeds started popping up right at the seams within weeks. For extra security in windy areas, I like to add an additional 3 inches of overlap on the sides that face prevailing winds. It's worth the extra fabric to prevent future headaches.
Precision Cutting Prevents Problems: The 2 inches of fabric around plant bases in Step 3 might seem excessive, but trust me on this. I've seen too many gardens where weeds crept right up against plants because the fabric was cut too close. Use a straightedge if you're not confident with freehand cutting—it makes all the difference. For curved edges, take your time and follow the natural contour of your garden bed. A little extra patience now means fewer weeds later.
Mulch Thickness Matters: That 3-4 inch layer of mulch in Step 4 isn't just about looks—it's about protecting your investment. I've noticed that when people use less than 3 inches, weeds start finding their way through within months. The mulch blocks sunlight that would otherwise break down the fabric. For pathways, I recommend using gravel instead of organic mulch—it lasts longer and doesn't need annual refreshing.
Pro Tips for Use Weed Barrier Fabric
- These simple tricks will help you create a weed-free garden that stays beautiful for years to come.
- Preparation is Key: I can't stress enough how important that 2-3 inch layer of coarse sand or gravel is in Step 1.
- Overlap Matters: When you're laying the fabric in Step 2, those 6 inches of overlap aren't just recommended—they're essential.
Frequently asked questions
Got questions about using weed barrier fabric? You’re not alone! Here are some of the most common concerns—and their straightforward answers—to help you get the most out of your landscape project.
What’s the best time of year to install weed barrier fabric?
Install weed barrier fabric in spring or early fall when the soil is workable but weeds haven’t taken over yet. Avoid winter (freezing temps can damage it) and summer (heat can stress plants and make installation harder). If you’re planting perennials, lay the fabric before the first frost for long-term protection.
Do I need to remove all weeds before laying the fabric?
Yes! Clear existing weeds, grass, and debris—even roots—from the area before installing the fabric. Weeds can poke through gaps, and buried roots will decompose, creating holes. Use a shovel or sod cutter for stubborn patches. A pre-emergent herbicide can also help prevent regrowth for a few weeks post-installation.
Is weed barrier fabric worth the cost compared to mulch or landscape fabric?
Weed barrier fabric is a long-term investment—it lasts 5–10+ years (vs. mulch, which needs yearly replacement). It’s ideal for high-traffic areas, slopes, or under pavers, where mulch would wash away. For lightweight use (like flower beds), landscape fabric (thinner, biodegradable) is cheaper but shorter-lived. Weigh your project’s needs!
How do I fix holes or tears in the fabric after installation?
Patch small tears with duct tape, heavy-duty tape, or overlapping fabric scraps secured with landscape staples. For larger gaps, cut a piece of new weed barrier fabric to size and staple it over the damaged area. If the tear is near plants, gently lift the fabric (don’t disturb roots) and reinforce edges with landscape pins or rocks.
Can I plant directly on top of weed barrier fabric?
No—always cut X-shaped slits in the fabric where plants go, then fold the flaps back to create a “pocket” for roots. This prevents smothering while blocking weeds. For ground covers (like clover), use perforated fabric designed for this purpose. Avoid planting where the fabric touches soil directly; roots need airflow!
Wrapping up and next steps
Using weed barrier fabric is a game-changer for keeping your garden lush, low-maintenance, and weed-free! Whether you're a seasoned gardener or just starting, this simple solution saves time and effort while protecting your plants year-round.
Now that you know the ins and outs, it’s time to roll up your sleeves and transform your outdoor space with confidence.
Ready to take the next step? Grab your materials, pick a sunny day, and start laying the foundation for a thriving garden—without the weeds! 🌱✨