
Pruning
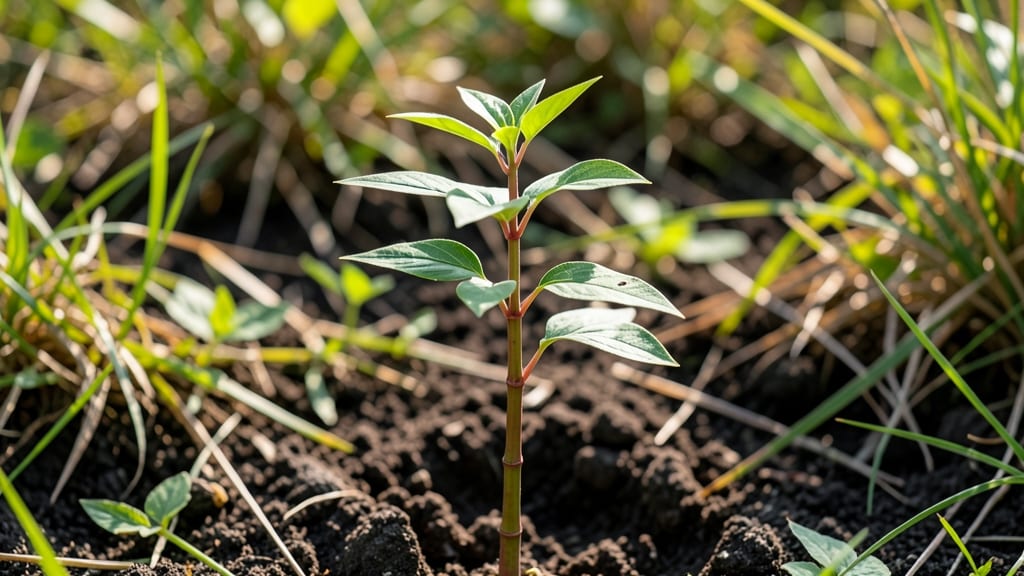
Spotting a Japanese knotweed seedling is every gardener’s worst nightmare—it’s invasive, aggressive, and spreads like wildfire. 🌱 The twist-and-tear method is your fastest way to stop it before it takes over, but timing and technique matter more than speed. One wrong move, and you’ll be fighting regrowth for years.
You’ll need gloves, a shovel, and a heavy-duty trash bag—no fancy tools, just brute force. The key is removing the entire root system, which means digging deeper than you think (often 12+ inches down). Legal rules vary by state, so check local regulations first—some areas require licensed removal.
Twist the root free from the soil, then tear it apart by hand until no pieces remain. Burn or bury the debris immediately—never compost it. Even tiny fragments can sprout new plants, and you don’t want to accidentally spread this menace further.
After removal, monitor the area for 3+ years—new shoots can pop up from dormant roots. If it keeps returning, you may need professional help. Prevention is easier than cleanup, so stay vigilant and act fast.
📚 In This Guide
- What you need
- Instructions
- Tips and common mistakes
- Wrapping up and next steps
What you need
- ● Heavy-duty pruning shears – Bypass or anvil type, 6-8 inch blades (for clean cuts without crushing stems).
- ● Garden fork or dandelion weeder – Sturdy, 12-18 inch tines (for digging deep into the root system).
- ● Gloves – Thick, chemical-resistant (nitrile or leather) (Japanese knotweed sap can irritate skin!).
- ● Shovel or mattock – For larger root clusters or compacted soil.
- ● Heavy-duty trash bags (30+ gallon) – For disposal of all plant material.
- ● Disposable coveralls or old clothes – To protect against sap and debris.
- ● Hose with nozzle – For rinsing tools and washing off sap.
- ● Sharpie or permanent marker – To label bags for proper disposal.
- ● Root barrier fabric – If treating an infested area long-term.
- ● Garden kneeler or pad – For comfort during extended digging.
- ● Glycerin soap or vinegar – To neutralize sap on tools/skin.
- ● Spray bottle with soapy water – For immediate cleanup of sap splatters.
- ● Local waste disposal contacts – Check regulations—some areas require special handling for Japanese knotweed!
Step-by-step instructions for Japanese knotweed seedling removal
Here's the method I've used to tackle stubborn knotweed—no special tools, just technique and timing.
✂️ Step 1: Identify and Locate the Seedling
Japanese knotweed seedlings sprout in early spring, often before other plants. Look for bright green, bamboo-like shoots emerging from the ground or cracks in pavement. The key is acting immediately—the younger the plant, the easier it pulls. I always check after rain when soil is softest, making roots easier to spot.
Run your fingers along the soil surface to feel for small, fibrous roots radiating from the base. You'll notice the shoot has a hollow stem and grows in clusters. Mark the area with a stick if needed—these plants spread aggressively, and missing even a tiny root fragment means regrowth.
💧 Step 2: Soften the Soil for Easier Extraction
Water the area thoroughly until the soil is saturated to a depth of 4-6 inches. You'll know it's right when water pools briefly on the surface but then drains within 10-15 minutes. This softens the roots without making the soil muddy. I use a watering can with a fine rose attachment to avoid disturbing the seedling.
Wait 30-60 minutes for the moisture to penetrate. The goal is pliable soil—if you press your thumb in and it leaves a clean impression, you're ready. This step is critical: dry soil makes roots brittle, causing them to snap and leave fragments behind that regrow.
🪴 Step 3: Twist and Tear the Root System
Grasp the seedling's base with both hands, about 1 inch from the soil line. Twist firmly in a clockwise direction while pulling upward with steady pressure. You'll hear a slight tearing sound when the root separates—this is your signal to stop pulling and switch to twisting. I've found that 3-5 seconds of twisting usually breaks the root cleanly.
Check the extracted root for any remaining soil clumps. If you see white, fibrous rootlets still attached, those need to come out too. Drop the entire plant into a sealed plastic bag immediately—never compost knotweed, as even small fragments can regrow. I keep a small trash bag handy to avoid dropping pieces back into the soil.
⏰ Step 4: Inspect and Repeat for Complete Removal
Examine the hole where the seedling was. Look for tiny green shoots or white root stubs—these indicate missed pieces. Use a small hand trowel to gently scrape the sides of the hole, checking for any remaining root fragments. I've learned the hard way that even a 1-inch root piece can regrow into a full plant within weeks.
If you find any remaining roots, repeat the twisting process on those fragments. For stubborn cases, I've had success soaking the area with vinegar (50% water, 50% white vinegar) for 24 hours before retrying. This weakens any hidden roots without harming surrounding plants.
🌱 Step 5: Monitor and Prevent Regrowth
Mark the removal site with a small flag or rock to monitor for new shoots over the next 4-6 weeks. Japanese knotweed can remain dormant underground for years, so vigilance is key. I check the area weekly after rain, when new growth is most visible. If you see any green shoots emerge, remove them immediately using the same twist-and-tear method.
For long-term prevention, consider applying a thick layer of cardboard and mulch over the area to block light, which knotweed needs to regrow. I've found that landscape fabric works even better, as it smothers any remaining roots while allowing water to penetrate. This extra step saves countless hours of future removal efforts.
Tips & tricks for perfect Japanese knotweed seedling removal
Here's what nobody tells you about making this process foolproof—lessons learned from years of battling regrowth.
Timing Secret: The 30-60 minute wait after watering is non-negotiable. I've tried rushing it, and dry soil makes roots snap like twigs, leaving fragments that sprout later. Test soil readiness by pressing your thumb in—it should leave a clean impression without crumbling. This is the single biggest mistake people make when they think they've removed all the roots but see new shoots weeks later.
Twisting Technique: That 3-5 second twist isn't just about pulling—it's about breaking the root cleanly at its base. I've found the clockwise direction works best because it aligns with how the root naturally fractures. If you're struggling, try using rubber gloves for better grip, especially if the soil is still damp. The tearing sound you hear is your confirmation that you've done it right.
Visual Cues: In Step 4, look for the "white root stubs" as your signal to dig deeper. I carry a small hand trowel everywhere now because those tiny fragments are invisible until you're right there scraping. Think of it like finding a needle in hay—except the needle can grow into a full plant if you miss it. Marking the hole with a rock helps me remember to check back weekly, which is when I catch most regrowth before it spreads.
Prevention Strategy: The 4-6 week monitoring window is critical because knotweed can lie dormant underground for years. I've seen plants reappear after 5 years if I missed even a small piece. For stubborn areas, the vinegar soak (50% water, 50% white vinegar for 24 hours) works wonders—it weakens those hidden roots without harming surrounding plants. Just don't use it on desirable plants nearby, as the acidity can affect them too.
Pro Tips for Japanese Knotweed Seedling
- Here's what nobody tells you about making this process foolproof—lessons learned from years of battling regrowth.
- Timing Secret: The 30-60 minute wait after watering is non-negotiable. I've tried rushing it, and dry soil makes root...
- Twisting Technique: That 3-5 second twist isn't just about pulling—it's about breaking the root cleanly at its base. ...
Frequently asked questions
Got questions about Japanese knotweed seedlings? You’re not alone!
Here are the most common concerns—and straightforward answers—to help you tackle this invasive plant with confidence.
How do I identify a Japanese knotweed seedling before it spreads?
Look for small bamboo-like shoots with zigzag stems and heart-shaped leaves. Seedlings often pop up in early spring (March–April) near disturbed soil or cracks in pavement. Pro tip: Snap a photo and compare it to verified images—early ID stops spread before it’s too late!
When is the best time to remove Japanese knotweed seedlings?
Act immediately—the earlier, the easier! Target seedlings in spring (March–May) before roots deepen. Warning: Avoid removal in fall (Sept–Nov), as regrowth can be aggressive. Use the twist-and-tear method (covered in our guide) for young shoots to minimize regrowth.
Can I just pull Japanese knotweed seedlings by hand?
Hand-pulling works for tiny seedlings, but only if you remove the entire root (even a 1-inch fragment can regrow). For stubborn or larger plants, use the twist-and-tear technique with gloves and tools. Key tip: Wear waterproof boots—knotweed sap can irritate skin!
What’s the fastest way to kill Japanese knotweed seedlings without chemicals?
For non-chemical control, solarization (covering with clear plastic for 4+ weeks) or smothering with cardboard/mulch can starve seedlings. Twist-and-tear extraction (as shown in our guide) is also instant and chemical-free. Repeat checks are critical—seedlings may resprout!
What should I do if I accidentally damage a Japanese knotweed seedling but leave root fragments?
Don’t panic! Act fast: Dig out remaining fragments immediately (within 24 hours) and dispose of them in double-bagged trash (not compost). Monitor the area for 3 months—new shoots may emerge. If unsure, call a licensed knotweed specialist for cleanup.
Still stumped?
Drop your question in the comments—we’ve got you covered!
Wrapping up and next steps
Identifying and removing Japanese knotweed seedlings early can save you time, money, and stress—before they become a full-blown headache. 🌱 With the right tools (like a sturdy knife, gloves, and a trash bag) and a methodical approach, you can tackle this invasive plant in minutes.
Don’t wait for it to spread—act now, stay vigilant, and protect your property!
Ready to take action? Grab your gear, follow the steps, and reclaim your garden with confidence! 💪