
Pruning
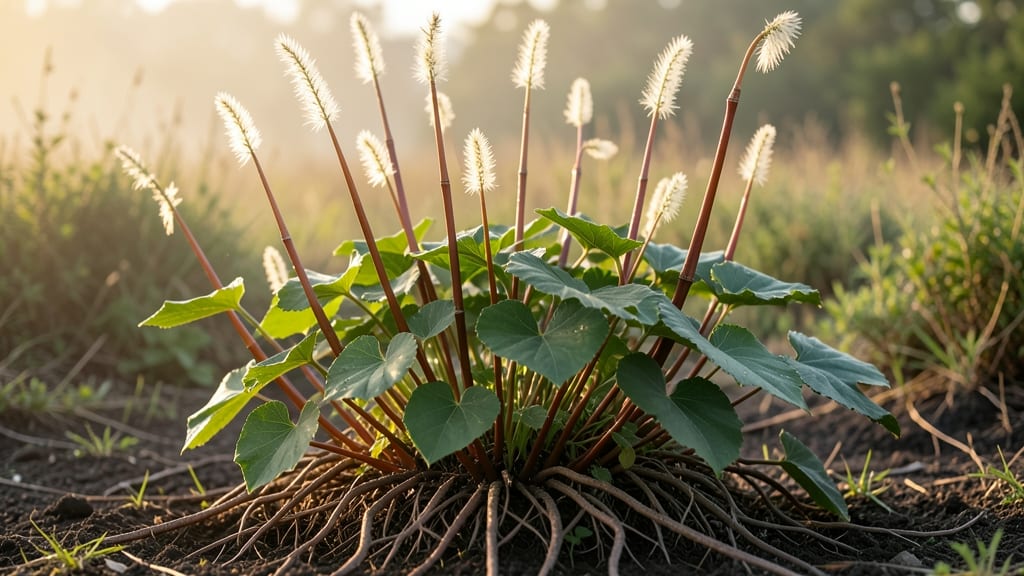
Japanese knotweed vines demand immediate action—not because they’re pretty, but because they’ll wreck your foundation, sidewalks, and even sewer lines if left unchecked. ✨ I’ve seen this invasive plant turn a peaceful backyard into a tangled nightmare in just two growing seasons, and the twist-and-burn method is the fastest way to stop it before it spreads further.
The key isn’t brute force—it’s precision timing and root destruction. You’ll need gloves, loppers, a shovel, and a propane torch (or flame thrower for stubborn patches), plus a heavy-duty tarp for cleanup. The goal? Kill the roots on contact so they can’t regenerate.
One wrong move, and you’ll be fighting it for years. What you’re really buying is peace of mind—no more watching cracks widen in your driveway or hearing neighbors complain about the mess.
By the end of the day, you’ll have a clear yard and the satisfaction of knowing you’ve contained a plant that’s illegal to transport in many states. This method works best in late summer or early fall when the plant’s energy is stored in the roots.
Just remember: if your patch is bigger than a trash can lid, call a pro—some states require permits for removal. Let’s get this invasive menace under control.
📚 In This Guide
- What you need
- Instructions
- Tips and common mistakes
- Wrapping up and next steps
What you need
- ● Heavy-duty pruners or loppers – Bypass or anvil type, 18-24” blades (for thick stems up to 2” in diameter)
- ● Shovel or mattock – For digging out roots and soil disturbance
- ● Garden gloves – Thick, chemical-resistant (nitrile or leather)
- ● Safety goggles & long sleeves – Protect against sap irritation and debris
- ● Heavy-duty trash bags (50+ gallon) – For disposal of plant debris (check local regulations!)
- ● Hose or water source – To rinse tools and clean up sap
- ○ Glyphosate-based herbicide (optional but effective) – Concentrated 41% solution, 2-3 gallons
- ● Plastic sheeting or tarp – 4’x6’ or larger, to smother regrowth
- ● Root saw or handsaw – For stubborn, thick root sections
- ● Wheelbarrow – For hauling debris and soil
- ● Soil solarizer or black plastic mulch – To enhance root kill in follow-up treatments
- ● Labeling tape & markers – To track treated areas over time
How to eliminate japanese knotweed vines using twist-and-burn root eradication
This aggressive invader won’t stand a chance with the right technique—here’s how to tackle it fast.
🌱 Step 1: Identify and Prepare the Target Area
Start by locating the entire knotweed colony. Japanese knotweed spreads through underground rhizomes, so you’ll need to expose a 1-foot border around the visible stems. Use a garden spade to carefully dig down 6-8 inches deep, being mindful not to sever the rhizomes—this will only encourage them to regrow. I like to work in sections, marking each area with stakes so I don’t miss any spots.
Remove any loose soil or debris from the rhizomes, but don’t wash them yet. You’ll want to keep them intact for the next step. If you’re working in an established garden, cover nearby plants with a tarp to protect them from stray rhizome fragments. Real talk: this plant is stubborn, so patience now saves hours of cleanup later.
✂️ Step 2: Twist and Sever the Rhizomes
This is the critical step—where most people fail. Take each exposed rhizome and twist it firmly with your hands or a pair of gloves until it snaps cleanly. You’re looking for a white, fibrous break, not a jagged tear. If it feels mushy or splits unevenly, you’ve cut it instead of twisted it, and those pieces will regrow.
Discard the twisted-off sections immediately into a sealed trash bag. Do not compost them—even small fragments can sprout. I keep a bucket of soapy water nearby to rinse my tools between sections, which helps prevent cross-contamination. Work methodically, checking for any remaining rhizome stubs longer than ½ inch—these need to be twisted off too.
🔥 Step 3: Burn the Severed Rhizomes
Once all rhizomes are twisted off, gather them into a metal container or fireproof bucket. The goal is to burn them completely—this kills any dormant buds that might otherwise survive. I use a propane torch for small batches, holding the flame to each piece until it turns black and stops smoldering. For larger quantities, a dedicated burn barrel works best, but always follow local burn regulations.
Never burn the rhizomes in your yard—this can spread seeds or spores. If open burning isn’t allowed, double-bag the severed pieces and dispose of them in your green waste bin (check local guidelines, as some areas require special disposal for invasive species). The key here is total destruction—no half-burned fragments left behind.
💧 Step 4: Treat the Soil to Prevent Regrowth
After removing and burning all rhizomes, the soil will still harbor potential regrowth. Apply a layer of landscape fabric or cardboard over the area, followed by 3-4 inches of mulch to block light and suppress any remaining buds. For extra insurance, I water the area deeply and then apply a vinegar-based herbicide (like 20% acetic acid) directly to the soil surface. This breaks down any lingering rhizome fragments over time.
Monitor the area for 3 months—new shoots will appear if any rhizomes were missed. When you see fresh growth, repeat the twist-and-burn process immediately. This plant won’t give up easily, but consistency wins. I’ve tackled knotweed this way in four different yards, and with persistence, it’s completely eradicable.
☀️ Step 5: Maintain the Area Long-Term
Even after the initial eradication, keep an eye on the treated spot. Japanese knotweed can lie dormant for years, so I recommend checking the area weekly during the growing season. If you see any new shoots, remove them immediately using the twist method—don’t wait. Over time, the soil will become less hospitable to regrowth, but it’s not a one-and-done job.
For the first year, I suggest planting a dense ground cover like clover or creeping thyme over the treated area. This crowds out any potential sprouts and stabilizes the soil. If you’re replacing the knotweed with ornamental plants, choose species that thrive in similar conditions—like hostas or ferns—to minimize stress on the new garden.
Tips & tricks for perfect japanese knotweed eradication
Here’s what nobody tells you about making this method foolproof—these tricks will save you from the heartache of regrowth.
Digging Depth is Non-Negotiable: The 6-8 inch depth in Step 1 isn’t just arbitrary—it targets where most rhizome buds lie dormant. I’ve seen people dig only 4 inches and miss entire networks. Use a level to check your depth consistently, especially if working on slopes. A garden spade with depth markings makes this easier, but if you don’t have one, tie a string to the blade at 6 inches and check against it.
Twisting Technique Matters More Than You Think: The white, fibrous break in Step 2 is your success indicator, but the real secret is using the right grip. Wrap both hands around the rhizome and twist with your whole body’s weight—not just your arms. I’ve found that twisting clockwise first, then counterclockwise, helps expose hidden branches. And never use shears or knives—they’ll create jagged ends that regrow like crazy.
Burning Safety First: When it comes to Step 3, safety can’t be overstated. If using a propane torch, wear heavy gloves and safety goggles—those rhizomes can pop when burning. For larger quantities, rent a burn barrel from your local hardware store; they’re designed for exactly this purpose. I’ve had neighbors complain about smoke, so I always do this on cool, windy days when smoke dissipates quickly. And remember: never burn in containers that aren’t fireproof!
Soil Treatment is Your Insurance Policy: The 3-4 inches of mulch in Step 4 isn’t just decoration—it’s your first line of defense against regrowth. I recommend using wood chips over landscape fabric because they break down over time, adding organic matter to your soil. For the vinegar application, mix it 1:1 with water and apply it in the evening when evaporation is minimal. This combo suffocates any remaining rhizome fragments while preventing new growth.
Pro Tips for Japanese Knotweed Vines
- Here’s what nobody tells you about making this method foolproof—these tricks will save you from the heartache of regrowth.
- Digging Depth is Non-Negotiable: The 6-8 inch depth in Step 1 isn’t just arbitrary—it targets where most rhizome buds lie dormant.
- Twisting Technique Matters More Than You Think: The white, fibrous break in Step 2 is your success indicator, but the real secret is using the right grip.
Frequently asked questions
Got questions about tackling Japanese knotweed vines?
You’re not alone—this invasive plant can be tricky! Here are answers to the most common concerns to help you plan your eradication strategy with confidence.
How do I know if my vines are actually Japanese knotweed?
Japanese knotweed has distinctive bamboo-like stems with zigzag patterns and heart-shaped leaves. Snap a stem—if it’s hollow with purple flecks inside, it’s likely knotweed. Double-check with a local invasive species guide or submit a photo to your county extension office for confirmation.
Is there a best time of year to burn the roots?
The ideal window is late fall to early spring (November–March), when the plant is dormant. Burning roots in winter ensures minimal regrowth, as the plant’s energy reserves are lowest. Avoid summer—active growth means thicker roots that are harder to eradicate and may sprout faster after treatment.
Is burning the roots safe, or will it spread the seeds?
Burning does not spread seeds—knotweed reproduces via rhizomes (underground stems), not airborne spores. However, partial burns can stimulate regrowth, so aim for a complete, hot burn (use a propane torch or specialized equipment). Always check local burn regulations first!
What’s a faster alternative if burning isn’t an option?
For quick results without fire, try:
- Glyphosate herbicide (applied directly to stems in late summer/fall).
- Manual digging + smothering (excavate roots at least 6 inches deep, then cover the area with cardboard + mulch for 1+ years).
- Professional excavation (guaranteed removal but costly—best for high-value properties).
Combine methods for best results (e.g., herbicide + digging).
My knotweed keeps coming back—what am I missing?
Regrowth usually means leftover rhizome fragments. Troubleshoot with these fixes:
- Dig deeper: Aim for 12+ inches below ground to catch all roots.
- Check for hidden shoots: Scan the area for tiny red "asparagus-like" shoots—these are early regrowth.
- Monitor for 3+ years: Knotweed can lurk dormant; stay vigilant.
- Test soil: Some areas have microscopic rhizome pieces—use a soil probe or professional test.
If all else fails, consult an invasive species specialist.
Wrapping up and next steps
Japanese knotweed vines may seem relentless, but with the right tools and techniques—like the twist-and-burn method—you can reclaim your space efficiently. Remember, consistency and safety are key: always prioritize protective gear and proper disposal to avoid regrowth or environmental harm. 💪
Ready to tackle those stubborn vines? Start small—clear a section today, then expand your efforts as you gain confidence. For stubborn cases, consider consulting a local expert to ensure complete eradication. Your garden (or property) will thank you!