
Orchid Care
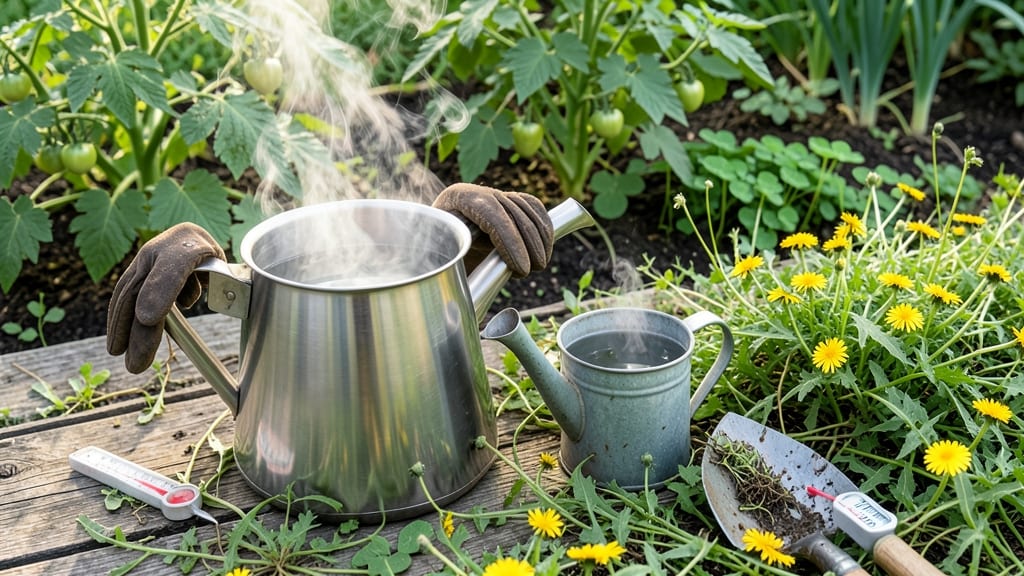
Boiling water kills weeds instantly—no digging, no chemicals, just steam-powered eradication that works in seconds. 🌱 I’ve used this method for years to clear stubborn weeds between stone paths and in tight flower beds where tools can’t reach, and it’s the fastest solution when you’re tired of pulling weeds one by one.
The beauty of this technique is its simplicity: grab a kettle, aim carefully, and pour. It’s best for small, isolated weeds or tight spaces where you can target them precisely.
Just be mindful of nearby plants—boiling water can damage them too, so keep a safe distance from your prized blooms or veggies. What you’ll love most is how clean and chemical-free your garden stays. No more worrying about herbicides lingering in the soil or disturbing the roots of your plants.
Plus, it’s a great way to tackle weeds in cracks in patios or between pavers where other methods fail. For larger areas, you might need to repeat the process or combine it with mulching.
But for quick, satisfying results with zero effort, boiling water is hard to beat—and your back will thank you too.
📚 In This Guide
- What you need
- Instructions
- Tips and common mistakes
- Wrapping up and next steps
What you need
- ● Kettle or large pot: Minimum 2-gallon capacity (for small areas) or 5+ gallons (for larger patches). A rapid-boil electric kettle (like a 2-liter) works great for quick, targeted treatment.
- ● Boiling water: Enough to cover weeds completely—aim for 1–2 gallons per square foot of dense weed growth.
- ● Heat-resistant gloves: Garden-grade or insulated (e.g., neoprene or silicone-coated) to protect hands from scalding.
- ○ Pouring spout or funnel: Optional but helpful—use a long-spouted kettle or a metal funnel to direct water precisely.
- ○ Trowel or small shovel: For scraping stubborn roots post-treatment (optional but recommended for thorough removal).
- ● Garden hose or water source: To rinse soil afterward and prevent heat damage to nearby plants.
- ● Vinegar or dish soap: Add 1 tbsp of dish soap to 1 gallon of boiling water to break down waxy weed leaves (e.g., dandelions) for faster kill.
- ● Plastic or metal tray: Place under weeds to catch runoff and protect surfaces like patios or mulch.
- ● Safety goggles: If weeds are near your face or eyes (e.g., near walkways).
- ● Reusable watering can: For reheating and reusing water efficiently (energy-saving!).
How to kill weeds with boiling water: a fast, chemical-free method
Here's how I eliminate weeds instantly—no digging, no chemicals, just heat and patience.
💧 Step 1: Gather Your Supplies and Safety Gear
You only need two things: a large pot of water and a heavy-duty kettle or stove-safe container. Fill it with enough water to cover the weed roots completely—aim for 2-3 gallons for stubborn patches. I always wear thick gardening gloves and closed-toe shoes because boiling water can cause burns if it splashes.
Find a sunny day when temperatures are above 70°F. Weeds absorb heat faster in warm conditions, and the sun helps prevent regrowth. Keep a small spray bottle of water nearby—you'll need it to dampen the soil before applying the boiling water.
☀️ Step 2: Prep the Weeds for Maximum Heat Transfer
Lightly mist the soil around the weeds with water until it's damp but not soggy. This ensures the boiling water penetrates deep into the roots instead of just sitting on top. Focus on the base of the weeds, where the roots connect to the soil—this is where the heat will do the most damage.
If the weeds are tall, trim them back to about 2 inches above the soil line. This prevents the boiling water from splashing onto your skin or clothes. I like to use pruning shears for this step—it's faster than pulling and avoids disturbing the soil.
🔥 Step 3: Apply Boiling Water Directly to the Weed Base
Carefully pour the boiling water directly onto the base of the weeds, aiming for the soil-root junction. Use a slow, steady stream to avoid splashing. You'll need about 1-2 cups per weed, depending on its size. The water should bubble and steam vigorously—this means the heat is penetrating the roots and killing the plant.
For thick patches, work in small sections. If you try to cover too much at once, the water will cool too quickly and lose effectiveness. Watch for the weeds to wilt and collapse within 30-60 seconds—that's your signal the heat is working.
✂️ Step 4: Monitor and Repeat for Stubborn Weeds
After 24 hours, check the treated area. Most weeds will be completely dead, but some stubborn ones might still show signs of life. If you see any green regrowth, repeat the boiling water treatment. The key is consistency—heat kills the root system, but some weeds have deep or resilient roots that require multiple applications.
I like to mulch the area with 2-3 inches of organic mulch (like straw or wood chips) after treating to prevent new weeds from sprouting. This also helps retain moisture and keeps the soil temperature stable, which discourages regrowth.
🌱 Step 5: Maintain the Treated Area
For the next 1-2 weeks, keep the area moist but not waterlogged. This helps break down any remaining weed debris and encourages beneficial soil microbes. Avoid walking on the treated soil until it's completely dry—this prevents disturbing the heat-treated zone and allows the soil to settle.
If new weeds appear, treat them immediately with the boiling water method. Over time, you'll notice fewer weeds sprouting in the same spot because the heat treatment disrupts their growth cycle. This method works best on young weeds—older, established weeds may require more frequent applications.
Tips & tricks for perfect weed eradication with boiling water
Here's what I've learned after years of battling weeds—these tricks make the boiling water method even more effective.
Timing is Everything: The 24-hour wait after treatment is crucial. This gives the heat time to fully penetrate the roots and break down any remaining plant cells. I've found that checking at exactly 24 hours gives you the clearest picture of which weeds need a second treatment—don't rush this step, or you might miss stubborn regrowth. The weeds should be completely brown and crispy, not just wilted.
Heat Transfer Hack: When you're prepping the weeds in Step 2, focus on getting that soil damp but not wet—think of it like wringing out a sponge. Too much water creates a barrier that prevents the boiling water from reaching the roots. I like to use a spray bottle with a fine mist setting to control the moisture perfectly. This single step can double your effectiveness, especially in sandy soils where water drains quickly.
Safety First: I can't stress this enough—boiling water is dangerous! Always wear heavy-duty gloves and closed-toe shoes, and consider adding safety goggles if you're working near your face or eyes. I've seen too many people underestimate the risk of splashes. Also, keep children and pets at least 10 feet away from the treatment area until the water has completely cooled and the soil is dry.
Mulch Matters: That 2-3 inches of organic mulch after treatment isn't just decorative—it's your secret weapon against regrowth. The mulch helps maintain consistent soil temperature, which discourages new weed seeds from germinating. I prefer straw over wood chips because it breaks down more quickly, adding organic matter to your soil as it decomposes. Plus, it looks great in garden beds!
Pro Tips for Killing Weeds Boiling Water
- Here's what I've learned after years of battling weeds—these tricks make the boiling water method even more effective.
- Timing is Everything: The 24-hour wait after treatment is crucial. This gives the heat time to fully penetrate the ro...
- Heat Transfer Hack: When you're prepping the weeds in Step 2, focus on getting that soil damp but not wet—think of it...
Frequently asked questions
Does boiling water kill weeds instantly, or do I need to wait?
Boiling water works fast! Most weeds wilt and die within minutes of contact, but for stubborn roots, wait 24–48 hours to see full results. The heat disrupts cell membranes, causing immediate damage, but deeper roots may take a little longer to decompose. Reapply if regrowth appears.
What’s the best time of day to use boiling water on weeds?
Early morning or late afternoon is ideal—avoid midday when temperatures are extreme. The soil is cooler, reducing heat loss, and weeds are often more hydrated (making them easier to kill). Also, you’ll avoid the risk of scorching nearby plants or pavement from residual steam.
Will boiling water harm my plants, grass, or garden beds?
Boiling water is highly targeted if used carefully. Pour it directly onto the weed’s base, avoiding surrounding plants. For grass or delicate perennials, stick to a 1-inch margin. Always test a small area first—some plants (like succulents) are more sensitive than others.
What if weeds keep growing back after boiling?
Persistent weeds likely have deep roots or seeds in the soil. For roots, repeat the boiling water treatment or dig them out. For seeds, consider a vinegar or salt solution (mix 1 gallon vinegar + 1 cup salt) for a chemical-free follow-up. Mulching afterward blocks sunlight and prevents regrowth.
Are there safer alternatives if boiling water isn’t practical?
Try these low-effort methods:
- Vinegar + dish soap: Mix 1 gallon white vinegar + 1 tbsp soap for a fast-acting herbicide.
- Salt: Sprinkle coarse salt directly on weeds (best for driveways, not garden beds).
- Boiling water sprayer: Repurpose a watering can by preheating water to 200°F+ for easier application.
Wrapping up and next steps
Killing weeds with boiling water is a fast, chemical-free, and eco-friendly solution that saves time and effort—no digging or harsh products required! 🌱 Whether you're tackling stubborn weeds in your orchid garden or around pathways, this method works wonders while keeping your plants safe.
Ready to reclaim your space? Grab your kettle or pot, follow the steps, and enjoy a weed-free oasis in no time.
Next step: Try it on a small patch first, then expand as you see results. Happy weeding!