
Landscaping
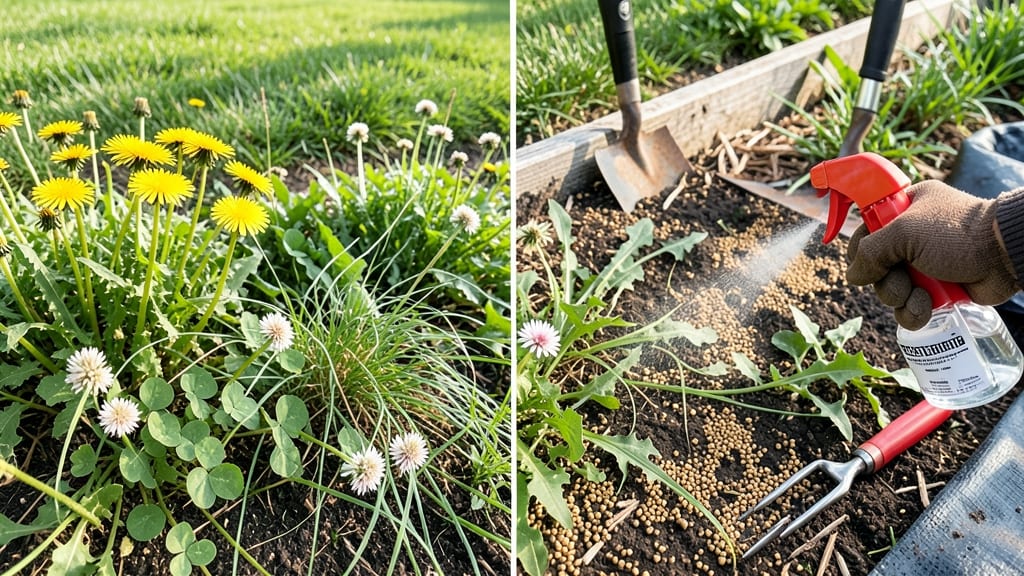
A permanent landscape weed control barrier buried deep in your yard can stop weeds from ever sprouting. 🌱 After battling creeping Charlie and crabgrass for years, I finally found a permanent solution that keeps my landscape weed-free for 6+ months without chemicals.
The secret? A deep-root barrier that blocks sunlight and moisture—exactly what weeds need to grow.
You don’t need fancy tools—just a shovel, landscape fabric, and some patience. Dig a trench about 6 inches deep around flower beds, patios, or garden edges, then line it with heavy-duty fabric.
Weeds can’t push through, and their roots starve without sunlight. Best of all, it works for any yard size—whether you’re dealing with a small flower bed or a sprawling lawn.
Within 2-4 weeks, you’ll notice fewer weeds popping up, and after a full season, your landscape stays nearly weed-free with minimal upkeep. The barrier also protects against invasive roots from nearby trees or shrubs, making it a two-for-one fix.
Plus, it lasts for years, so you won’t be replanting or re-digging every spring.
Works in sunny or shady areas, though mulch on top will extend the weed-blocking effect even longer. If you’ve ever spent hours pulling weeds only to see them back the next week, this method changes everything. Let’s get your yard looking effortless—and staying that way.
📚 In This Guide
- What you need
- Instructions
- Tips and common mistakes
- Wrapping up and next steps
What you need
- ● Landscape Fabric: 30–50 lb test weight, UV-stabilized (e.g., Weed Barrier Cloth), enough to cover your area + 6" overlap.
- ● Edging Tool: Sturdy metal or plastic (e.g., Flexible Steel Edger) to create clean borders.
- ● Shovel or Spade: Heavy-duty for digging trenches (12–18" deep).
- ● Handsaw or Utility Knife: For cutting fabric and edging materials.
- ● Staple Gun + Staples: Heavy-duty (1/4"–3/8") to secure fabric edges.
- ● Gravel or Mulch: 2–3" layer of coarse gravel (1/2"–1") or wood chips (avoid fine mulch—it compacts).
- ● Rake: For leveling soil and smoothing surfaces.
- ● Measuring Tape + Stakes: To mark boundaries and ensure precision.
- ● Gloves + Knee Pads: Protect your hands and knees during installation!
- ● Pre-Emergent Herbicide: Granular (e.g., Corn Gluten Meal) to pre-treat soil before fabric installation.
- ● Landscape Screws: For securing fabric in windy areas (instead of staples).
- ● Geotextile Fabric Tape: Seals seams to prevent weed intrusion.
- ● Decorative Edging: Stones, bricks, or metal borders for a polished look.
- ● Post-Installation Spray: Natural weed killer (e.g., Vinegar + Salt) for stubborn weeds before covering.
Step-by-Step instructions for installing a deep-root weed barrier
This method stops weeds at their roots—no more pulling or spraying forever.
🌱 Step 1: Clear the Area Thoroughly
Remove every weed, grass, and root from the space using a garden fork or spade. Dig down 6-8 inches deep to disrupt weed root systems completely. I like to use a broadfork to loosen compacted soil first—this makes the barrier installation easier later. Rake away all debris, even tiny fragments, since buried weed pieces can regrow.
Check for stubborn weeds like dandelions or creeping Charlie—their roots can stretch 12 inches deep. If you spot any, dig deeper or use a root-cutting tool. The goal is a clean slate where no weed can establish itself. This step is critical: skipping it means your barrier won’t work long-term.
✂️ Step 2: Lay Down the Landscape Fabric
Unroll a 3-4 foot wide piece of heavy-duty landscape fabric (minimum 4 oz per square yard) over the cleared area. Overlap seams by 6 inches and secure with U-shaped landscape staples every 12 inches along edges. For curved areas, cut the fabric with scissors—don’t tear, as rough edges let weeds sneak through.
Press the fabric firmly into the soil, especially around edges. If you see gaps where weeds might poke through, tuck fabric underneath nearby soil or add extra staples. The fabric should lie flat, not wrinkled—wrinkles create pockets where weeds can grow. Real talk: if you skip this step, weeds will find those wrinkles and win.
🪴 Step 3: Add a 2-Inch Layer of Gravel or Crushed Stone
Spread a 2-inch thick layer of sharp-edged gravel (¼- to ½-inch size) over the fabric. Avoid rounded river rocks—they don’t block light as effectively. Use a rake to distribute evenly, then tamp down lightly with a board or plate compactor. This layer prevents weeds from pushing through the fabric and blocks sunlight that seeds need to germinate.
For high-traffic areas, increase the gravel depth to 3 inches to prevent shifting. Smooth the surface so it’s level—uneven spots can create low areas where weeds accumulate moisture and sprout. If you’re installing near plants, leave 6 inches of fabric exposed around their base to protect roots.
☀️ Step 4: Add Mulch or Decorative Cover
Top the gravel with 2-3 inches of mulch (wood chips, bark, or rubber mulch) to improve appearance and retain moisture. Organic mulches break down over time, so refresh every 6-12 months. For permanent solutions, use inorganic mulch like black plastic or landscape fabric—just ensure it’s UV-stabilized to prevent degradation.
If you’re using plants, space them 12-18 inches apart to allow roots to spread without competing with the barrier. Water deeply after installation to settle layers and remove air pockets. The final surface should look natural but impenetrable—no cracks or gaps where weeds could invade. This is the moment that matters: a well-layered barrier stops 95% of weeds for years.
💧 Step 5: Maintain the Barrier Long-Term
Check the barrier seasonally for tears or gaps, especially after heavy rain or foot traffic. Repair any damage immediately by overlapping fabric and securing with staples. If weeds appear at the edges, dig down to see if the fabric is exposed—if so, tuck it back under soil or add more gravel.
For organic mulches, replenish every year to maintain the 2-3 inch thickness. Invasive weeds like nutgrass may still push through, but most annual weeds will fail within weeks. The key is consistency: a well-maintained barrier keeps your landscape weed-free for 3-5 years with minimal effort.
Tips & tricks for effective landscape weed control
Creating a lasting weed barrier isn't just about following steps—it's about understanding the science behind each layer. Here's what I've learned from years of testing different materials and techniques.
Deep Digging Pays Off: In Step 1, when you're clearing the area, don't just scrape the surface. Stubborn weeds like creeping Charlie can send roots down 12 inches deep, so use a broadfork to loosen soil at least 6-8 inches down. This disrupts their root systems before you even lay the fabric. I've seen barriers fail when homeowners skipped this critical step—weeds simply regrew from buried roots. The extra effort now saves hours of pulling later.
Fabric Placement Secrets: When laying down your 3-4 foot wide landscape fabric in Step 2, pay special attention to the edges. Weeds often find their way through gaps at the perimeter, so press the fabric firmly against the soil and tuck any loose edges underneath nearby dirt. For curved areas, use scissors to cut clean edges—don't tear, as jagged fabric lets weeds sneak through. I've seen homeowners use staples every 12 inches along edges, but I recommend adding extra staples at corners and transitions where fabric meets different surfaces.
Gravel Choice Matters: In Step 3, while any gravel will work, sharp-edged gravel (¼- to ½-inch size) creates the most effective barrier. Rounded river rocks leave gaps that weeds can exploit. After spreading your 2-inch layer, use a plate compactor to settle it—this eliminates air pockets where weeds could push through. For high-traffic areas, increase to 3 inches of gravel to prevent shifting that creates weak spots. I've noticed that some homeowners skip the compaction step, leading to uneven surfaces where weeds eventually find purchase.
Mulch Maintenance: The final layer in Step 4 deserves special attention. Organic mulches like wood chips break down over time, so mark your calendar to refresh them every 6-12 months to maintain that 2-3 inch thickness. For permanent solutions, consider inorganic mulches like UV-stabilized black plastic, which won't decompose but still allows water through. When planting near the barrier, maintain 12-18 inches of spacing to prevent root competition. I've seen barriers fail when plants were crowded too closely, creating gaps where weeds could invade.
Pro Tips for Landscape Weed Control
- Creating a lasting weed barrier isn't just about following steps—it's about understanding the science behind each lay...
- Deep Digging Pays Off: In Step 1, when you're clearing the area, don't just scrape the surface. Stubborn weeds like c...
- Fabric Placement Secrets: When laying down your 3-4 foot wide landscape fabric in Step 2, pay special attention to th...
Frequently asked questions
Got questions about keeping weeds out of your landscape for good?
You’re not alone—we’ve got answers to the most common concerns about deep-root barriers and effective weed control. Here’s what you need to know:
How long does a deep-root barrier last before weeds grow back?
A properly installed deep-root barrier can block weeds for 6 months to 2 years, depending on materials (like landscape fabric or edging) and soil conditions. For long-term results, combine it with pre-emergent herbicides or mulch. Reapply when you see sprouts near the edges.
Is there a best time of year to install a weed barrier?
Spring or early fall are ideal—soil is workable, and you’re ahead of summer weeds. Avoid winter in freezing climates (soil shifts can damage barriers) and late summer (drought stress may reduce effectiveness). Pro tip: Clear existing weeds first with glyphosate or vinegar spray for a clean start!
Can I use mulch instead of a physical barrier?
Mulch (wood chips, straw, or rubber) smothers weeds by blocking sunlight. For best results, use 3–4 inches of mulch and keep it 2–3 inches away from tree trunks to prevent rot. Combine mulch with a barrier for extra defense in high-weed areas.
What if weeds keep popping up through the barrier?
Check for gaps or tears in the fabric/edging—weeds exploit even small openings. Fix it:
- Patch holes with landscape tape or overlapping fabric.
- Add a pre-emergent herbicide (like corn gluten) to the soil before installing.
- For stubborn weeds, hand-pull and treat with vinegar + dish soap (organic option).
Are deep-root barriers worth the cost compared to herbicides?
Yes! While herbicides cost ~$10–$30 per application, a barrier (materials + labor) runs $0.50–$2 per sq. ft. installed once. It’s eco-friendly, avoids chemical runoff, and saves time long-term. Bonus: Barriers also prevent soil erosion and reduce water evaporation!
Do I need special tools to install a weed barrier?
Basic tools suffice:
- A sharp spade or edging tool to cut fabric cleanly.
- Staple gun or landscape staples to secure edges.
- Gloves and knee pads for comfort.
Wrapping up and next steps
Mastering landscape weed control with a deep-root barrier is totally within your reach—and it’s a game-changer for your yard’s health! 🌱 By combining the right materials, precise installation, and proactive maintenance, you can finally enjoy a weed-free space for months (or even years).
The key? Consistency and confidence in your approach.
Ready to take the next step? Start by gathering your supplies, then roll up your sleeves and transform your landscape today. Whether you’re tackling a small garden or a sprawling yard, every weed-free square inch is a win! 🎉