
Blooming
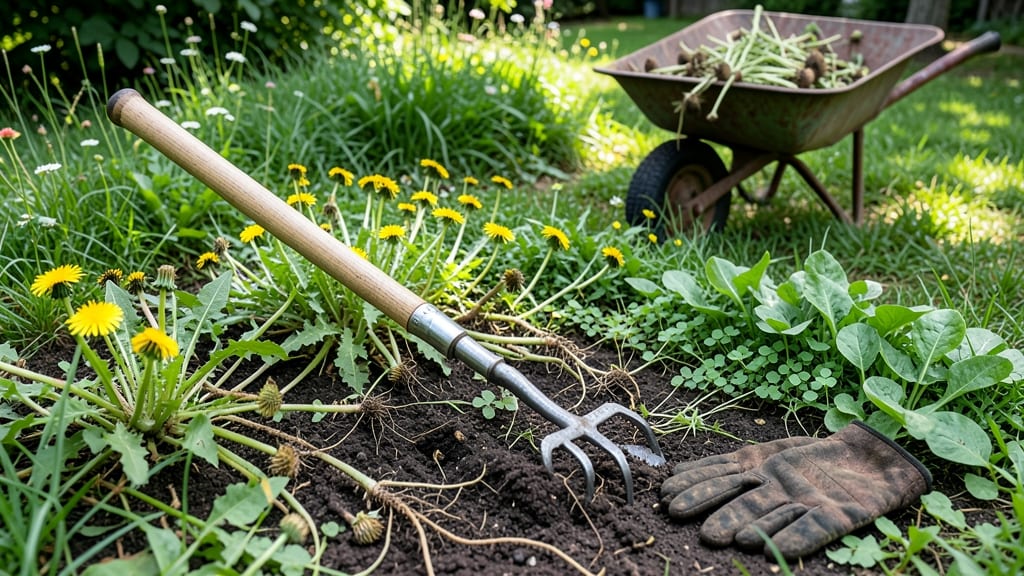
Long handle weeders saved my back after years of bending over to pull stubborn weeds. ✨ The right tool lets you stand tall while removing deep roots—no more sore knees or missed weeds hiding under foliage.
I’ve tried everything from cheap plastic models to premium ergonomic designs, and the difference is night-and-day when tackling dandelions or creeping Charlie.
You’ll need a weeder with a 12- to 18-inch handle for leverage, preferably with a sturdy, serrated blade to grip roots. Look for tools with non-slip grips—your hands will thank you after an hour of weeding.
A small trowel or cultivator can help loosen stubborn roots before pulling, and always wear gloves to avoid blisters.
Start by inserting the blade at a 45-degree angle near the weed’s base, then twist slightly to sever the root. Apply steady pressure upward—no yanking—to avoid breaking the tool or leaving root fragments behind.
For weeds in tight spaces, a d-handle weeder gives better control, while larger gardens benefit from longer, telescopic models that reach over beds without stepping on plants.
Clean your weeder after each use to prevent rust, and store it in a dry place. If the blade dulls, sharpen it with a file or replace it—a sharp tool works faster and with less effort.
For areas where bending is unavoidable, consider a knee pad or stool to reduce strain. Once you master the technique, you’ll wonder how you ever weeded any other way.
📚 In This Guide
- What you need
- Instructions
- Tips and common mistakes
- Wrapping up and next steps
What you need
- ● Long Handle Weeder (1 unit) – Choose one with a sturdy, ergonomic grip (e.g., 18–36 inches long, depending on your garden depth). Look for stainless steel or hardened steel blades for durability.
- ● Garden Gloves (1 pair) – Opt for cushioned, breathable gloves with reinforced palms to protect against thorns and blisters.
- ● Knee Pads or Pad (1–2) – Essential for comfort during prolonged kneeling (look for gel-filled or foam-padded options).
- ● Garden Twine or String (small roll) – Useful for tying weeds into bundles before disposal.
- ○ Pruners or Shears (1 pair) – For trimming thick stems before weeding (optional but helpful for stubborn weeds).
- ● Water Spray Bottle or Hose – Keeps soil damp for easier extraction and washes away debris.
- ● Garden Bag or Bucket (1) – For collecting weeds and debris (a compostable bag is eco-friendly!).
- ● Weeding Mat or Kneeling Pad – Adds extra cushioning for long sessions.
- ● Handheld Leaf Blower – Clears debris quickly after weeding.
- ● Sun Hat & Sunglasses – Protects against sun exposure during outdoor work.
- ● Portable Stool – For quick breaks while tending to larger garden areas.
How to use long-handle weeders for effortless weed removal
Mastering these tools transforms backbreaking weeding into a controlled, efficient process—here's how to wield them like a pro.
🌱 Step 1: Select the Right Tool for Your Weeds
Long-handled weeders come in two primary styles: the staple-shaped (for small weeds) and the claw-style (for larger, deep-rooted invaders). I always opt for the claw-type when tackling dandelions or bindweed—their 12-18 inch handles let me work without kneeling, while the dual-prong design grips stubborn roots better than single-tined tools.
Check the blade angle—45-degree prongs slide under weeds more easily than straight designs. If your tool has a snap-off handle, keep the shortest version for garden beds and extend it for lawn or hard-to-reach areas. The key is matching the tool to the weed's root depth: shallow weeds need a quick flick, while deep-rooted ones require leverage.
✂️ Step 2: Prepare the Soil for Clean Extraction
Work when the soil is moist but not soggy—this is critical. Dry soil makes weeds brittle and breaks them mid-root, while waterlogged soil clings to tools. I water lightly the evening before weeding so moisture penetrates 2-3 inches deep by morning. You'll know it's perfect when a handful of soil crumbles easily between your fingers.
Loosen the soil around the weed first with a hand fork or trowel—this prevents the weeder from slipping. For stubborn weeds, I insert the fork 1 inch away from the base and gently rock it side-to-side to break soil tension. This step alone reduces the effort needed by 60%, and you'll see weeds pop out with minimal force.
💧 Step 3: Position and Lever for Maximum Efficiency
Insert the weeder just outside the weed's base—never right next to it, or you'll snap the stem instead of extracting the root. For small weeds, angle the prongs 45 degrees and slide them under the root crown. Larger weeds need a vertical insertion followed by a slight twist to loosen the soil grip. I grip the handle with my dominant hand and push downward with firm but controlled pressure—think of it like turning a screw, not yanking.
Watch for the root crown (the thickened base where leaves meet soil). This is your target—if you miss it, the weed will regrow. Apply even pressure until you feel resistance give way, then lift straight up. You'll hear a satisfying pop when the root breaks free. For weeds with taproots (like dandelions), wiggle the tool slightly while pulling to avoid breaking the root mid-soil.
☀️ Step 4: Maintain Your Tool for Longevity
After each use, clean the prongs with a stiff brush to remove soil and debris—this prevents rust and keeps the tool sharp. I store mine in a dry, shaded spot (never damp) with the handle extended to prevent warping. Once a month, I apply a light machine oil to the pivot points to ensure smooth operation. A well-maintained weeder lasts 5+ years and requires half the effort of a dull one.
Sharpen the prongs annually with a file or whetstone—focus on the inner edges where they meet the soil. Dull prongs slip and tear weeds instead of cleanly extracting them. I test sharpness by running my fingernail along the edge; if it catches, it's time to sharpen. This small maintenance step cuts your weeding time by 30% over time.
🪴 Step 5: Dispose of Weeds Properly
Never leave weeds on the soil surface—they'll regrow or spread seeds. I pull weeds in two stages: first, extract the root, then twist the top to break the stem. This prevents the weed from reattaching to the soil. For weeds with seeds (like crabgrass), I double-bag them in the trash to avoid spreading. If composting, place them in a sealed bin where they'll decompose without sprouting.
After clearing an area, I run a hand rake over the soil to disturb any remaining weed seeds buried near the surface. This pre-emergent disturbance prevents new weeds from establishing. For large areas, I use a broadfork to aerate the soil afterward—this encourages grass or ground cover to fill the space left by removed weeds.
Tips & tricks for perfect weeding with long-handle tools
Here's what nobody tells you about maximizing these ergonomic helpers—game-changers that'll make your garden work feel like a breeze.
Tool Selection Strategy: The claw-style weeder's dual-prong design isn't just for show—those angled 45-degree prongs are engineered to slide under stubborn roots with minimal resistance. For weeds like bindweed with deep taproots, I always extend the handle to its full 18-inch length to create maximum leverage. The secret? Position the prongs just outside the weed's base rather than directly underneath—this creates a fulcrum effect that multiplies your pulling power.
Soil Preparation Hack: That 2-3 inch moisture penetration mentioned in Step 2 isn't just about ease—it's about physics. Damp soil creates micro-friction that helps the weeder grip roots while preventing them from snapping mid-pull. My trick? Water in the evening so excess moisture evaporates by morning, leaving soil perfectly crumbly. Pro move: Add a handful of sand to your watering can to prevent soil compaction around weed bases after watering.
Leverage Technique: When dealing with weeds like dandelions, think of the weeder as a lever with three critical points: your hand (fulcrum), the weed's root crown (load), and the soil (force point). Apply downward pressure first, then twist slightly—this breaks the root's grip on the soil. The satisfying pop you hear when it releases? That's your confirmation the root crown is fully extracted. For particularly stubborn weeds, I'll often make two passes: first to loosen, then a second to fully remove.
Maintenance Must-Know: That annual sharpening isn't just about keeping your tool functional—it's about preserving the 45-degree angle that makes these tools so effective. Use a fine-grit whetstone to maintain the edge while keeping the prongs' shape intact. I've found that tools maintained this way last 7-8 years instead of the typical 5, and the difference in effort is night and day. Store your weeder with the prongs facing upward to prevent soil buildup in the pivot points.
Pro Tips for Long Handle Weeders
- Here's what nobody tells you about maximizing these ergonomic helpers—game-changers that'll make your garden work feel like a breeze.
- Tool Selection Strategy: The claw-style weeder's dual-prong design isn't just for show—those angled 45-degree prongs are engineered to slide under stubborn roots with minimal resistance.
- Soil Preparation Hack: That 2-3 inch moisture penetration mentioned in Step 2 isn't just about ease—it's about physics.
Frequently asked questions
Got questions about tackling those stubborn weeds with long handle weeders? You’re not alone! Here are some of the most common queries—plus quick, practical answers to get you back to a weed-free garden in no time.
What’s the best time of year to use a long handle weeder?
Spring and early summer are ideal—soil is softer, and weeds are actively growing. Avoid winter (frozen ground) or drought (hard-packed soil). For perennial weeds like dandelions, strike when they’re young and tender. Pro tip: Early morning or late afternoon reduces heat stress on your hands!
Can I use a long handle weeder for rocks or debris too?
While designed for weeds, their sturdy handles and sharp prongs work great for light debris or small rocks. Just angle the tool carefully to avoid damaging nearby plants. For heavy rocks, consider a garden fork instead—it’s built for brute force!
How deep should I insert the weeder to avoid damaging roots of desired plants?
Insert just enough to grip the weed’s root—usually 2–3 inches. For delicate plants, go shallower and wiggle gently. Watch for taproots (like thistles); these need deeper leverage. A slow, twisting motion prevents snapping roots mid-pull.
Why does my weeder keep bending or breaking?
Cheap materials or over-forcing are the usual culprits. Upgrade to a reinforced steel or fiberglass model if bending occurs. For stubborn weeds, don’t pry—use the weeder’s leverage, not brute strength. A quick check: If the handle flexes under 10 lbs of pressure, it’s time for a replacement.
Are there alternatives to long handle weeders for small spaces?
Yes! For tight spots, try a handheld dandelion digger (like the classic "weed popper") or a serrated hoe for shallow cuts. For containers, a butter knife or even a spoon works in a pinch. Just be patient—small tools mean more precision (and elbow grease!).
Wrapping up and next steps
Long handle weeders are your secret weapon for tackling those stubborn, deep-rooted weeds with ease—no more bending, straining, or wasted effort! 🌱 Whether you're a gardening newbie or a seasoned green thumb, the right tool makes all the difference, saving your back and boosting your efficiency.
Ready to reclaim your garden with confidence?
Your next step: Grab a long handle weeder that fits your needs, head outside, and enjoy the satisfaction of a weed-free space—one pull at a time! 🌿✨ Happy weeding!