
How To
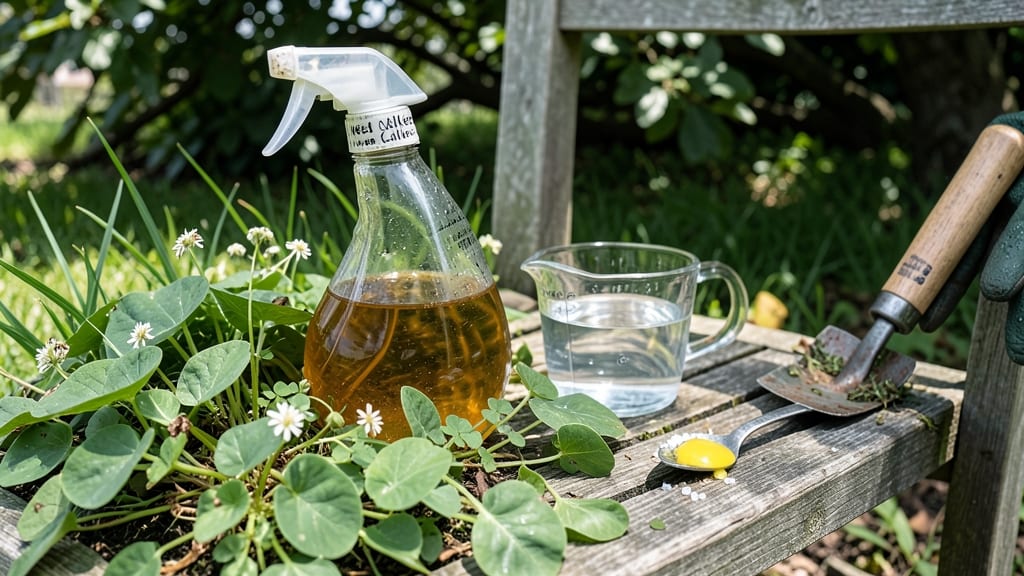
A natural weed killer using vinegar works like a chemical-free flamethrower for weeds—24-hour root starvation that leaves your garden spotless. 🌱 The secret is mixing the right strength (1 gallon white vinegar + 1 cup salt + 1 tbsp dish soap) and applying it on a dry, sunny afternoon when weeds are actively growing. This isn’t just about spraying—it’s precision. Use a spray bottle or pump for small weeds, or a garden sprayer for larger patches. The vinegar burns leaves, but the salt and soap combo ensures the roots absorb enough to die within a day. Just avoid windy days or you’ll regret it when your prized petunias get collateral damage. You’ll see results immediately: crispy leaves by evening, dead weeds by morning. The soil stays unaffected (vinegar breaks down quickly), but nearby plants? Keep them protected with cardboard or a spray shield—this stuff doesn’t discriminate. For stubborn weeds or thick patches, repeat every 3-4 days until the area is clear. Pair it with mulch or landscape fabric to prevent regrowth, and you’ve got a weed-free zone without harsh chemicals. Let’s tackle that overgrown corner!
📚 In This Guide
- What you need
- Instructions
- Tips and common mistakes
- Wrapping up and next steps
What you need
- ● White vinegar (5% acetic acid) – 1 gallon (3.8 liters). Avoid colored vinegar—it’s less effective!
- ● Dish soap (liquid, unscented) – 1-2 tablespoons. Cuts surface tension so the solution sticks to weeds.
- ● Spray bottle or pump sprayer – 16 oz (473 mL) or larger. A reusable, dedicated sprayer works best to avoid cross-contamination.
- ● Protective gloves – 1 pair. Vinegar can irritate skin, especially if you have cuts or sensitive skin.
- ○ Eye protection (optional but recommended) – Safety goggles. Splashing vinegar in your eyes? Not fun.
- ● Newspaper or cardboard – 1-2 sheets. Lays down to protect nearby plants and soil from accidental spray.
- ● Salt – 1 cup. Adds to the mix for extra drying power (use sparingly—it can harm soil over time).
- ● Rubbing alcohol (70% isopropyl) – 1/4 cup. Speeds up the weed-killing process by breaking down plant cell walls.
- ● Garden hose with nozzle – For rinsing tools or diluting spills.
- ● Marking spray (e.g., water + food coloring) – To outline areas you’ve already treated.
Step-by-step instructions for making an effective vinegar weed killer
Here’s the straightforward method I’ve used to eliminate weeds without harsh chemicals—works best on young, healthy weeds.
💧 Step 1: Gather and Mix Your Vinegar Solution
Fill a 1-gallon spray bottle with white vinegar (the higher the acidity, the better—look for 5% or higher). Add 1 tablespoon of dish soap to help the solution cling to weed leaves. Swirl gently to combine—no shaking needed, or you’ll create suds that waste product. The soap breaks the vinegar’s surface tension, ensuring it sticks and absorbs properly.
I like to add 1 cup of salt for extra potency, especially for tough weeds like dandelions. Stir until fully dissolved. This mixture is most effective when applied on a sunny, dry day—the sun amplifies the vinegar’s burning effect. Avoid using it on windy days, or you’ll risk spraying nearby plants.
🎯 Step 2: Target Weeds Precisely for Maximum Effect
Wait until weeds are dry and fully grown—morning applications work best because the vinegar has all day to work. Hold the spray bottle 6-8 inches away from weeds and apply until fully saturated (you should see droplets clinging to leaves). Avoid spraying broadleaf plants or grass, as vinegar will kill them too—it’s not selective.
Focus on the leaves and stems, not the soil. The vinegar works by denaturing proteins in the plant, causing cellular damage. You’ll see wilting within hours and complete death in 24-48 hours for small weeds. For deep-rooted weeds, repeat the process every 3-5 days until the plant turns crispy and brown.
⏰ Step 3: Monitor and Retreat as Needed
Check treated areas 24 hours later. If weeds are still green, reapply the solution—some tough species require 2-3 treatments. The key is consistency. I’ve found that morning applications in direct sunlight yield the fastest results, as the heat accelerates the vinegar’s effect.
If weeds regrow, they’re likely younger shoots from the same root. Dig them out or apply the vinegar again. For stubborn weeds like clover, you may need to repeat weekly until the root system is exhausted. Always keep a small amount of solution handy for touch-ups.
🌱 Step 4: Prevent Regrowth with Mulch or Barrier
Once weeds are dead, cover the area with mulch (straw, wood chips, or cardboard) to block sunlight and prevent new growth. A 2-3 inch layer suffices. Mulch also retains moisture and suppresses future weeds naturally. If mulching isn’t an option, consider landscape fabric under decorative rocks for long-term control.
For pathways or cracks in pavement, a weekly vinegar spray keeps weeds at bay without chemicals. Just remember: vinegar kills everything it touches, so always spray only the weeds and wear gloves to protect your skin. Store your solution in a cool, dark place—it loses potency over time.
Tips & tricks for targeted weed elimination
Real talk: Vinegar weed killer works, but only if you nail these key details. Here's how to make every drop count.
Solution Mixing: The 1-gallon spray bottle is non-negotiable—it gives you enough volume to treat larger areas without diluting the potency. When adding the 1 tablespoon of dish soap, use a liquid dish soap (like Dawn) rather than powdered or gel varieties, which can clump. The soap should create just enough surface tension to make the vinegar cling, not create suds that waste your mixture. Pro tip: If you notice the solution separating after a few days, give it a quick swirl before use.
Timing Secret: Those 24-48 hours for complete weed kill are critical, but don't assume all weeds will die in that window. I've found that morning applications in direct sunlight (after the dew has dried) accelerate the process—you'll often see wilting within hours, not days. For stubborn weeds like clover, stick to the 3-5 day reapplication schedule rather than trying to rush it. The vinegar needs time to work its way down to the roots.
Application Technique: The 6-8 inch distance from your spray bottle is perfect for creating that fine mist that covers every leaf surface. Here's what I do: I hold the bottle vertically and press the trigger in short bursts while moving in a zigzag pattern. This ensures complete saturation without missing spots. For weeds growing in tight clusters, I'll often apply twice from slightly different angles to guarantee full coverage. And always wear gloves—vinegar can be harsh on skin!
Prevention Strategy: The 2-3 inch mulch layer is your best defense against regrowth. I've learned this the hard way—skipping mulch means you'll be back spraying in a few weeks. For garden beds, straw mulch breaks down nicely and adds organic matter to the soil. For pathways, I use crushed gravel with landscape fabric underneath—it keeps weeds out while allowing water drainage. This combo has kept my walkways weed-free for over a year.
Pro Tips for Natural Weed Killer Using Vinegar
- Real talk: Vinegar weed killer works, but only if you nail these key details. Here's how to make every drop count.
- Solution Mixing: The 1-gallon spray bottle is non-negotiable—it gives you enough volume to treat larger areas without diluting the potency.
- Timing Secret: Those 24-48 hours for complete weed kill are critical, but don't assume all weeds will die in that window.
Frequently asked questions
Got questions about using vinegar as a natural weed killer? We’ve got answers! Here are some common concerns and quick solutions to make your DIY weed control a breeze.
How long does it take for vinegar to kill weeds?
Vinegar works fast! Most weeds show visible damage within 24 hours, but complete death can take 3–7 days, depending on the weed type and weather. Hot, sunny days speed up the process—just reapply if needed.
Will vinegar harm my plants or grass?
Yes, vinegar is non-selective, so it can kill desirable plants too. Always avoid spraying near flowers, vegetables, or grass. Use a targeted sprayer (like a pump sprayer with a fine nozzle) and apply only to weeds. For safety, test a small area first.
Does rain wash away the vinegar before it works?
Rain can dilute vinegar’s effectiveness, so apply it on a dry, wind-free day and avoid watering for 24 hours afterward. If rain is forecast, opt for a higher vinegar concentration (20–30%) or a vinegar + salt mix for better adhesion.
What if the weeds keep coming back?
Persistent weeds may need multiple treatments. Dig out any remaining roots to prevent regrowth. For tough weeds like dandelions, mix vinegar with dish soap (1 tsp per cup) to break surface tension and improve absorption. Repeat every 3–5 days until gone.
Are there safer alternatives if vinegar doesn’t work?
If vinegar isn’t cutting it, try these natural backups:
- Boiling water: Pour directly on weeds (best for driveways and cracks).
- Salt + vinegar: Mix 1 cup salt + 1 gallon vinegar for stubborn weeds.
- Corn gluten meal: Prevents new weeds from sprouting (pre-emergent).
- Manual removal: Pull weeds early for the least effort.
Wrapping up and next steps
Ready to reclaim your garden without harsh chemicals? 🌱 A natural weed killer using vinegar is a game-changer—it’s fast, eco-friendly, and targets weeds at their core by starving their roots in just 24 hours.
Whether you’re tackling stubborn weeds in cracks or overgrown lawns, this DIY solution saves money and keeps your space chemical-free.
Now that you’re armed with the know-how, grab that vinegar and spray bottle—your weed-free oasis is one application away! For extra efficiency, check out our pro tips to maximize results. Happy gardening! 🌿