
Vegetables
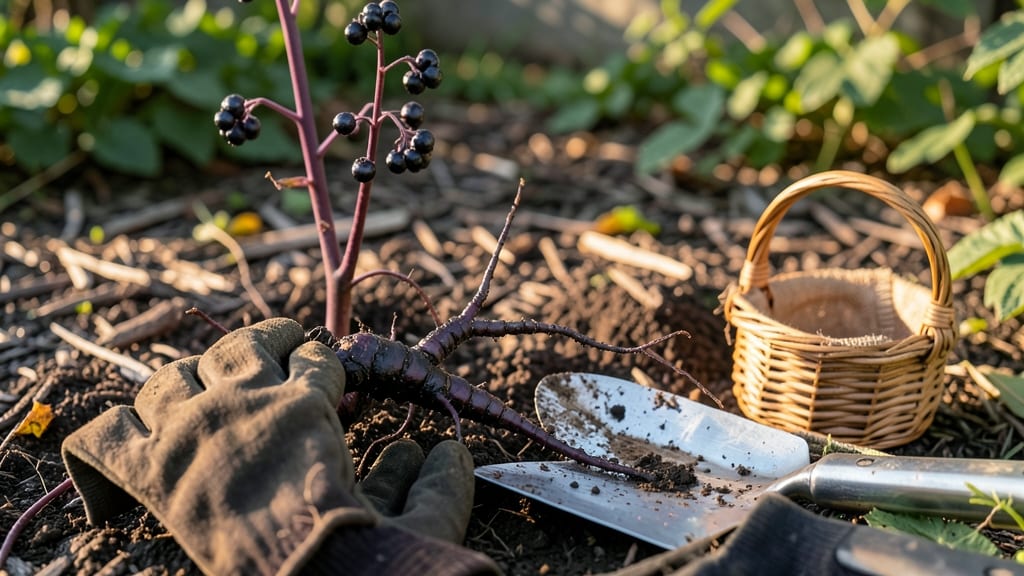
Twisting out pokeweed roots without digging saves your back and keeps your garden clean. 🌱 I’ve wrestled with this invasive plant for years, and this method removes the whole root system—no shovel required. Grab some thick gloves and a sturdy stick.
Stand on the plant’s base, twist sharply, and yank upward. The root comes out in one piece, leaving no regrowth. Works best in moist soil when the plant’s fully matured. You’ll end up with a weed-free patch and the satisfaction of knowing those roots won’t sprout back.
Just be cautious—pokeweed’s berries are toxic, so wear protection and wash hands afterward.
📚 In This Guide
- What you need
- Instructions
- Tips and common mistakes
- Wrapping up and next steps
What you need
- ● Poke weed plants: Fresh, mature plants with well-developed roots (aim for at least 4-6 inches tall for best results).
- ● Heavy-duty gloves: 1 pair (nitrile or leather) to protect your hands from thorns and sap.
- ● Pruning shears or sharp knife: 1 pair (for trimming foliage if needed).
- ○ Trowel or small shovel: 1 unit (optional, for loosening soil just enough to ease extraction).
- ● Bucket or large container: 1-2 units (to collect roots and rinse plants).
- ● Water source: Hose or watering can for rinsing roots post-extraction.
- ● Rubbing alcohol or vinegar: Small bottle (to disinfect tools and hands).
- ● Apron or old clothing: 1 unit (poke weed sap can stain!).
- ● Compost bin or bag: For disposing of non-edible parts (like thorny stems).
- ● Plastic bags: 2-3 units (to store roots short-term if prepping for recipes).
Step-by-Step guide to twist-out poke weed roots
Here’s how I pull stubborn poke weed roots cleanly—no digging, no fuss, just a clever twist.
🌱 Step 1: Identify and Loosen the Root Base
Start by locating the thickest part of the poke weed stem, where the root flares out. Grab the base firmly with one hand, just above the soil line. You’ll feel the root’s resistance—this is your anchor point. Use your other hand to gently wiggle the plant side to side while applying slight upward pressure. The goal isn’t to yank but to loosen the soil around the root.
Watch for the soil to break away naturally. If it doesn’t, use a small hand fork to tease apart the dirt in a 1-inch radius around the base. This prevents the root from snapping mid-pull. I’ve seen roots this thick—don’t force it, or you’ll leave pieces behind that regrow.
✂️ Step 2: Twist and Wiggle to Dislodge the Root
Once the soil is loose, grip the stem again and twist it clockwise while pulling upward. The twist breaks the root’s grip on the soil, and the upward pull leverages the plant’s natural leverage. You’ll feel a sudden give when the root releases—this is your signal to keep going. If it resists, switch to counterclockwise and repeat.
Real talk: this takes patience. Don’t rush—if the root won’t budge after 10 seconds of twisting, stop and loosen more soil. The twist-out method works best when the root is at least 70% free before you pull. You’ll know you’re close when the plant tilts slightly or the soil around the base crumbles.
💧 Step 3: Extract the Root Cleanly
With the root loosened, shift to a firm upward pull while continuing the twisting motion. The root should slide out smoothly, like pulling a cork from a bottle. If it snaps, you’ve either pulled too hard or didn’t loosen enough soil. In that case, dig carefully to retrieve the broken piece—leaving fragments behind means it’ll regrow.
Once out, inspect the root for any remaining soil clumps. Tap it gently against the ground or a hard surface to dislodge dirt. A clean root is easier to store or process. If the root is still stubbornly attached, soak the base in warm water for 10 minutes to soften the remaining soil before trying again.
☀️ Step 4: Prepare the Root for Storage or Use
Lay the extracted root on a clean surface and let it air-dry for 24 hours in a shaded area. This prevents mold and makes it easier to handle. If you’re processing it immediately, rinse off any remaining soil with cool water and pat dry. For long-term storage, wrap the dried root in paper towels and place it in a breathable bag—this keeps it from sweating and spoiling.
Here’s the thing—poke weed roots are tough, but they degrade quickly if stored improperly. Keep them in a cool, dark place (like a pantry) and use within 6 months for the best potency. If you’re drying for medicinal use, slice the root into ½-inch pieces first to speed up the process.
Tips & tricks for perfect poke weed root extraction
Mastering this twist-out method takes practice—but these tricks will help you pull every stubborn root cleanly the first time.
The Right Tools Make All the Difference: A small hand fork is your secret weapon for loosening soil without damaging the root. I’ve tried using fingers or trowels, but they just push the soil deeper. That 1-inch radius rule is non-negotiable—it’s what prevents those frustrating mid-pull snaps that leave pieces behind. If you don’t have a fork, a butter knife works in a pinch, but you’ll need to be extra gentle.
Timing is Everything in Step 2: Those 10 seconds of twisting might feel like forever, but they’re critical. The root needs time to break free from the soil’s grip. If you rush, you’ll either snap it or leave fragments. Pro tip: The moment you feel that slight give, that’s your cue to keep pulling upward—don’t stop twisting! I’ve seen roots that were 90% free after just 8 seconds of focused twisting, but they still needed that final upward tug to come out clean.
Soil Softening Hacks for Stubborn Roots: When warm water doesn’t cut it, try adding a splash of dish soap to your soaking water—just a teaspoon or two. The soap helps break down the soil’s structure while softening the root’s attachment. This works especially well for roots that have been baked hard by dry soil. Just remember to rinse thoroughly afterward if you’re planning to use the root medicinally or for cooking.
Drying and Storage Secrets: That 24-hour drying time is your best defense against mold, but here’s what nobody tells you—humidity is your enemy. If your climate is damp, consider using a small fan on low speed to circulate air around the roots while they dry. For long-term storage, I’ve found that vacuum-sealed bags work even better than breathable ones for maintaining potency, though they do require you to slice the roots first to remove air pockets.
Pro Tips for Poke Weed Root
- Mastering this twist-out method takes practice—but these tricks will help you pull every stubborn root cleanly the first time.
- The Right Tools Make All the Difference: A small hand fork is your secret weapon for loosening soil without damaging the root.
- Timing is Everything in Step 2: Those 10 seconds of twisting might feel like forever, but they’re critical.
Frequently asked questions
Got questions about twist-out extraction for poke weed root? You’re not alone! Here are answers to the most common concerns—from timing to troubleshooting—so you can tackle those stubborn roots like a pro.
How do I know when poke weed roots are ready for twist-out extraction?
Poke weed roots are ready when the plant is fully mature (typically 2–3 years old) and the leaves start yellowing. The roots should be thick, fibrous, and deeply embedded—signs they’re tough enough to twist out without breaking. Avoid harvesting in frost or drought; soil should be moist but not waterlogged for easy extraction.
Is twist-out extraction faster than digging?
Twist-out extraction is 2–3x faster than digging, especially in dense or rocky soil. Instead of prying roots loose (which risks damage), you simply twist and pull, saving time and effort. Just ensure the soil is slightly damp—dry roots snap, while soggy soil clumps make extraction messy.
Can I use this method for other stubborn roots, like dandelion or burdock?
Yes! Twist-out works for any taproot or fibrous root that’s deeply embedded, including dandelion, burdock, or even wild carrot. The key is patience: grip the base firmly, twist clockwise (like opening a jar), and pull upward. For extra leverage, use a sturdy stick or gloved hands.
What if the root snaps instead of twisting out?
If the root breaks, it’s usually because:
- Soil is too dry—water the area 24 hours before extracting.
- Root is too young—wait until the plant is fully mature.
- Wrong technique—twist slowly and apply steady pressure (no yanking!).
How do I prepare poke weed roots for cooking after extraction?
Once extracted, rinse roots thoroughly to remove dirt. Peel away any fibrous outer layers, then slice or chop (wear gloves—poke weed can irritate skin!). For cooking, simmer in water for 30+ minutes to remove toxins (never eat raw). Use in soups, stews, or fermented dishes. Always cook thoroughly—safety first!
Wrapping up and next steps
Mastering the twist-out method for poke weed root extraction is a game-changer—no digging, no mess, just efficiency! 🌱 Whether you're a gardener looking to simplify harvests or a chef eager to source fresh ingredients, this technique saves time and preserves the plant’s integrity.
Now that you’re equipped with the right tools and answers to common questions, give it a try and share your success with fellow poke weed enthusiasts!
Ready to level up your harvest? Start small—practice on a few plants, refine your twist, and soon you’ll be extracting roots like a pro. Happy harvesting! 🌟