
Pests
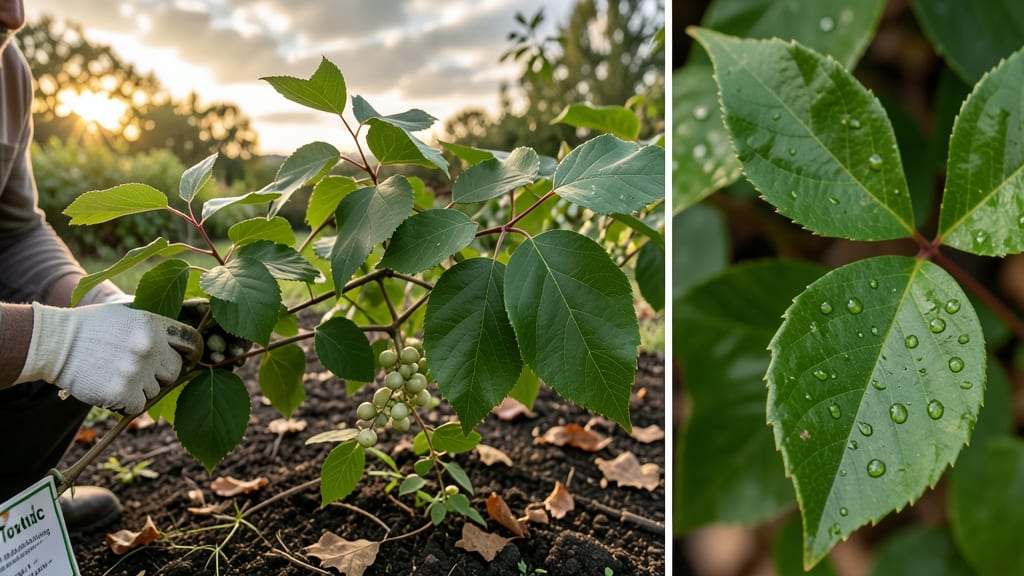
Poison ivy, stinging nettles, and other rash-causing weeds don’t belong in your garden—or anywhere near your skin. 🌿 I’ve spent years dealing with these sneaky plants, and I’ve learned the safest ways to remove them without breaking out in hives or needing a doctor’s visit.
The key is prevention first: long sleeves, closed-toe shoes, and a lightweight fabric barrier spray (like those used for thistle removal) act as your first line of defense. Never touch these plants with bare hands—even a brief brush can cause a reaction that lasts for weeks.
For stubborn patches, a mix of vinegar and dish soap sprayed directly on the leaves works surprisingly well without harsh chemicals. Once you’ve contained the spread, focus on root removal—digging deep to prevent regrowth. A putty knife or trowel helps scrape out stubborn roots without exposing your skin.
Afterward, wash your tools with soapy water to avoid cross-contamination. For families with kids or pets, these weeds are a serious hazard. Create a buffer zone of mulch or ground cover around play areas, and teach everyone to "Leave it be" if they spot these plants.
A little caution goes a long way in keeping your yard—and your skin—safe.
📚 In This Guide
- What you need
- Instructions
- Tips and common mistakes
- Wrapping up and next steps
What you need
- ● Heavy-duty gardening gloves (nitrile-coated, 12-14 inches long) – Even if you’re avoiding chemicals, gloves protect against skin irritation from sap or thorns.
- ● Sturdy long-sleeve shirt & long pants – Opt for tightly woven fabric (like cotton or polyester blends) to block contact with weed sap.
- ● Hand trowel or digging fork – A 5-inch stainless steel trowel works best for precision, while a heavy-duty fork is great for stubborn roots.
- ● Pruners or loppers – Choose bypass pruners (7-8 inches) for clean cuts; loppers (up to 24 inches) handle thicker stems.
- ● Heavy-duty trash bags (20-30 gallon) – For disposing of weeds (seal tightly to avoid spreading seeds!).
- ● Rubbing alcohol (70% isopropyl) or vinegar (5% acetic acid) – For immediate skin cleanup if sap touches exposed areas.
- ● Baking soda or cornstarch – Helps neutralize skin irritation if a rash starts.
- ● Knee pads with cushioning – Makes long removal sessions more comfortable.
- ● Garden hose with nozzle – Helps loosen soil and wash away debris post-removal.
- ● Compost bin (for non-seedy weeds) – If weeds are young and haven’t gone to seed, they can be composted.
- ● Face mask (N95 or dust mask) – Reduces inhaling spores or dust from disturbed soil.
- ● After-sun lotion or aloe vera gel – Soothes skin after a long removal session.
Step-by-Step instructions for removing rash-causing weeds safely
Here's how to tackle stinging nettles, poison ivy, and other irritating weeds without gloves or harsh chemicals.
🌿 Step 1: Identify and Confirm the Weed
First, correctly identify the weed by examining its leaves, stems, and growth pattern. Rash-causing weeds like poison ivy have three leaflets with smooth edges ("leaves of three, let it be"), while stinging nettles have serrated leaves and fine hairs that cause irritation. Avoid touching the plant until you're certain—mistakes can lead to unnecessary rashes.
I like to snap off a small stem and rub it between my fingers (carefully, from a distance) to check for reactions. If you feel a tingling or burning sensation, that's a sign it's a stinging nettle. For poison ivy, look for the reddish stems and the way the leaves grow in a pattern along the stem. Never assume—always confirm before removal.
✂️ Step 2: Use Tools to Protect Your Skin
Grab a pair of long-handled pruners or loppers to cut the weed at the base. The longer handle keeps your hands far enough away from the plant's irritating parts. If you don't have pruners, use a sturdy stick or broom handle to poke and break the stems at ground level. The key is to avoid direct contact with the plant.
I always work in the early morning when the air is cooler and the plants are less likely to release irritants. Cutting the weed just above the soil prevents regrowth from the stem and reduces the chance of spreading seeds. For larger patches, cut the weed into smaller sections first—this makes disposal easier and safer.
💧 Step 3: Bag and Dispose of Weeds Properly
Place the cut weeds into a heavy-duty trash bag immediately after removal. Seal the bag tightly to prevent any irritants from escaping. I double-bag the weeds to be extra cautious—one bag inside another ensures nothing gets left behind. If you're dealing with poison ivy, mark the bag clearly with a permanent marker so no one accidentally handles it later.
Don't compost these weeds under any circumstances. The heat from a compost pile can actually release more irritants into the air. Instead, dispose of the bagged weeds in your outdoor trash bin. If you're unsure about local disposal rules, check with your waste management service—they often have guidelines for hazardous plant waste.
🌱 Step 4: Prevent Regrowth and Spread
After removal, cover the area with a thick layer of mulch or cardboard to block sunlight and prevent new weeds from sprouting. I use 3-4 inches of mulch for best results—this suffocates any remaining weed roots and seeds. For stubborn weeds, you can also lay down black plastic sheeting to smother them, but remove it after a few weeks to avoid harming surrounding plants.
Keep the area weed-free by regularly inspecting the spot for new growth. If you see any shoots, remove them immediately using the same cutting method. Consistency is key—weeds like poison ivy can regrow from even the smallest piece of root left behind. I check my garden weekly during the growing season to stay ahead of any potential regrowth.
🪴 Step 5: Clean Up and Protect Yourself
Wash your tools thoroughly with soapy water to remove any residual irritants. I like to use a stiff brush to scrub the pruners or loppers before rinsing them off. This step is crucial—even small amounts of plant sap can cause reactions if left on tools. Store your tools in a dry place to prevent rust and contamination.
Finally, take a shower with cool water and mild soap to rinse off any potential irritants that might have landed on your skin or clothing. Avoid hot water, as it can open pores and increase the risk of a reaction. If you experience any redness, itching, or swelling, apply a cold compress and consider using an over-the-counter antihistamine cream. When in doubt, consult a healthcare provider for advice.
Tips & tricks for safe weed removal without gloves
These practical tips will help you tackle irritating weeds safely and effectively, even without protective gear.
Visual Identification: When checking for poison ivy in Step 1, look for the "V" shape where the leaves attach to the stem—this is a key identifier. For stinging nettles, focus on the fine hairs that give them their signature sting. I keep a small field guide handy for tricky cases, but remember: when in doubt, don't touch!
Tool Selection: In Step 2, if you don't have pruners, a sturdy plastic spoon or even a butter knife wrapped in duct tape can work in a pinch. The key is to keep your hands completely clear of the plant. I've used a garden trowel with the blade wrapped in plastic wrap for stubborn patches—it gives me better control than a stick.
Disposal Strategy: For Step 3, consider adding a few drops of dish soap to your sealed trash bag before tying it closed. This helps neutralize any lingering irritants. I also recommend placing the bagged weeds in a second trash bag labeled "Hazardous Plant Waste" to prevent accidental exposure during trash collection days.
Follow-Up Inspection: After covering the area with mulch in Step 4, mark the spot with a small stake or flag so you remember to check it weekly. I keep a garden journal where I note which areas I've treated and when—this helps me stay consistent with my follow-up inspections during the growing season.
Pro Tips for Rash Causing Weeds
- These practical tips will help you tackle irritating weeds safely and effectively, even without protective gear.
- Visual Identification: When checking for poison ivy in Step 1, look for the "V" shape where the leaves attach to the ...
- Tool Selection: In Step 2, if you don't have pruners, a sturdy plastic spoon or even a butter knife wrapped in duct t...
Frequently asked questions
What are the most common rash-causing weeds I should watch for?
Look out for poison ivy (leaves of three, let it be), poison oak, giant hogweed, and stinging nettle. These are the top culprits for skin irritation. Always double-check before touching any unfamiliar plant—when in doubt, avoid!
How long does it take for a rash to appear after contact?
Rashes usually show up within 12 to 48 hours of exposure, but symptoms can take up to a week in some cases. If you suspect contact, wash the area immediately with soap and water to minimize reactions.
Can I safely remove these weeds without gloves or chemicals?
Yes! Use a long-sleeved shirt, pants, and closed-toe shoes as a barrier. For stubborn weeds, try vinegar or boiling water (apply carefully to avoid nearby plants). Always dispose of weeds in sealed bags to prevent spread.
Are there natural alternatives to kill weeds without harming my lawn?
Try a mix of vinegar (20% acetic acid), dish soap, and water in a spray bottle. For tougher weeds, boiling water or salt (sparingly) can work. Test on a small area first to avoid damaging grass.
What should I do if I already have a rash?
Cleanse the area with cool water and mild soap, then apply calamine lotion or hydrocortisone cream. Over-the-counter antihistamines can relieve itching. See a doctor if the rash spreads, oozes, or causes severe discomfort.
Can pets or kids be exposed to these weeds?
Yes! Pets and kids are especially vulnerable. Keep them away from known weed patches. If exposure happens, wash their skin and paws immediately. Monitor for reactions and consult a vet if needed.
Wrapping up and next steps
Now that you’re armed with the knowledge to tackle rash-causing weeds safely, you can reclaim your yard with confidence! 🌿 Whether it’s poison ivy, stinging nettle, or sumac, the right tools and techniques make all the difference. Start small—remove one patch at a time—and always prioritize safety over speed.
Ready to take action? Grab your supplies, suit up, and get rid of those pesky weeds for good! Your skin (and sanity) will thank you. 😊