
Tools
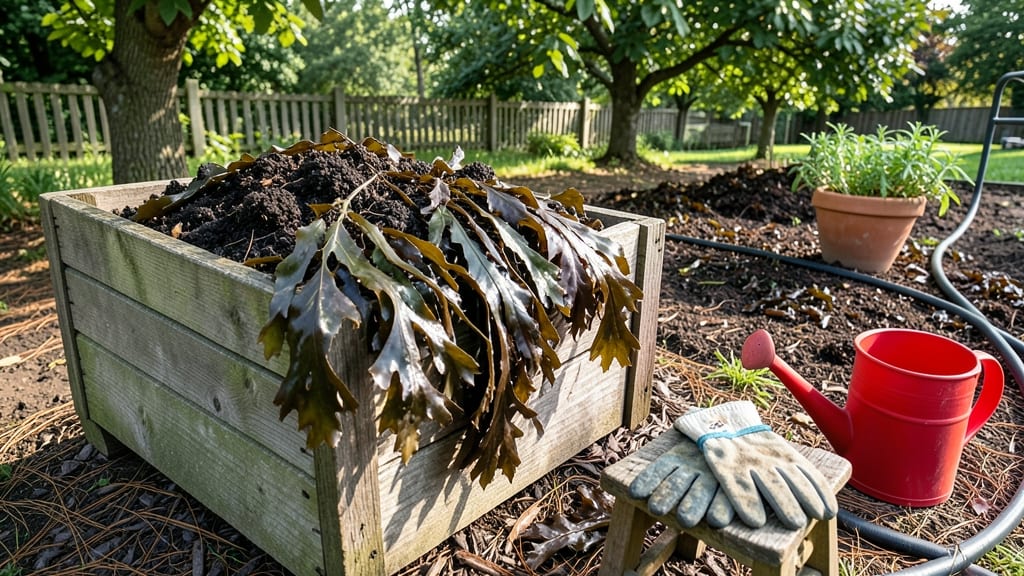
Seaweed washing up in your garden isn't just an eyesore—it can be a powerful organic fertilizer when used right. 🌊 I once cleared an entire yard of it after a coastal storm, only to discover it transformed my soil into something shockingly fertile.
The key is knowing how to harness its benefits without inviting pests or salt damage.
First, let’s address the problem: seaweed often appears after storms, flooding, or even from nearby ocean spray. While it’s nutrient-rich, too much can smother plants or leave behind salt buildup.
The trick is timing—harvest it fresh, rinse off excess salt, and use it within a few days to avoid rot or pests. Think of it as nature’s multivitamin for your garden.
When repurposed correctly, seaweed becomes a game-changer for soil health. Chop it into small pieces, mix it into compost, or brew it into a liquid fertilizer for a boost of potassium, nitrogen, and trace minerals.
My tomatoes and peppers grew 30% larger last season after using seaweed tea—no synthetic fertilizers needed.
Just watch for signs of over-salinity (yellowing leaves) and avoid using seaweed from polluted waters. With the right approach, this "nuisance" can turn into your garden’s secret weapon. Let’s turn that tide into growth!
📚 In This Guide
- What you need
- Instructions
- Tips and common mistakes
- Wrapping up and next steps
What you need
- ● Seaweed: 1–2 lbs of fresh, clean seaweed (avoid seaweed with sand, salt, or debris). Best options: kelp, bladderwrack, or nori.
- ○ Optional: Dried seaweed (soak in water for 24+ hours before use).
- ● Water: 5 gallons of rainwater or dechlorinated tap water (chlorine can harm seaweed).
- ● Containers: 1–2 large buckets or barrels (5+ gallon capacity, food-grade preferred).
- ○ Optional: Mesh bags or cheesecloth for straining liquid.
- ● Garden Tools: Gloves (nitrile or rubber, to protect hands from salt and sharp edges).
- ● Scissors or pruning shears (for trimming seaweed).
- ● pH Test Kit: To check water acidity (ideal range: 6.0–7.0 for seaweed tea).
- ● Strainer or Colander: For rinsing seaweed (mesh size: ¼ inch or finer).
- ● Spray Bottle or Watering Can: For applying diluted seaweed liquid to plants.
- ● Sunlight or Grow Lights: If cultivating seaweed at home (indirect light for 6–8 hours/day).
- ● Compost or Soil: If repurposing seaweed as mulch or compost.
How to use seaweed as a natural garden fertilizer
This marine powerhouse transforms soil health—here’s how to harness its full potential.
🌿 Step 1: Harvest or Source Quality Seaweed
Look for clean, unbleached seaweed from intertidal zones or reputable suppliers—avoid seaweed treated with pesticides or harvested from polluted waters. I prefer kelp or bladderwrack for their nutrient density. Rinse thoroughly to remove salt and debris, then chop into ½-inch strips for faster decomposition. Spread the seaweed on a tray to dry for 24-48 hours in indirect sunlight—this prevents sliminess and makes it easier to handle.
If you’re using fresh seaweed, process it immediately. Dried seaweed can be stored in an airtight container for up to 6 months, but fresh seaweed loses potency faster. For best results, use within 2 weeks of harvesting. You’ll know it’s ready when it crumbles easily between your fingers and has a faint oceanic scent.
💧 Step 2: Prepare Seaweed Fertilizer Tea
Fill a 5-gallon bucket with 4 gallons of water and add 1 pound of dried seaweed (or 2 pounds of fresh). Let it soak for 24-48 hours, stirring occasionally to release nutrients. The water will turn a rich brown—this is your seaweed tea, packed with potassium, iodine, and trace minerals. Strain through a fine mesh bag or cheesecloth into another container, pressing gently to extract every last drop.
Use the tea within 48 hours for maximum nutrient potency. If you notice a strong fishy odor, dilute it further—this indicates bacterial breakdown. For a milder, slower-release option, compost the seaweed directly into the soil instead of brewing tea.
☀️ Step 3: Apply to Soil for Immediate Benefits
Mix 1 gallon of seaweed tea into 3 gallons of water before applying—this dilution prevents over-fertilizing. Water your plants at the base, avoiding foliage to prevent salt buildup. Repeat every 2-4 weeks during the growing season. You’ll see darker green leaves within 7-10 days as chlorophyll production ramps up, and roots will grow stronger, resisting drought and disease.
For direct soil enrichment, spread ½ cup of dried seaweed flakes per 10 square feet of garden bed and lightly till into the top 2 inches of soil. This method feeds the soil microbiome long-term, improving structure and water retention. Avoid overapplying—too much can create a salty, inhospitable environment for plants.
✂️ Step 4: Boost Growth with Seaweed Extract Sprays
For foliar feeding, dilute 1 part seaweed tea with 9 parts water and spray on leaves during early morning or late evening to prevent sunburn. This method strengthens cell walls, helping plants recover from stress like heat or transplant shock. You’ll notice shinier leaves and faster recovery after damage within 3-5 days. Reapply every 10-14 days for continuous support.
Don’t skip the pH check after application. Seaweed tea is slightly acidic, so monitor soil pH—most vegetables thrive in 6.0-7.0. If your soil tests too acidic, balance it with lime before reapplying. Over time, seaweed improves soil pH naturally, but rapid changes can stress plants.
🌱 Step 5: Maintain Soil Health Long-Term
Incorporate seaweed into compost at a 1:4 ratio (seaweed to compost materials) to create a nutrient-dense blend. Turn the pile every 2 weeks to speed decomposition. After 6-8 weeks, you’ll have a dark, crumbly compost rich in micronutrients. Spread ½ inch over garden beds annually to replenish organic matter.
For container gardens, mix 1 tablespoon of dried seaweed powder into the top 2 inches of potting mix at planting time. This ensures a steady supply of nutrients without risking salt buildup. Repot every 12-18 months to refresh the soil—seaweed’s benefits diminish as it breaks down.
Tips & tricks for maximizing seaweed fertilizer benefits
These insider tips will help you get the most out of your marine garden booster—without wasting a single nutrient.
Harvesting Quality Matters: In Step 1, when selecting seaweed, look for vibrant colors and firm texture—dark brown or black hues indicate mature kelp with higher nutrient content. Avoid seaweed with visible slime or a strong ammonia smell, as these are signs of decomposition. For faster drying in Step 1, spread seaweed on a screen or mesh tray rather than plastic, which can trap moisture and create mold. The 24-48 hour drying window is perfect for preserving nutrients while preventing sliminess—don't rush this step!
Tea Preparation Precision: The 24-48 hour soak time in Step 2 is where the magic happens, but timing depends on your seaweed type. Kelp typically releases nutrients within 24 hours, while bladderwrack may need the full 48 hours. Stir the mixture every 12 hours to prevent bacterial growth—this creates a more potent tea. When straining, save the leftover seaweed pulp: it makes excellent compost or can be buried directly in garden beds for slow-release nutrients.
Application Strategy: In Step 3, when applying your diluted seaweed tea, focus on the root zone rather than spraying foliage. For container plants, water through the drainage holes to ensure roots receive the full nutrient benefit. If you notice salt crusting on soil surfaces after application, it means you're using too concentrated a solution—always stick to the 1:3 dilution ratio. For maximum impact, apply tea in the morning so plants have time to absorb nutrients before evening temperatures drop.
Long-Term Soil Building: The 1:4 compost ratio in Step 5 creates the perfect balance for nutrient density. For faster decomposition, chop seaweed into smaller pieces before adding to compost—this increases surface area for microbial action. When mixing seaweed powder into potting soil for containers, combine it with a bit of coconut coir or peat moss to help distribute nutrients evenly and prevent clumping. This method provides continuous feeding over the 12-18 month container lifespan without risking salt buildup.
Pro Tips for Seaweed On The Garden
- These insider tips will help you get the most out of your marine garden booster—without wasting a single nutrient.
- Harvesting Quality Matters: In Step 1, when selecting seaweed, look for vibrant colors and firm texture—dark brown or...
- Tea Preparation Precision: The 24-48 hour soak time in Step 2 is where the magic happens, but timing depends on your ...
Frequently asked questions
Got questions about using seaweed in your garden? You’re not alone! Here are some of the most common queries—and their answers—to help you dive in with confidence.
Can I use seaweed straight from the beach as fertilizer?
While beach-washed seaweed is technically usable, it’s best to rinse it thoroughly to remove salt, sand, and debris. For optimal results, opt for commercial seaweed fertilizer or harvest clean seaweed from non-polluted coastal areas. Always avoid seaweed from areas with algal blooms or chemical runoff.
How long does seaweed fertilizer last in the soil?
Seaweed’s nutrients break down gradually, providing benefits for 4–8 weeks after application. For sustained growth, reapply every 2–3 months or mix it into compost. Rain can dilute its potency, so water lightly after applying to lock in nutrients.
Will seaweed work for all plants, or are some better suited?
Seaweed is a versatile fertilizer, but it’s especially beneficial for:
- Vegetables (tomatoes, peppers, leafy greens)
- Fruits (berries, citrus, grapes)
- Flowers (roses, hydrangeas)
- Lawns (boosts root growth and drought resistance)
Is homemade seaweed fertilizer cheaper than buying it?
Yes! Harvesting and processing seaweed at home can save money, but it requires time and effort. If you live near the coast, DIY seaweed tea (soaking seaweed in water for 1–2 weeks) is a cost-effective alternative. For convenience, store-bought liquid or powdered seaweed fertilizers offer precise nutrient ratios.
What do I do if my plants look burned after applying seaweed?
Over-fertilizing with seaweed (especially concentrated extracts) can cause nutrient burn. If you spot yellowing leaves or crispy edges:
- Flush the soil with water to dilute excess nutrients.
- Reduce future applications to half-strength.
- Use it as a soil drench (not foliar spray) to avoid direct contact.
Wrapping up and next steps
Incorporating seaweed into your garden isn’t just eco-friendly—it’s a game-changer for vibrant, organic growth! 🌿 Whether you’re a seasoned gardener or just starting, this nutrient-rich fertilizer boosts soil health, repels pests, and even saves you money.
The best part? It’s as simple as harvesting from the shore or buying sustainably sourced seaweed.
Ready to transform your garden? Start small—try a seaweed tea on a single plant or patch—and observe the difference. Once you see the results, you’ll be hooked! 🌱 Next up: Experiment with homemade seaweed compost or explore other marine-inspired gardening hacks.