
Planting
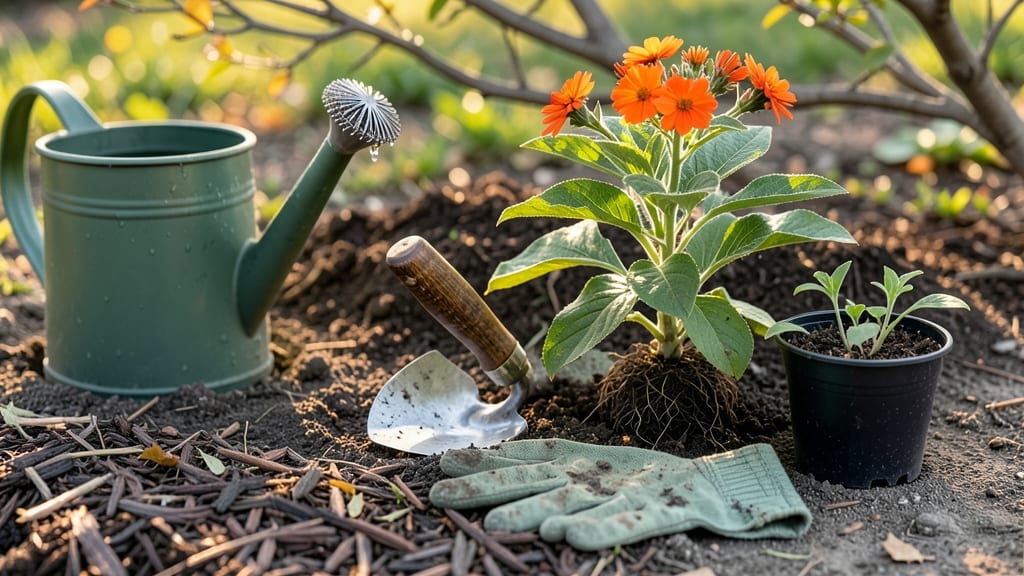
Transplanting milkweed plants feels like giving monarch butterflies a lifeline. 🌿 The key is timing—spring or fall when temperatures are mild and the plant is dormant. I’ve moved milkweed twice now, and the secret lies in preparing the soil and handling roots with care to keep stress low.
Start by amending the new spot with compost to improve drainage, since milkweed hates soggy roots. Dig a hole twice as wide as the root ball but no deeper, then gently loosen the plant’s roots before easing it into place.
Water deeply right away to settle the soil and encourage new growth. After transplanting, keep the area shaded for a few days to reduce shock, then apply a 2-inch layer of mulch to retain moisture.
You’ll see fresh green shoots within 2-3 weeks, and by next season, your relocated milkweed will be thriving—just like the monarchs that rely on it. This method works for both common milkweed and butterfly weed, making it perfect for pollinator gardens. The payoff?
A stress-free plant that supports one of nature’s most important migrations.
📚 In This Guide
- What you need
- Instructions
- Tips and common mistakes
- Wrapping up and next steps
What you need
- ● Healthy milkweed plants: 1–5 mature plants (depending on your garden size), with roots intact and free of pests/disease.
- ● Transplanting shovel or spade: 1 medium-sized (16–20 inches long) with a sharp edge for clean cuts.
- ● Garden gloves: 1 pair (nitrile or leather) to protect hands from sap and thorns.
- ● Watering can or hose with gentle nozzle: 1 for hydrating plants before/after transplanting.
- ● Pruning shears: 1 pair for trimming damaged or overgrown stems.
- ○ Organic mulch (optional but recommended): 2–3 inches of shredded bark, straw, or leaves to retain moisture.
- ● Measuring tape: 1 (to mark new planting spots 12–18 inches apart).
- ● Garden fork or trowel: 1 for loosening soil in the new location.
- ● Compost or slow-release fertilizer: 1 small bag (balanced 10-10-10 or organic option like worm castings).
- ● Root stimulator gel or powder (e.g., Mycorrhizal fungi) to boost recovery.
- ● Plant support stakes (if transplanting tall varieties like Asclepias tuberosa).
- ● Shade cloth (lightweight) for the first 24 hours post-transplant.
- ● Label tags (if tracking different milkweed species).
Instructions for transplanting milkweed plants
Here’s how I move milkweed without shocking the roots or stressing the plant—key for monarch butterflies that rely on it.
🌱 Step 1: Time the Transplant for Optimal Survival
Choose a cool, overcast day or transplant in the early morning when temperatures are below 75°F. Milkweed thrives when moved during its active growth phase—spring or early fall. Avoid transplanting in summer heat, which causes transplant shock and wilting.
Dig up the milkweed when the soil is moist but not soggy. Use a shovel or garden fork to loosen the soil around the plant in a 12-inch radius, then gently lift it by the base. The goal is to keep as much of the root ball intact as possible—milkweed roots are fibrous but sensitive to disturbance.
☀️ Step 2: Prepare the New Location
Select a spot with full sun—at least 6-8 hours daily—and well-draining soil. Milkweed tolerates poor soil but grows best in sandy or loamy soil with a pH of 5.0-7.0. If your soil is heavy clay, mix in 2-3 inches of compost or sand to improve drainage.
Dig a hole twice as wide as the root ball but only as deep as the plant was growing before. This prevents burying the crown too deeply, which can cause rot. Water the hole 1-2 hours before transplanting to settle the soil and reduce stress on the roots.
🪴 Step 3: Plant and Stabilize the Milkweed
Place the milkweed in the hole, ensuring the top of the root ball sits level with the soil surface. Fill the hole with soil, pressing gently to remove air pockets. Leave a 1-inch gap at the surface—this allows for settling after watering.
Water deeply right after planting to help the soil settle around the roots. Use a slow, steady stream to avoid displacing the plant. Mulch the base with 2-3 inches of organic mulch (like shredded leaves or straw) to retain moisture and suppress weeds. Avoid piling mulch directly against the stem.
💧 Step 4: Monitor and Care for Recovery
Keep the soil evenly moist for the first 2-3 weeks—water when the top 1-2 inches feel dry. Avoid overhead watering, which can spread disease. You’ll notice new growth within 3-4 weeks if the transplant was successful.
Fertilize lightly 4-6 weeks after transplanting with a balanced, slow-release fertilizer (like 10-10-10). Milkweed doesn’t need heavy feeding, but a little extra nutrients encourage strong regrowth. Watch for yellowing leaves—this can signal overwatering or poor drainage.
Tips & tricks for transplanting milkweed plants
Moving milkweed without stressing the plant takes a few key tricks—here’s how I’ve perfected the process after years of trial and error with my garden.
Timing is Everything: The 75°F temperature limit isn’t just arbitrary—it’s when milkweed starts showing transplant shock. If you must move plants during summer, do it on a cloudy day and water thoroughly before and after. I’ve found that early morning transplants (right after dew evaporates) give roots the best chance to recover before afternoon heat sets in.
Root Ball Preservation: When loosening soil in that 12-inch radius, think of it like unwrapping a delicate package. Use a garden fork to tease roots apart gently rather than cutting through them. I’ve learned the hard way—severed roots mean slower recovery, and monarch caterpillars need healthy plants ASAP.
Soil Prep Secret: That 1-2 hours of pre-watering the hole isn’t just about moisture—it’s about creating a welcoming environment. The settled soil helps roots establish contact immediately. For heavy clay soils, I mix in 2-3 inches of compost right in the hole before planting, which gives roots a nutrient boost while improving drainage.
Post-Transplant Care: The 2-3 weeks of even moisture is critical, but don’t drown the plant. I use a moisture meter to check soil at 1-2 inches deep—if it’s dry, water slowly until it runs out the bottom of the hole. Mulching with straw (not wood chips) keeps moisture consistent while preventing weeds from competing for resources.
Pro Tips for Transplanting Milkweed Plant
- Moving milkweed without stressing the plant takes a few key tricks—here’s how I’ve perfected the process after years ...
- Timing is Everything: The 75°F temperature limit isn’t just arbitrary—it’s when milkweed starts showing transplant sh...
- Root Ball Preservation: When loosening soil in that 12-inch radius, think of it like unwrapping a delicate package. U...
Frequently asked questions
Got questions about transplanting milkweed?
You’re not alone! Here are answers to the most common concerns—so you can relocate your plants like a pro and keep those monarchs happy.
When is the best time to transplant milkweed?
The ideal window is early spring (after the last frost) or early fall (before hard freezes). Avoid transplanting during extreme heat or drought—milkweed is sensitive to stress. If you must move it in summer, do it on a cloudy day and water thoroughly before/after.
How long does it take for milkweed to recover after transplanting?
Most milkweed species bounce back in 2–4 weeks, but give it time! Watch for new growth and avoid fertilizing until you see signs of recovery. If leaves wilt, trim damaged ones and keep soil moist (but not soggy) to speed healing.
Can I transplant milkweed with monarch caterpillars already on it?
Yes, but with caution! If caterpillars are present, move the plant slowly and gently to avoid dislodging eggs or larvae. Replant in a shaded spot temporarily to reduce stress, and monitor the caterpillars daily. They’ll adapt, but avoid transplanting during peak feeding times (late morning/early afternoon).
What if my milkweed looks unhealthy after transplanting?
Yellow leaves, wilting, or stunted growth often signal stress. First, check the roots—if they’re mushy or black, it’s root rot (too much water). If roots are dry or brittle, it’s underwatering. Adjust care, trim dead foliage, and consider a light mulch layer to stabilize soil moisture. Most milkweed recovers with patience!
Are there alternatives to transplanting if my milkweed is in a bad spot?
If relocation isn’t an option, try container gardening—milkweed thrives in pots with good drainage. Or, propagate from cuttings: Snip healthy stems, remove lower leaves, and root them in water or moist soil. Just avoid transplanting if the plant is too large (over 3 feet)—it’s easier to start fresh!
Wrapping up and next steps
Transplanting milkweed isn’t just about moving a plant—it’s about nurturing a vital ecosystem for monarch butterflies and pollinators. With the right timing, tools, and care, you can give your milkweed a thriving new home while supporting biodiversity. 🌱
Ready to take the next step? Start small—whether it’s a single patch or a whole garden bed—and watch your efforts bloom into a butterfly hotspot. Share your progress with fellow gardeners or local conservation groups to inspire even more action!
- Pro tip: Document your transplant journey—future monarchs (and fellow enthusiasts) will thank you! 📸