
Pests and Diseases
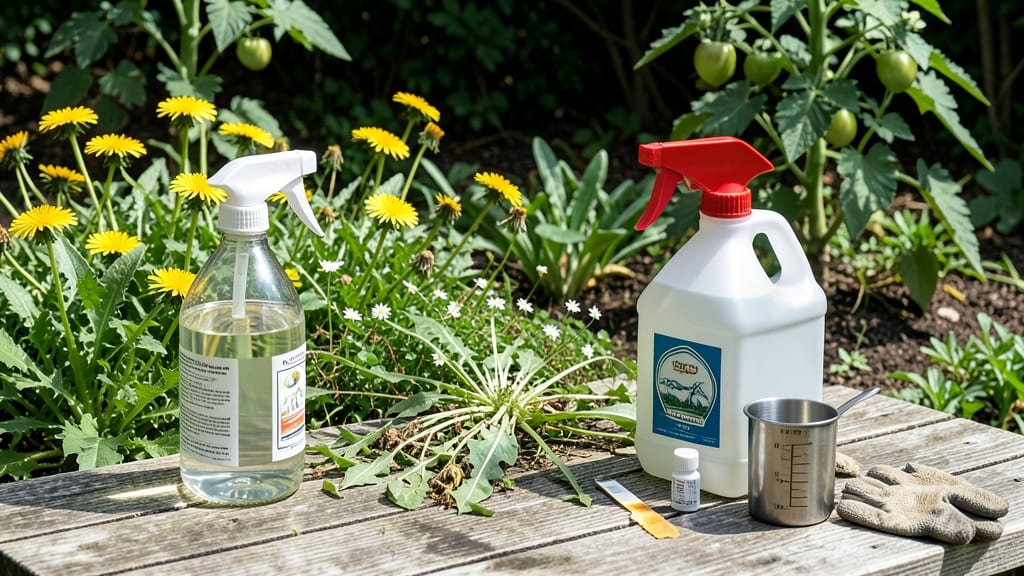
Using vinegar for weed control delivers instant results that even the most stubborn weeds can't survive. 🌱 I’ve used it to clear driveways and garden beds in under 24 hours—no digging, no backbreaking work, just a targeted spray that leaves weeds crispy in minutes. The secret lies in the right concentration, timing, and technique, which I’ll break down so you don’t waste a drop on your prized plants.
This method works best on young, healthy weeds with no seed heads, and it’s especially effective for driveways, sidewalks, and non-edible garden areas. You’ll need household white vinegar (5% acidity), dish soap (just a squirt), and a spray bottle—no fancy equipment required.
The key is precision: vinegar kills indiscriminately, so avoid spraying near desirable plants or grass.
Within hours, you’ll see weeds wilting and turning brown, with roots dying off completely by the next day. The process is fast, chemical-free, and leaves no residue, making it ideal for organic gardeners.
Just be prepared to reapply every 2-4 weeks for persistent weeds, and always test a small area first to check for unintended damage.
For tougher weeds or larger areas, consider combining vinegar with a boiling water treatment or using a vinegar-soapy spray for extra potency. The method isn’t perfect—it won’t kill deep-rooted weeds like dandelions—but for most garden nuisances, it’s a game-changer that saves time and effort. Ready to try it?
📚 In This Guide
- What you need
- Instructions
- Tips and common mistakes
- Wrapping up and next steps
What you need
- ● White vinegar (5% to 20% acetic acid): 1 gallon (3.8 liters) of higher-acid vinegar (20-30%) for stronger results (available at garden centers or online).
- ● OR 1 gallon of household white vinegar (5% acid)—though it may require multiple applications.
- ● Dish soap (unscented, liquid): 1–2 tablespoons (helps the vinegar stick to weeds).
- ● Water: 1 gallon (for diluting higher-acid vinegar if needed).
- ● Spray bottle or pump sprayer: 1–2 quart capacity (for precise application).
- ● Protective gear: Gloves (nitrile or rubber).
- ● Long sleeves/pants (vinegar can irritate skin).
- ● Safety goggles (if spraying near eyes).
- ● Salt: 1–2 cups (boosts effectiveness but may harm soil long-term—use sparingly!).
- ● Citric acid or lemon juice: ½ cup (enhances weed-killing power and reduces vinegar smell).
- ● Plastic or cardboard: To shield nearby plants from accidental spray.
- ● Marking spray (water + food coloring): For labeling treated areas.
Step-by-Step instructions for using vinegar for weed control
Here's how to eliminate weeds permanently with a natural, targeted approach that works in hours.
🌱 Step 1: Choose the Right Vinegar and Prepare Your Solution
Select clear, white vinegar with at least 20% acetic acid—the higher the concentration, the faster it works. I like to use 25-30% vinegar for stubborn weeds, but avoid anything stronger than 30% as it can damage surrounding plants. Mix equal parts vinegar and water in a spray bottle for a gentler, more controlled application.
Add 1 tablespoon of dish soap per gallon of solution. This helps the vinegar cling to weed leaves instead of beading up and running off. Shake well before use—this ensures even coverage. I always label my spray bottle with the date and concentration, especially if I'm using multiple spray bottles for different weed types.
🌿 Step 2: Target Weeds on Sunny, Dry Days
Wait for a bright, sunny day with no rain forecast for 24 hours. Vinegar works best when weeds are actively photosynthesizing—this maximizes absorption. Avoid spraying when plants are wet, as the vinegar will dilute and lose effectiveness. I like to do this in the late morning when dew has evaporated but temperatures are still cool.
Apply the solution only to weeds, avoiding desirable plants. Use a small paintbrush or cotton swab for precise application on weeds growing near flowers or vegetables. For larger areas, a spray bottle with a fine mist nozzle works best. Watch for wilting within 1-2 hours—this confirms the vinegar is working.
💧 Step 3: Apply Directly to Leaves and Reapply as Needed
Spray or brush the vinegar solution until leaves are fully saturated, but avoid overspraying soil or nearby plants. The acetic acid disrupts cellular processes, causing weeds to droop and brown within hours. For deep-rooted weeds like dandelions, you may need 2-3 applications spaced 2-3 days apart to kill the entire plant.
If rain is forecast within 24 hours, reapply immediately after it stops. You'll know it's working when leaves turn yellow and crispy within a day. For stubborn weeds, I sometimes add a teaspoon of salt to the mix—this enhances the burn effect but should only be used sparingly to avoid soil damage.
☀️ Step 4: Monitor and Prevent Regrowth
Check treated areas 24-48 hours later—healthy weeds should be completely brown and crispy. If any green remains, reapply the solution. Vinegar kills weeds by disrupting their cellular structure, but it doesn’t prevent regrowth from roots or seeds. Pull any remaining roots manually to ensure complete removal.
To prevent future weeds, apply a thin layer of mulch (like straw or wood chips) to bare soil. This blocks sunlight, which weeds need to germinate. I also recommend hand-pulling any new sprouts before they establish roots. Over time, you’ll see fewer weeds in treated areas as the soil ecosystem shifts against them.
✂️ Step 5: Maintain Surrounding Plants Safely
Vinegar can harm nearby plants if it drifts, so always apply on calm days and use a shield (like cardboard) to protect desirable plants. For edible gardens, wait at least 2 weeks before harvesting any produce near treated areas. The acetic acid breaks down quickly, but it’s better to be cautious.
If you accidentally spray a desired plant, rinse it immediately with water. Most plants recover, but sensitive varieties like tomatoes or peppers may show temporary leaf burn. I keep a small water spray bottle nearby for quick cleanup—it’s the fastest way to neutralize any accidental contact.
Tips & tricks for perfect vinegar weed control
These targeted strategies will help you maximize effectiveness while protecting your garden—no more wasted vinegar or accidental plant damage.
Acid Concentration Matters: The 25-30% vinegar concentration in Step 1 is ideal for stubborn weeds, but for delicate areas near flowers or vegetables, I recommend diluting to 20% acetic acid. This reduces the burn risk while still delivering results. Always test on a small weed patch first to gauge the reaction—you'll notice faster wilting with higher concentrations, but also greater potential for drift damage.
Timing is Everything: That 24-hour rain-free window in Step 2 isn't just about avoiding dilution—it's about photosynthesis timing. Weeds absorb vinegar most effectively when their stomata (leaf pores) are fully open, which typically happens between 10 AM and 2 PM. I've found late morning applications (after dew evaporation) give the best immediate wilting within those critical 1-2 hours mentioned in the instructions.
Precision Application Technique: For weeds growing near desirable plants, I've switched to using an old makeup brush instead of spray bottles. The brush gives me pinpoint control to apply solution only to weed leaves while completely avoiding nearby plants. This is especially helpful when treating weeds in flower beds or vegetable gardens where accuracy matters most. The brush also helps saturate thick leaves more effectively than misting.
Root Follow-Up Strategy: After the 24-48 hour monitoring period in Step 4, I've developed a two-step root removal method. First, gently loosen the soil around the base with a fork, then grasp the weed at the soil line and pull upward with a twisting motion. This ensures you're removing the entire root system that vinegar alone might miss. For particularly stubborn weeds like dandelions, I'll make a final application to the exposed roots before pulling.
Pro Tips for Using Vinegar For Weed Control
- These targeted strategies will help you maximize effectiveness while protecting your garden—no more wasted vinegar or...
- Acid Concentration Matters: The 25-30% vinegar concentration in Step 1 is ideal for stubborn weeds, but for delicate ...
- Timing is Everything: That 24-hour rain-free window in Step 2 isn't just about avoiding dilution—it's about photosynt...
Frequently asked questions
Got questions about using vinegar for weed control? You’re not alone! Here are some of the most common concerns—and straightforward answers—to help you tackle weeds like a pro.
How long does it take for vinegar to kill weeds completely?
Vinegar kills weeds fast—typically within 24 to 48 hours after application. However, for stubborn roots or deep-seated weeds, you may need to reapply every 1-2 weeks until the area stays weed-free. The key is consistency!
Can I use regular vinegar, or do I need a special kind?
You’ll want household white vinegar (5% acetic acid) for best results. Avoid apple cider or other diluted varieties—they won’t pack enough punch. For tougher weeds, 20-30% horticultural vinegar (available at garden centers) works even faster.
Will vinegar harm my grass or plants nearby?
Vinegar is selective—it targets broadleaf weeds but can damage grass and desirable plants if it drifts. Always spot-treat weeds on sunny days (to minimize evaporation) and avoid spraying windy conditions. For grassy areas, consider a vinegar + salt + dish soap mix applied only to weeds.
What’s the best time of day to apply vinegar for weed control?
Apply vinegar on a clear, sunny day between 10 AM and 4 PM. This ensures the acetic acid stays concentrated and absorbs into the weeds. Avoid early mornings or evenings when dew or humidity can dilute its effectiveness.
What if vinegar doesn’t work? Are there alternatives?
If vinegar falls short, try these natural alternatives:
- Boiling water: Pour directly on weeds (great for driveways and cracks).
- Salt + dish soap: Mix 1 cup salt + 1 gallon water + 1 tbsp soap for a potent spray.
- Corn gluten meal: Prevents weed seeds from germinating (best as a preemptive measure).
- Commercial herbicides: Use only as a last resort—follow label instructions carefully.
For persistent weeds, combine methods (e.g., vinegar + salt) or dig out roots manually.
Can I reuse vinegar after killing weeds?
After treating weeds, dilute the leftover vinegar (1:1 with water) and use it as:
- A natural cleaner for surfaces, tools, or garden pots.
- A plant fertilizer (1:3 vinegar-to-water ratio) for acid-loving plants like blueberries or hydrangeas.
- A weed-prevention spray for garden beds (reapply monthly).
Just avoid reusing vinegar that’s been heavily contaminated with dirt or plant debris.
Wrapping up and next steps
Using vinegar for weed control is a natural, budget-friendly, and effective way to tackle unwanted plants without harsh chemicals. With the right concentration, timing, and technique, you can see results in just 24 hours—and the best part? It’s safe for your garden’s long-term health! 🌱
Ready to give it a try? Start small—test a patch of weeds first, then scale up as you gain confidence. Your garden (and your wallet) will thank you!