
Advice
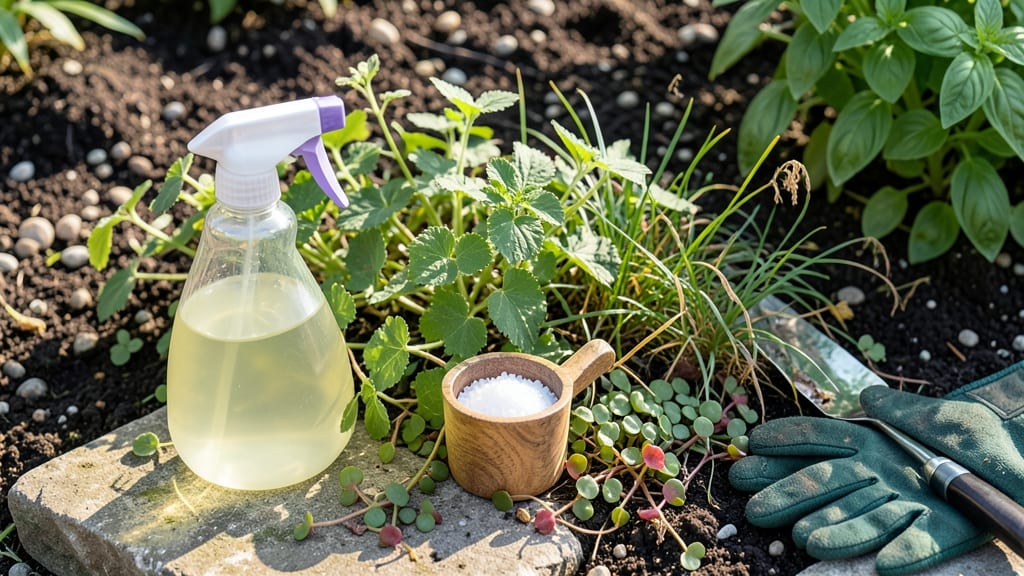
A vinegar, salt, and dish soap weed killer can turn your stubborn weeds into crispy memories by lunchtime—no harsh chemicals, just kitchen scraps and elbow grease. ✨ I’ve used this mix to clear cracked pavement and flower beds without harming the plants I actually want to keep.
The secret lies in the right ratios and timing, plus knowing which weeds respond best (and which won’t budge). This formula works fastest on young, healthy weeds in sunny spots—think driveways, sidewalks, or between patio stones.
You’ll need white vinegar (20% acetic acid or higher), coarse salt (like kosher or sea salt), and a few drops of dish soap to help the solution stick. Mix it in a spray bottle, apply on a dry, wind-free day, and watch the weeds wilt within hours.
The results are dramatic but temporary—this isn’t a long-term solution for your soil’s health. Salt can alter soil chemistry over time, so use it sparingly in garden beds. For delicate plants nearby, shield them with cardboard or a barrier spray.
And if you’re dealing with deep-rooted weeds like dandelions, you might need to repeat the process. For a gentler approach, try spot-treating with boiling water or corn gluten meal in garden areas. This mix is best for non-organic surfaces where you want a fast, chemical-free cleanup.
Ready to give it a try?
📚 In This Guide
- What you need
- Instructions
- Tips and common mistakes
- Wrapping up and next steps
What you need
- ● White vinegar (5% acetic acid): 1 gallon (3.8 liters) – Check the label for acetic acid percentage to ensure effectiveness.
- ● Salt (non-iodized): 1 cup (200g) – Avoid iodized salt; iodine can reduce the solution’s potency.
- ● Dish soap (blue Dawn or similar): 1 tablespoon – Look for a degreasing, non-toxic formula for best results.
- ● Spray bottle: 1 gallon-sized (or a reusable container with a spray nozzle) – Ensure it’s clean and labeled for non-toxic use.
- ○ Gloves (optional but recommended): 1 pair – Protects your hands from irritation, especially if you have sensitive skin.
- ● Water: Enough to fill the spray bottle to the top – Use tap or distilled water for consistency.
- ● Garden sprayer: For larger areas – Saves time if you’re treating a big patch of weeds.
- ● Garden hose with spray nozzle: For rinsing or diluting – Useful if you need to adjust the mixture’s strength.
- ● Markers or labels: To label your spray bottle – Prevents accidental misuse on plants you want to keep!
- ● Sunny day: For application – Weeds absorb the solution best in direct sunlight.
Step-by-Step instructions for mixing and applying vinegar-salt-dish soap weed killer
Here's how I make this powerful, budget-friendly weed killer that works fast and safely on driveways, sidewalks, and between paving stones.
🌱 Step 1: Gather the Right Ingredients and Tools
You'll need 1 gallon white vinegar (the higher the acidity, the better—look for 5% or more), 1 cup coarse salt (like kosher or sea salt), and 1 tablespoon liquid dish soap (the kind that cuts grease, like Dawn). Grab a spray bottle (at least 16 ounces) and a wooden stick or spoon for stirring.
I always mix this in a dedicated spray bottle—never reuse one for plants. The vinegar and salt combo is strong stuff, and you don’t want to accidentally spray your prized petunias. Wear gloves too; salt can irritate skin, and vinegar’s fumes aren’t great for sensitive lungs.
💧 Step 2: Mix the Solution in the Correct Ratio
Pour the 1 gallon of vinegar into the spray bottle first. Then, add the 1 cup of salt, stirring vigorously with the wooden stick until it fully dissolves. If you see undissolved crystals at the bottom, don’t worry—just give it a few extra shakes. Next, add the 1 tablespoon of dish soap and swirl gently to combine.
Here’s the thing—don’t dilute this mix. The salt and vinegar work together to dehydrate weeds, and the dish soap helps the solution stick to the leaves. If you dilute it, you’ll weaken the effect. Shake the bottle before each use—the salt will settle, and you want an even spray every time.
☀️ Step 3: Apply on a Sunny, Windless Day
Wait for a bright, sunny day with no wind. The sun amplifies the vinegar’s effectiveness, and wind can blow the spray onto unwanted areas. Focus on target weeds—this isn’t a selective killer, so avoid spraying near grass, flowers, or other plants you want to keep.
Hold the spray bottle 6-8 inches away from the weeds and apply until the leaves are fully wet, including the undersides. You’ll see the solution bead up—this means it’s working. For stubborn weeds, reapply after 24 hours. You’ll notice wilting within hours, and most weeds will crisp up and die in 3-5 days.
✂️ Step 4: Pull or Rake Dead Weeds
Once the weeds turn brown and brittle (usually 3-7 days after spraying), use a garden fork or weeding tool to pull them out by the roots. If they’re deeply embedded, like dandelions, a strong tug or a quick rake will loosen them. Don’t leave dead weeds lying around—they’ll decompose and may spread seeds.
For weeds in cracks between paving stones, a narrow trowel works best. Scrape out the dead plant material and any remaining soil, then fill the gaps with fresh gravel or sand to prevent regrowth. This step keeps your space looking clean and weed-free for weeks.
🪴 Step 5: Prevent Regrowth with Maintenance
Weeds grow back, especially in sunny, disturbed areas. To keep them at bay, reapply the spray every 2-3 weeks during the growing season (spring through fall). For high-traffic areas like driveways, a layer of mulch or landscape fabric after treatment can block new weeds from sprouting.
I like to spot-treat new weeds as soon as they appear—this keeps the job manageable. If you notice the solution isn’t working as well, your vinegar might be old (it loses potency over time). Always use fresh vinegar for the best results.
Tips & tricks for effective vinegar-salt weed control
These simple but powerful tricks will help you get the most out of your homemade weed killer—without wasting a drop.
Solution Strength: The 1 gallon of white vinegar should be the highest acidity you can find (5% or more). Regular vinegar with lower acidity won't work as effectively. I've tried the cheaper versions, and while they might show some results, they take significantly longer to work—sometimes up to a week instead of the promised 3-5 days. The extra cost is worth it for faster, more reliable weed elimination.
Mixing Technique: When stirring the 1 cup of coarse salt into the vinegar in Step 2, don't just give it a quick shake. Use that wooden stick to really break up any clumps at the bottom. The salt needs to fully dissolve to work properly—undissolved crystals won't help with weed control. If you're in a hurry, you can give the bottle a few extra shakes after letting it sit for 5 minutes to help dissolve any remaining salt.
Application Precision: In Step 3, the 6-8 inch distance from the weeds is crucial. Any closer, and you might miss spots; any farther, and the solution won't stick properly. I like to work in small sections, focusing on one weed at a time. For weeds growing in tight clusters, consider using a smaller spray bottle (like an 8-ounce one) for better control. The dish soap helps the solution cling, but you still need that precise application to get full coverage on all leaf surfaces.
Timing is Everything: The 24-hour reapplication for stubborn weeds is non-negotiable. While most weeds will die in 3-5 days, some tougher varieties like dandelions might need that extra treatment. I've found that reapplying in the early morning gives the solution the full day to work before potential rain or evaporation. Always check the weather forecast—if rain is expected within 24 hours, wait until after the storm to reapply for maximum effectiveness.
Pro Tips for Vinegar Salt And Dish Soap Weed Killer
- These simple but powerful tricks will help you get the most out of your homemade weed killer—without wasting a drop.
- Solution Strength: The 1 gallon of white vinegar should be the highest acidity you can find (5% or more).
- Mixing Technique: When stirring the 1 cup of coarse salt into the vinegar in Step 2, don't just give it a quick shake.
Frequently asked questions
How long does it take to see results?
Most weeds start wilting within 24–48 hours after application, but complete death may take 1–2 weeks, depending on the weed type and weather. Hot, sunny days speed up the process—just avoid applying if rain is forecasted within 24 hours.
Is this safe for pets, kids, or plants I want to keep?
No! This mixture is not pet-safe and can harm desirable plants. Keep pets and children away until fully dry (at least 24 hours). For edible gardens, use a spray shield or apply only on windless days to avoid drift.
Can I reuse the spray if I didn’t finish it?
No, this DIY weed killer loses effectiveness after mixing. Vinegar breaks down quickly, and bacteria from the dish soap can grow. Always make a fresh batch for best results. Store ingredients separately if you plan to reuse them for future applications.
What if the weeds aren’t dying after a few days?
Try these fixes:
- Reapply the solution—some tough weeds (like dandelions) need 2–3 treatments.
- Check the weather: Cold or rainy conditions slow the process.
- Add 1 tsp of Epsom salt for extra potency (but test on a small area first).
Is this cheaper than store-bought weed killers?
Yes! For about $5–$10 per gallon, this DIY mix covers large areas. Store-bought herbicides (like glyphosate) cost $15–$30+ for similar volumes, but they’re faster-acting. For small yards or driveways, this is a budget-friendly win!
Wrapping up and next steps
Ready to reclaim your garden or patio from unwanted weeds?
This simple, vinegar, salt, and dish soap weed killer is a budget-friendly and eco-conscious solution that delivers fast results—often in just a few hours! 🌱 With no harsh chemicals, it’s perfect for those who love a natural approach to yard care.
Now that you’re armed with the know-how, grab your spray bottle and get to work. For best results, reapply as needed and keep an eye on those pesky weeds—you’ve got this! Happy gardening! 🌿