
How To
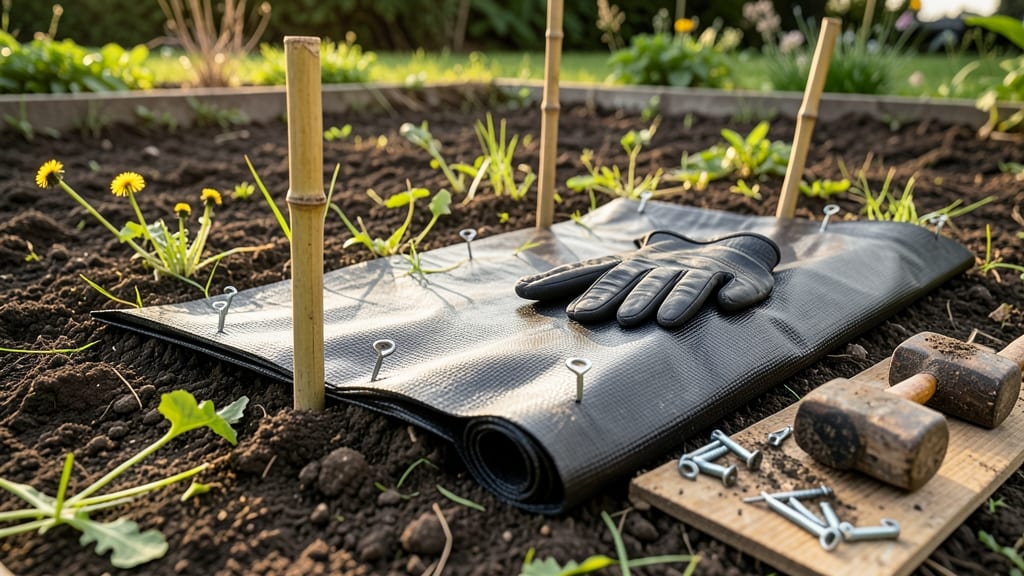
Weed barrier stakes finally gave me the clean garden beds I’d been chasing for years. 🌱 After struggling with hand-pulling and mulch that never lasted, these fabric barriers transformed my vegetable patches and flower beds into weed-free zones with minimal effort.
The stakes hold the fabric in place while letting water and air reach your plants—no more smothered roots or wasted time yanking weeds.
You’ll need durable fabric (landscape cloth works best), sturdy stakes (galvanized metal lasts longest), and a pair of scissors for cutting to size. For a 4-foot-wide bed, I use 12-inch stakes spaced every 3 feet—simple math that keeps the fabric taut and effective.
The fabric blocks sunlight, which weeds need to germinate, while still allowing nutrients to seep through to your plants.
By summer’s end, you’ll have beds so clean you’ll forget what weeds even look like. The fabric stays in place for 3-5 years if installed correctly, and you’ll spend 90% less time weeding—time better spent harvesting or admiring your blooms.
Plus, it works just as well in raised beds, pathways, or even under shrubs where weeds love to creep in.
No more bending over to pull weeds or watching mulch blow away—this system keeps your garden looking sharp with almost no maintenance. Once installed, it’s basically set-and-forget, though I’ll share my top tips to make it last even longer in the next section.
📚 In This Guide
- What you need
- Instructions
- Tips and common mistakes
- Wrapping up and next steps
What you need
- ● Weed barrier fabric: 1 roll of landscape fabric (3–4 ft wide, 50–100 ft long; 30–50 lb test weight for durability). Pro tip: 💡 Opt for UV-stabilized fabric to prevent degradation.
- ● Weed barrier stakes: 10–20 stakes (depending on garden size); 6–12 inches long, ¼–½ inch thick (galvanized or plastic-coated for longevity).
- ○ Optional but helpful: Staple gun + landscape staples (if securing fabric to stakes).
- ● Utility knife or scissors (for trimming fabric).
- ● Measuring tape + chalk (for marking garden beds).
- ● Garden twine or zip ties (to anchor stakes to fabric).
- ● Gloves + knee pads (for comfort!).
Step-by-Step guide to installing weed barrier stakes
Here’s how to create a weed-free garden bed that stays tidy all season—no more pulling weeds by hand.
🪴 Step 1: Mark and Outline Your Garden Bed
Use a garden hose or string to trace the shape of your garden bed on the ground. I like to use wooden stakes and twine for larger areas—this keeps the outline crisp and visible. Measure the length and width of each side, then mark the corners with temporary stakes so you don’t accidentally dig in the wrong spot.
Double-check your measurements before moving forward. A common mistake is rushing this step and ending up with an uneven bed that makes installation messy. Keep the outline at least 12 inches wide to allow for easy access and proper weed suppression.
✂️ Step 2: Cut and Secure the Weed Barrier Fabric
Unroll the weed barrier fabric and cut it to fit the dimensions of your outlined bed, adding an extra 6-8 inches on all sides for overlap. I always use a sharp utility knife for clean edges—ragged cuts let weeds sneak through later. Lay the fabric flat and smooth out any wrinkles before positioning it over the bed.
Secure the fabric in place with U-shaped landscape staples or heavy-duty staples along the edges, driving them through the fabric and into the soil. For extra stability, especially in windy areas, add a second row of staples about 12 inches apart along the perimeter. This prevents the fabric from shifting when you plant.
🌱 Step 3: Create Planting Holes and Install Support Stakes
Use a garden trowel or spade to cut X-shaped slits in the fabric at each planned planting location. The slits should be just large enough to accommodate your plants’ root balls—no bigger, or weeds will invade through the gaps. I like to mark these spots with a pencil before cutting to avoid mistakes.
Drive 4-6 inch galvanized metal stakes into the ground at each corner and along the center of longer bed edges. These stakes anchor the fabric and provide a clean edge for mulch or soil. Space stakes about 3 feet apart for stability. If your bed is wider than 4 feet, add a row of stakes down the middle to prevent sagging.
☀️ Step 4: Cover and Mulch for Long-Term Protection
Once your plants are in place, cover the exposed fabric with a 2-3 inch layer of mulch, leaving only the planting holes uncovered. I prefer organic mulch like shredded bark or straw because it breaks down over time, adding nutrients to the soil. Avoid inorganic mulches like rocks, which can trap heat and harm plant roots.
Check the fabric periodically for tears or gaps, especially after heavy rain or wind. A small repair with landscape tape or additional staples keeps your weed barrier effective for years. This step is what makes the whole system work—without mulch, sunlight will eventually break down the fabric and let weeds through.
Tips & tricks for perfect weed barrier installation
Creating a weed-free garden bed isn't rocket science, but these little-known tricks will make your installation foolproof and long-lasting.
Precision in Step 1: For Step 1, I can't stress enough how important it is to use a level when marking your bed outline. Uneven beds lead to uneven fabric coverage, creating weak spots where weeds can sneak through. A simple carpenter's level or even a straight board with a bubble level will ensure your outline is perfectly straight—this makes cutting and securing the fabric in Step 2 so much easier. Trust me, the extra 5 minutes spent leveling now will save you hours of frustration later when your fabric starts sagging or bunching.
Fabric Handling Secret: When you're ready to cut and secure the weed barrier fabric in Step 2, roll it out on a flat surface like a table or clean driveway before bringing it to the garden. This prevents wrinkles and makes measuring much more accurate. I've learned the hard way that trying to smooth out wrinkles in the fabric once it's on the ground is nearly impossible—especially if you're working with a stiff fabric. Once you've got it perfectly flat, cut it with a sharp utility knife and mark the edges with chalk for precise placement.
Stake Placement Strategy: In Step 3, when installing your 4-6 inch galvanized metal stakes, don't just place them at the corners. I recommend adding stakes at every point where your bed changes direction—think of it like reinforcing the corners of a picture frame. For long straight edges, place stakes every 4 feet instead of the suggested 3 feet if you're using particularly heavy plants or if your garden gets a lot of foot traffic. This extra reinforcement prevents the fabric from stretching over time, which is the #1 reason weed barriers fail after just one growing season.
Mulch Application Hack: For Step 4, I've found that applying your 2-3 inch layer of mulch in two stages works best. First, spread about 1 inch of mulch right after installing the fabric—this helps hold it in place before planting. Then, after your plants are established, add the remaining 1-2 inches of mulch. This two-step approach prevents the mulch from smothering your plants during germination and gives you a chance to adjust the fabric if needed before complete coverage. Plus, it looks more natural and professional when you build up the mulch gradually.
Pro Tips for Weed Barrier Stakes
- Creating a weed-free garden bed isn't rocket science, but these little-known tricks will make your installation foolp...
- Precision in Step 1: For Step 1, I can't stress enough how important it is to use a level when marking your bed outli...
- Fabric Handling Secret: When you're ready to cut and secure the weed barrier fabric in Step 2, roll it out on a flat ...
Frequently asked questions
Got questions about weed barrier stakes?
You’re not alone! Here are answers to the most common concerns—so you can tackle weeds like a pro.
What’s the best time of year to install weed barrier stakes?
Install them before planting season—spring or early fall works best. This gives the barrier time to settle and suppress weeds before they take root. Avoid winter in freezing climates (fabric can stiffen) and extreme heat (which may warp stakes).
How deep should I bury the stakes for maximum weed control?
Bury them 6–12 inches deep, depending on soil type. Loose soil? Aim for 10–12 inches. Compacted soil? 8–10 inches suffices. The deeper the stakes, the harder it is for weeds to push through the fabric barrier. Pro tip: Use a mallet for stubborn spots!
Can I reuse weed barrier stakes in another garden bed?
Yes! If the fabric is still intact and the stakes aren’t bent or rotted, reuse them. Just clear old debris, reposition the barrier, and secure it tightly. Bonus: Add fresh mulch to extend their lifespan.
What’s a good alternative if I don’t have stakes?
Try landscape fabric alone (lap edges 6+ inches) or cardboard/corrugated plastic (soak in water first to prevent decomposition). For heavy-duty control, gravel or rocks work too—but they won’t break down like organic barriers.
Why are weeds still growing through my barrier?
Check for gaps or tears in the fabric, or stakes that aren’t buried deep enough. Weeds may also sprout from under the barrier—add mulch or topsoil to seal edges. Fix it: Patch holes with extra fabric or secure loose spots with landscape staples.
| Quick Fix | When to Use |
|---|---|
| Re-secure stakes with zip ties | Loose or shifting barriers |
| Add 2–3 inches of mulch | Weeds poking through edges |
| Check for buried weed seeds | New sprouts after installation |
Wrapping up and next steps
Transforming your garden into a lush, weed-free paradise is easier than ever with weed barrier stakes! These durable fabric barriers save you time, effort, and frustration—keeping your plants thriving while minimizing maintenance. Whether you're a seasoned gardener or just starting, this solution is a game-changer for tidy, healthy beds.
Ready to take the next step? Grab your stakes, roll out the fabric, and enjoy a garden that’s almost maintenance-free! 🌱✨