
Pests and Diseases
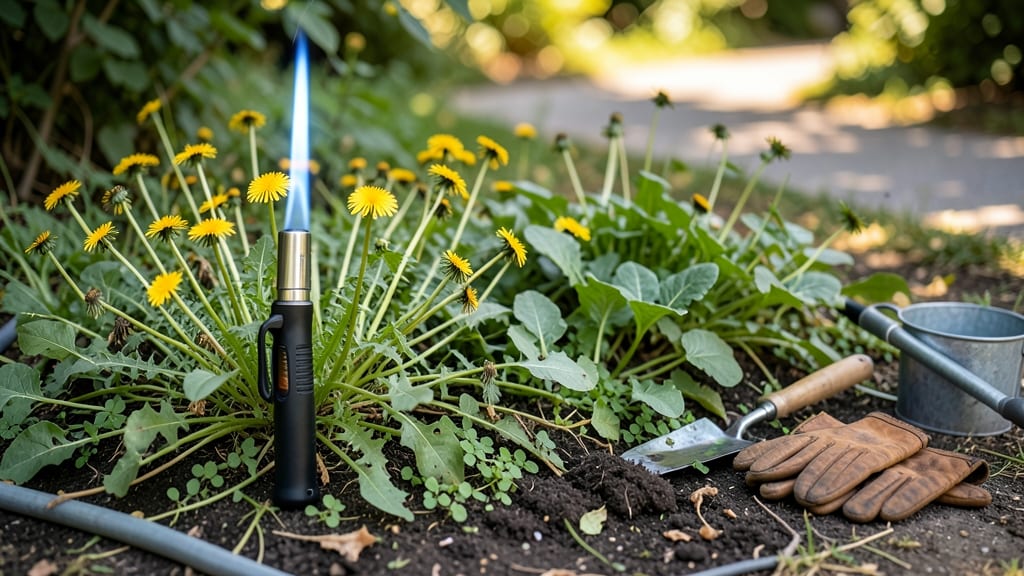
A weed control torch turns stubborn weeds into ash in seconds—no digging, no chemicals, just targeted heat. 🔥 I’ve used mine to clear stubborn dandelions and creeping Charlie from my garden paths, and the difference is night-and-day compared to pulling weeds by hand.
The torch works by delivering a precise burst of flame that sears the weed’s root system, killing it instantly. You’ll need a propane-powered torch (never gasoline—safety first!), a pair of heat-resistant gloves, and a clear day with no wind to avoid spreading embers.
It’s especially effective on young weeds, so tackle them before they go to seed. What you’ll love is how clean the garden looks after just one pass—no more stubborn roots popping back up weeks later. The torch also sanitizes the soil, reducing disease risk for your plants.
For larger areas, you can even mount it on a cart for efficiency. Best of all, it’s chemical-free and works in organic gardens. Just be mindful of nearby plants—keep the flame at least 2 inches away to avoid scorching your flowers or veggies.
📚 In This Guide
- What you need
- Instructions
- Tips and common mistakes
- Wrapping up and next steps
What you need
- ● Weed Control Torch: Propane-powered (recommended for ease of use)
- ● Adjustable flame control (for precision)
- ● Lightweight and ergonomic design (for comfort)
- ● Propane Tank: Standard 1 lb or 20 lb tank (depending on project size)
- ● Regulator included (for consistent fuel flow)
- ● Safety Gear: Closed-toe shoes (to protect feet)
- ● Long sleeves and pants (to shield skin from heat)
- ● Safety goggles (to protect eyes from debris)
- ● Gloves (heat-resistant, like leather or flame-retardant)
- ● Fire Extinguisher: ABC-rated (for versatility)
- ● Easily accessible during use
- ● Water Source: Garden hose or bucket (for emergency cooling)
- ● Extension pole attachment (for hard-to-reach areas)
- ● Wind shield or screen (for breezy conditions)
- ● Weed torch fuel additive (to enhance burn efficiency)
- ● Notebook and pen (to track treatment areas)
Step-by-Step instructions for using a weed control torch
Here's how I torch weeds safely and effectively—no chemicals, no digging, just clean, crisp results.
🔥 Step 1: Prepare the Area and Safety Gear
Clear the area of dry leaves, mulch, or flammable debris first. I always wear safety goggles and closed-toe shoes—flame torches can kick up debris. A long-sleeve shirt protects my arms from accidental sparks, and I keep a fire extinguisher or water source nearby just in case.
Check the wind direction before starting. You want a light breeze (5-10 mph) to carry smoke away from you, but never work in gusty conditions. I test the breeze by holding a tissue—if it moves steadily, it's safe. Avoid torching on dry, windy days, as stray embers can become a fire hazard.
🔥 Step 2: Test the Torch and Adjust Flame
Fill the torch with the recommended propane and ignite it outside and away from flammable materials. Hold the torch 1-2 inches above the weeds and adjust the flame to a blue-tipped, steady flame. A yellow, flickering flame means the propane is dirty or the torch needs cleaning.
I like to test on a small weed first—if the flame rolls smoothly over the leaves without sputtering, it's ready. Too much propane creates a loud roar; too little gives a weak flame that won't kill deep-rooted weeds. Aim for a medium-blue flame that covers about 1-2 inches of weed width at a time.
🌱 Step 3: Torch Weeds Systematically
Start at the outer edges of the area and work inward. I move the torch in slow, overlapping passes, keeping it 1-2 inches above the weeds. The goal is to char the leaves completely—you'll see them turn black and crisp within seconds. Don’t rush; lingering too long can scorch the soil, but a quick pass won’t kill the roots.
Focus on the base of the weed where it meets the soil. This disrupts the plant’s ability to photosynthesize and weakens its root system. For stubborn weeds like dandelions, I make 2-3 passes until the entire plant blackens. Watch for steam rising from the soil—that’s your signal the heat is working.
✂️ Step 4: Follow Up and Monitor
After torching, pull any remaining dead weeds by hand—they’ll come out easily now. I water the area lightly to cool the soil and prevent heat damage to nearby plants. Most weeds die within 24-48 hours, but some may regrow from deep roots, so I repeat the process if needed.
I avoid torching during peak sun hours—midday heat can make the soil too hot for surrounding plants. Instead, I work in the early morning or late afternoon when the air is cooler. Keep an eye on treated areas for 1-2 weeks
After use, turn off the torch and let it cool completely before refilling or storing. I clean the flame tip with a brass brush to remove soot buildup, which ensures a steady flame next time. Store the torch in a dry, ventilated area, away from children and pets. Check the propane tank monthly for leaks—soapy water on the connections will bubble if there’s a leak. Replace the tank if it’s empty or damaged. With proper care, a weed torch lasts for years and saves me hours of digging and pulling weeds by hand.💧 Step 5: Maintain and Store the Torch
Tips & tricks for mastering your weed control torch
Here's what I've learned after torching weeds for years—these tricks will help you get the cleanest results without any surprises.
Safety First: I can't stress this enough—always test the wind direction before starting. I use a tissue test to check for a steady breeze (5-10 mph), and I never work in gusty conditions. Remember, stray embers can travel up to 10 feet in strong winds, so clear a 10-foot safety zone around your work area. I also keep a garden hose nearby as a backup to any fire extinguisher.
The Perfect Flame: That medium-blue flame mentioned in Step 2 is your golden ticket. A yellow flame means incomplete combustion and wasted propane. I adjust the flame by turning the propane valve slightly until I see a clean blue tip. For stubborn weeds, I sometimes increase the flame just enough to see a slight orange tint at the edges—this gives extra heat without creating soot.
Steam is Your Friend: When you see steam rising from the soil during Step 3, that's your confirmation the heat is working. I look for a steady stream of steam that lasts about 5-10 seconds per weed. If you don't see steam, you're not applying enough heat. For thick weeds, I make 2-3 overlapping passes, moving the torch in a slight figure-8 pattern to ensure even coverage.
Timing is Everything: The 24-48 hour window mentioned in Step 4 is when most weeds will die, but I've found that 48 hours works better for deep-rooted weeds like dandelions. If you see new sprouts after 1-2 weeks, that means the roots are still active—just repeat the process on those specific weeds. I always water the area lightly after torching to help cool the soil and prevent heat damage to nearby plants.
Pro Tips for Weed Control Torch
- Here's what I've learned after torching weeds for years—these tricks will help you get the cleanest results without any surprises.
- Safety First: I can't stress this enough—always test the wind direction before starting.
- The Perfect Flame: That medium-blue flame mentioned in Step 2 is your golden ticket.
Frequently asked questions
Got questions about using a weed control torch? You’re not alone! Here are answers to the most common concerns—from safety to effectiveness—to help you torch weeds like a pro.
Is a weed control torch safe for my garden or lawn?
A weed torch is generally safe when used correctly, but it’s not for every situation. Avoid using it near flammable materials (like mulch, dry leaves, or wooden structures) or in windy conditions. Always clear the area of debris and keep a fire extinguisher or water source nearby. For delicate plants or near structures, opt for manual removal or targeted herbicides instead.
What’s the best time of day to use a weed control torch?
The ideal time is early morning or late afternoon when weeds are moist from dew or watering—this makes them more susceptible to the flame. Avoid midday when weeds are dry or the ground is too hot, which can reduce effectiveness or even damage nearby plants. A light misting before use can also boost results!
Will a weed torch kill weeds permanently, or will they grow back?
When used correctly, a weed torch delivers heat deep into the root system, often killing weeds permanently. However, some deep-rooted weeds (like dandelions or bindweed) may regrow. For stubborn weeds, repeat treatments or combine the torch with vinegar-based herbicides for better results.
Can I use a weed torch on my driveway or sidewalk cracks?
Yes! Weed torches are perfect for driveways, sidewalks, and cracks—they’re fast, chemical-free, and leave no residue. Just ensure the surface is clean and free of flammable materials. For large areas, a propane-powered torch with a long nozzle makes the job even easier.
What should I do if the torch doesn’t work on my weeds?
If weeds persist, try these fixes:
- Increase flame intensity—adjust the torch’s heat setting or get closer to the weed.
- Reapply—some weeds need 2-3 treatments, especially if they’re large or woody.
- Use a pre-treatment—lightly water the area or apply a vinegar spray 24 hours before torching to weaken the plants.
- Check for moisture—dry weeds resist heat better; aim for damp conditions.
Wrapping up and next steps
Mastering the weed control torch is your ticket to a lush, weed-free lawn—without harsh chemicals! 🌱 With the right prep, safety measures, and technique, you can torch weeds in seconds while keeping your plants and family safe.
Whether you’re tackling stubborn weeds or maintaining a pristine garden, this flame-based method is efficient and eco-friendly.
Ready to take action? Grab your torch, follow the steps, and reclaim your outdoor space with confidence! For extra tips, check out our FAQs or share your success stories—happy torching! ✨