
Tools
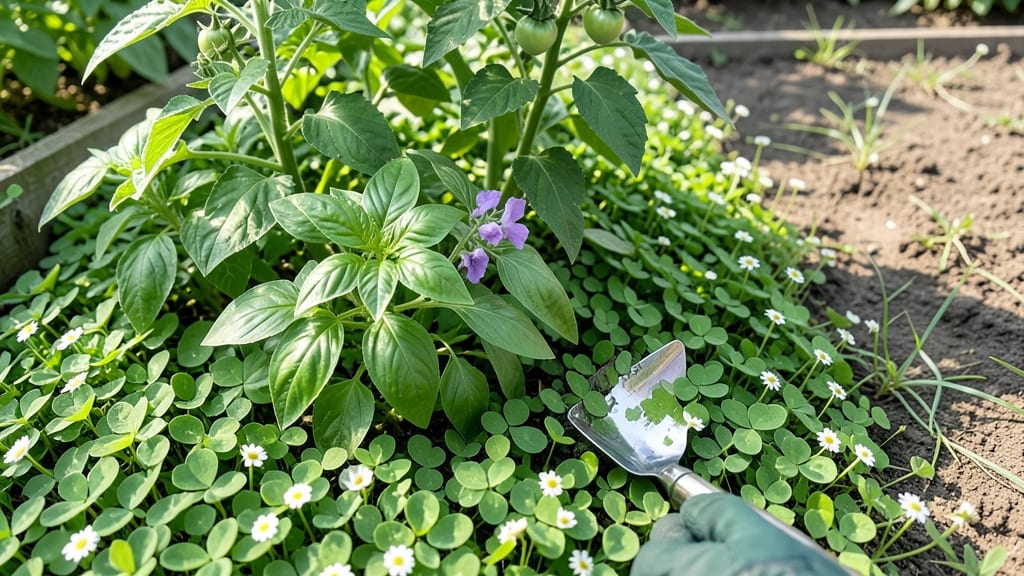
My garden transformed after I swapped plastic mulch for living weed cover—no more pulling weeds or buying expensive landscape fabric. 🌿 The right weed cover doesn’t just block weeds; it feeds your soil, keeps moisture in, and looks intentional, not like a hack.
Whether you choose clover, creeping thyme, or even fast-growing annuals, this method turns a chore into a feature that improves your garden over time.
You’ll need to pick your cover based on sunlight and soil type—some thrive in shade, others need full sun. I started with white Dutch clover in my vegetable beds, and within weeks, the weeds vanished while the soil stayed cool and moist.
The best part? No tilling, no chemicals, just a living layer that gets better each year. Even synthetic options like landscape fabric have their place, but organic covers win for long-term soil health.
By summer’s end, your garden will look tidier with less effort, and your plants will thank you for the rich, weed-free environment. The cover suppresses weeds, prevents erosion, and even adds nitrogen to the soil.
Plus, you can mow or trim it back to keep it neat—no more ugly gaps or bare soil waiting for weeds to take over.
Works in vegetable gardens, flower beds, or even between patio stones. The key is choosing the right cover for your space and giving it time to establish. Once it’s in place, you’ll wonder why you ever pulled weeds by hand.
📚 In This Guide
- What you need
- Instructions
- Tips and common mistakes
- Wrapping up and next steps
What you need
- ● Living mulch seeds: Choose fast-growing, low-maintenance plants like clover, creeping thyme, or buckwheat. Aim for 1–2 lbs of seed per 100 sq ft.
- ○ Organic mulch (optional but helpful): Straw, wood chips, or shredded leaves (2–3 inches thick) to suppress weeds initially while the living mulch establishes.
- ● Compost or fertilizer: A balanced organic fertilizer (e.g., 10-10-10) or compost (1–2 lbs per 100 sq ft) to nourish the living mulch.
- ● Broadcast spreader (for even seed distribution) or a hand-held seeder.
- ● Garden rake (to level soil and mix in compost).
- ● Hoe or cultivator (for light soil prep before planting).
- ● Watering can or hose with a gentle spray nozzle (living mulch needs consistent moisture to thrive).
- ○ Garden twine or stakes (optional)—if marking rows or sections for clarity.
- ● A sunny to partially shaded garden bed (most living mulch thrives in full sun but tolerates light shade).
- ● Well-draining soil (amend with compost if your soil is heavy or clay-like).
- ● Time for patience! Living mulch takes 4–6 weeks to fully establish and smother weeds.
Step-by-Step instructions for creating a natural weed barrier
Here's how I transform bare soil into a weed-free, thriving garden bed—no chemicals needed.
🌱 Step 1: Choose Your Living Mulch Plants
Pick fast-spreading, low-growing plants that tolerate foot traffic. Clover, creeping thyme, or white Dutch clover are my top choices—they form dense mats that block weeds while adding nitrogen to the soil. Avoid aggressive spreaders like mint unless you want them to take over.
For a 4-foot by 8-foot bed, you'll need about 20-30 plants spaced 12 inches apart. Plant them in early spring or late summer when soil is warm but not scorching. Water them in well right after planting so roots establish quickly before summer heat arrives.
🌿 Step 2: Prepare the Soil Properly
Remove existing weeds and debris first—this is critical. I use a hoe to chop up any remaining weed roots, then rake the area smooth. The goal is a clean slate where your living mulch can spread unobstructed. Avoid tilling, which brings buried weed seeds to the surface.
Work in 2-3 inches of compost to feed the new plants. This step is non-negotiable—weak soil means weak ground cover that won't outcompete weeds. Test your soil pH too; most living mulches prefer 6.0-7.0. If your soil is too acidic, add lime before planting.
💧 Step 3: Establish the Ground Cover
Plant your selected ground cover in a staggered pattern—this creates a tighter mat faster. Water deeply every 2-3 days for the first 2 weeks until you see new growth. The soil should stay moist but not soggy; you'll know it's right when water drains through in about 15 minutes.
Once established, these plants will need 1 inch of water per week during dry spells. The key is consistency—skipping watering lets weeds sneak in. I set up a soaker hose on a timer to automate this. Within 4-6 weeks, you should see a dense mat forming that blocks sunlight from reaching weed seeds.
✂️ Step 4: Maintain and Manage Growth
After the first year, your living mulch should be thick enough to suppress weeds naturally. That said, I still check for gaps in spring and fill them with new plants. Trim back any aggressive spreaders that creep into flower beds—this keeps them contained while maintaining their weed-blocking power.
In late fall, cut back any dead growth but leave the stems. This provides winter protection for soil microbes while still blocking weed seeds from germinating. The next spring, your ground cover will bounce back faster than annual mulch ever could.
Tips & tricks for perfect living mulch installation
Here's what nobody tells you about making your living mulch truly effective.
Plant Spacing Secret: The 12-inch spacing in Step 1 might seem generous, but it's crucial for letting your plants spread quickly. I've learned that staggering rows by 6 inches—like bricks in a wall—creates a tighter mat faster. This "herringbone" pattern fills gaps and blocks weeds sooner. Think of it as planting a puzzle where each piece interlocks.
Weed Prevention: In Step 2, when you're removing weeds, don't just pull them—chop their roots with a hoe first. This prevents buried seeds from sprouting later. I cover the area with black plastic for 2 weeks before planting to kill any remaining weed seeds in the soil. It's like giving your living mulch a head start in a weed-free zone.
Watering Wisdom: That 15-minute drainage test in Step 3 is your best friend. If water pools longer than that, you're either overwatering or have poor drainage. Amend the soil with sand or perlite if needed—your plants can't thrive if their roots suffocate. I set a timer for those first two weeks to avoid forgetting, because consistent moisture is everything.
Winter Prep: When you cut back dead growth in late fall (Step 4), leave those stems! They act like little umbrellas protecting soil microbes from freezing. Plus, the stems break down slowly, feeding your plants all winter. It's like giving your living mulch a cozy blanket to grow back stronger in spring.
Pro Tips for Weed Cover For Garden
- Here's what nobody tells you about making your living mulch truly effective.
- Plant Spacing Secret: The 12-inch spacing in Step 1 might seem generous, but it's crucial for letting your plants spread quickly.
- Weed Prevention: In Step 2, when you're removing weeds, don't just pull them—chop their roots with a hoe first.
Frequently asked questions
Got questions about using weed cover for your garden?
You’re not alone! Here are answers to the most common concerns—from timing to troubleshooting—so you can get the most out of your living mulch solution.
What’s the best time of year to install weed cover?
Plant your weed cover in early spring or late summer for optimal results. This gives it time to establish roots before winter or summer stress. Avoid planting in peak heat or cold snaps—aim for mild, moist conditions. If using clover or creeping thyme, spring is ideal; for dense ground covers like Vinca minor, fall works too. Just ensure weeds are minimal before installation!
How long does it take for weed cover to smother weeds?
Most living mulches start suppressing weeds within 4–8 weeks, but full coverage takes 3–6 months. Fast-growing options like microclover or buckwheat (used as a temporary cover) can outcompete weeds in as little as 2 months. Patience is key—thin areas may need spot-weeding until the cover fills in completely.
What if weeds keep popping up through the cover?
If weeds persist, check for gaps in coverage or shallow rooting. Hand-pull stubborn weeds, then thicken the mulch layer (add straw or compost) or overseed bare spots. For aggressive weeds like bindweed, consider a pre-emergent herbicide before planting your cover crop, or use a dense, fast-spreading option like creeping Charlie.
Are there non-living alternatives to weed cover?
Yes! If living mulch isn’t your style, try:
- Cardboard + Mulch: Lay down wet cardboard (no tape/glossy sides) and top with 6+ inches of wood chips or straw.
- Landscape Fabric: Use biodegradable fabric (like coconut coir) for 1–2 years, then replace.
- Gravel/Rocks: Best for high-traffic areas (e.g., pathways) but doesn’t improve soil.
How do I remove weed cover when it’s time to replant?
Most covers can be mowed low (like grass) or smothered with cardboard for 2–4 weeks before planting. For perennials (e.g., clover), simply cut back and till into the soil as free compost. Avoid herbicides—they’ll harm your new plants! If using annual covers like buckwheat, pull or till them in before they seed.
Wrapping up and next steps
Transforming your garden with a weed cover for garden isn’t just about aesthetics—it’s a game-changer for low-maintenance, eco-friendly landscaping! 🌱 By choosing the right living mulch, you’ll smother weeds naturally, boost soil health, and create a thriving ecosystem with minimal effort.
Whether you opt for clover, creeping thyme, or ground-cover perennials, the key is consistency and patience as your green carpet takes root.
Ready to take the next step? Start small—pick a sunny patch or a troublesome weed-prone area—and experiment with a few plants.
Before you know it, your garden will be effortlessly lush, and your weekends will be free for sipping lemonade instead of pulling weeds. Your future self will thank you! 🌿✨