
How To
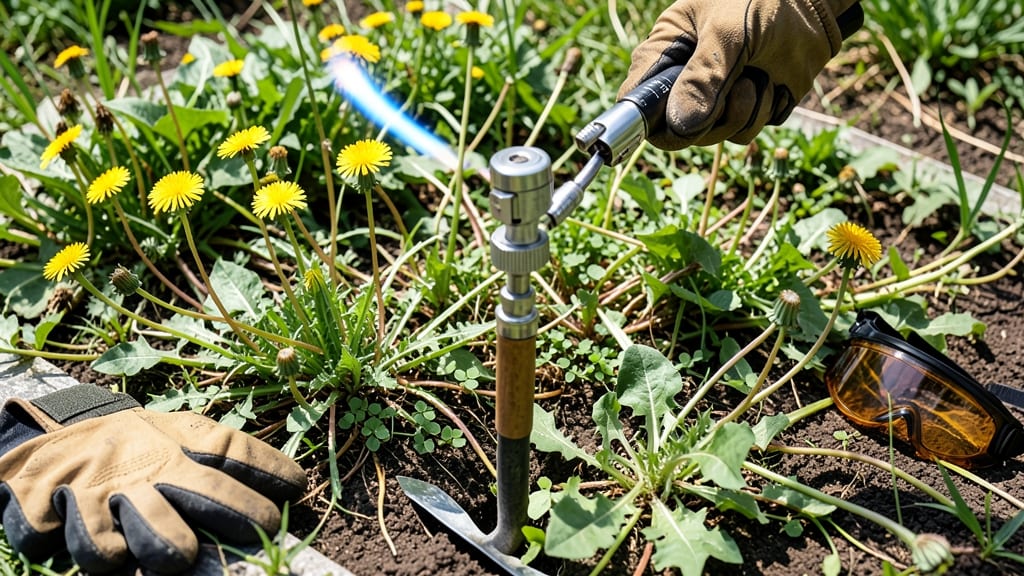
A weed killer propane torch turns stubborn weeds into ash in seconds—no chemicals, no digging, just a quick burst of heat. ✨ I’ve used mine for years to clear driveways, sidewalk cracks, and even between patio stones where weeds seem impossible to pull.
The key is timing: do it on a dry, windless day when weeds are small but established. You’ll need a propane torch (like the Weed Dragon or similar), safety goggles, and a long-sleeve shirt to protect yourself.
Start with a low flame—just enough to see a blue tip—and pass it over weeds in smooth, even strokes. Too high, and you risk burning surrounding plants or pavement; too low, and you’ll waste time.
The results are immediate: weeds shrivel and die within 24 hours, leaving no regrowth. It works best on young weeds but can handle older ones with multiple passes. For stubborn roots, repeat after a week or use a metal scraper to loosen them afterward.
This method beats herbicides for driveways and sidewalks, but avoid using it near wood mulch, plastic, or flammable surfaces. For delicate garden beds, stick to hand-pulling or vinegar sprays instead. Once you master the technique, weeds won’t stand a chance.
📚 In This Guide
- What you need
- Instructions
- Tips and common mistakes
- Wrapping up and next steps
What you need
- ● Propane torch (specifically designed for weed control, e.g., Weed Torch, TorchMaster, or similar brands—ensure it’s 100% propane-compatible with a 1 lb propane tank or larger for extended use).
- ● Propane fuel (1 lb tank minimum; DO NOT use butane or other fuels).
- ● Fire-resistant gloves (heat-resistant leather or heavy-duty fabric, rated for 400°F+).
- ● Safety goggles (ANSI-rated to protect against debris and heat).
- ● Long-sleeve shirt and pants (made of natural fibers like cotton or wool—avoid synthetics!).
- ● Closed-toe shoes (no sandals or open-toed footwear).
- ● Garden hose or water source (with a spray nozzle for emergencies).
- ● Wind shield or barrier (e.g., cardboard, metal sheeting, or a tarp to protect nearby plants from heat).
- ● Trash bag or bucket (for disposing of charred weeds afterward).
- ● Extension pole attachment (for hard-to-reach areas, like between cracks in pavement).
- ● Heat-resistant torch stand (to stabilize the torch during long sessions).
- ● Dust mask (to avoid inhaling smoke or debris).
- ● Garden kneeler or stool (for comfort during extended use).
- ● Thermal spray shield (to protect nearby plants or structures from accidental heat).
How to use a propane torch for weed control
This method delivers fast, targeted results without chemicals—just heat and precision.
🔥 Step 1: Prepare Your Work Area and Safety Gear
Clear the space of flammable debris like dry leaves or mulch within a 3-foot radius—even small embers can ignite unexpected fires. Wear long sleeves, heavy-duty gloves, and safety goggles to protect against heat and flying debris. A fire extinguisher (rated for Class B fires) should be within arm's reach, though proper technique minimizes risk.
I always work on a windless day (morning or evening) to prevent flames from spreading. If you're near structures or dry grass, lay down a wet towel or fire blanket as an extra precaution. The torch's flame can reach 1,500°F, so never point it at anything other than weeds.
🔧 Step 2: Assemble and Test the Propane Torch
Attach the propane tank securely to the torch, following the manufacturer’s instructions for connections. Open the tank valve slowly—a sudden rush can cause leaks. Light the torch in an open area, holding it upright to establish a steady blue flame (never yellow, which indicates incomplete combustion and soot).
Adjust the flame to a 1-2 inch high cone—too large wastes fuel, while too small won’t generate enough heat. Practice on a small patch of weeds first to gauge the torch’s intensity. You’ll notice the weeds blacken instantly when the heat is right; if they just turn brown, the flame isn’t hot enough.
✂️ Step 3: Target Weeds with Precision
Hold the torch 1-2 inches above the weed, moving it in a slow, steady motion (about 1 inch per second). The flame should char the weed to the base—you’ll see the stem collapse or turn black within seconds. Avoid lingering on one spot; prolonged exposure can scorch surrounding soil or damage nearby plants.
For broadleaf weeds like dandelions, focus on the center of the leaf where the stem meets the soil. Grassy weeds (like crabgrass) require a slightly longer pass since their fibrous roots need more heat. Watch for smoke or popping sounds—these indicate the weed’s moisture is vaporizing, a sign the heat is working.
💧 Step 4: Cool and Monitor the Area
After treating a section, douse the area with water to extinguish any lingering embers and cool the soil. This also helps prevent regrowth by sealing the weed’s roots. I use a hose on a gentle setting to avoid disturbing the soil too much—just enough to dampen the surface.
Check for missed spots within 24 hours; new growth may appear where the heat wasn’t applied evenly. Re-treat stubborn weeds immediately, but avoid burning the same area more than once every 2 weeks to prevent soil damage. Overheating can kill beneficial microbes and compact the soil.
☀️ Step 5: Maintain Equipment and Store Safely
After use, turn off the propane tank first, then let the torch cool completely before storing. Wipe down the flame tip with a damp cloth to remove soot, which can clog the nozzle over time. I keep the torch in a ventilated shed or garage, away from direct sunlight or heat sources.
Refill the propane tank only when cool and follow safety guidelines for storage—never leave it in a hot car or near open flames. Check the O-ring seals monthly for wear, as leaks are the most common cause of accidents. With proper care, a torch can last years and handle thousands of weeds efficiently.
Tips & tricks for precision weed torching
Mastering this method means understanding the subtle details that separate effective weed control from potential hazards.
Safety First: The 3-foot clearance and 1,500°F flame temperature aren't just suggestions—they're critical for safety. I've seen too many close calls where people rushed this step. Always double-check for hidden debris like dry grass or mulch that could ignite unexpectedly. The wet towel barrier is especially important near patios or wooden structures, where embers can travel faster than you think.
Flame Calibration: That 1-2 inch flame height in Step 2 is your sweet spot—any taller wastes propane, while anything shorter won't generate enough heat. I recommend testing on a small weed patch first: if the weed just turns brown instead of blackening instantly, your flame needs adjustment. Pro tip: A blue flame means complete combustion (good), while yellow indicates incomplete burning and potential soot buildup that can clog your torch.
Targeting Technique: The 1-inch-per-second speed in Step 3 might seem slow, but it's essential for even heat distribution. For broadleaf weeds like dandelions, focus on the leaf-stem junction where the plant's vascular system is most vulnerable. For grassy weeds, you'll need that slightly longer pass—their fibrous roots require more concentrated heat. Watch for that telltale popping sound when moisture vaporizes; it's your confirmation the heat is working at the right intensity.
Post-Treatment Care: The 24-hour monitoring window in Step 4 is non-negotiable. New growth often appears where the heat wasn't applied evenly, especially in shaded areas. I've found that using a gentle hose setting (not full blast) helps cool the soil without disturbing it too much—just enough to dampen the surface and seal those weed roots. This prevents regrowth while protecting your soil's beneficial microbes.
Pro Tips for Weed Killer Propane Torch
- Mastering this method means understanding the subtle details that separate effective weed control from potential hazards.
- Safety First: The 3-foot clearance and 1,500°F flame temperature aren't just suggestions—they're critical for safety.
- Flame Calibration: That 1-2 inch flame height in Step 2 is your sweet spot—any taller wastes propane, while anything shorter won't generate enough heat.
Frequently asked questions
Got questions about using a weed killer propane torch? You’re not alone! Here are some common concerns and quick answers to help you get the best results—without the guesswork.
Is a propane torch safe for all types of weeds?
A propane torch works best on broadleaf weeds and young grasses, but it’s not ideal for thick, woody plants or deep-rooted weeds like dandelions. For stubborn weeds, spot-treat first, then use herbicide as a follow-up. Always keep the torch 1–2 inches away to avoid burning soil or nearby plants.
How long does it take for weeds to die after torching?
Most weeds wilt within minutes and die within 24–48 hours, but larger weeds may take up to a week. For best results, torch on a dry, windless day when weeds are actively growing. Repeat treatments may be needed for regrowth, especially in shaded or high-traffic areas.
Can I use a propane torch near flammable materials (like mulch or wood)?
No!
Always keep the torch at least 3 feet away from flammable surfaces, dry grass, or structures. Use a metal shield or fire-resistant mulch as a buffer. If winds pick up, stop immediately and extinguish the torch. Safety first—always have water or a fire extinguisher nearby.
What’s a good alternative if I don’t want to use a torch?
If torching feels too intense, try these low-toxicity alternatives:
- Boiling water – Effective for small weeds in cracks or driveways.
- Vinegar + dish soap – A natural herbicide (but less precise than a torch).
- Manual removal – Best for small patches (pull weeds when soil is moist).
- Corn gluten meal – A pre-emergent herbicide for preventing weeds.
Why isn’t my propane torch working as well as expected?
Check these common issues:
- Low propane – Refill or replace the tank if the flame is weak.
- Dirty or clogged nozzle – Clean with a wire or compressed air.
- Wrong distance – Hold the torch too close (burns soil) or too far (ineffective).
- Wet weeds – Torch on dry weeds for best results.
- Wind interference – Use on calm days or add a windscreen.
Wrapping up and next steps
Mastering the weed killer propane torch is your secret weapon for tackling stubborn weeds with ease and precision! 🌱✨ This method saves time, reduces chemical use, and delivers fast, effective results—perfect for gardeners and landscapers alike.
Whether you're clearing a driveway, patio, or garden beds, you now have the confidence to take control of those pesky invaders.
Ready to transform your outdoor space? Grab your torch, follow the safety tips, and get ready to enjoy a weed-free haven in no time! Start small, practice, and soon you’ll be a pro—happy torching! 🔥