
How To
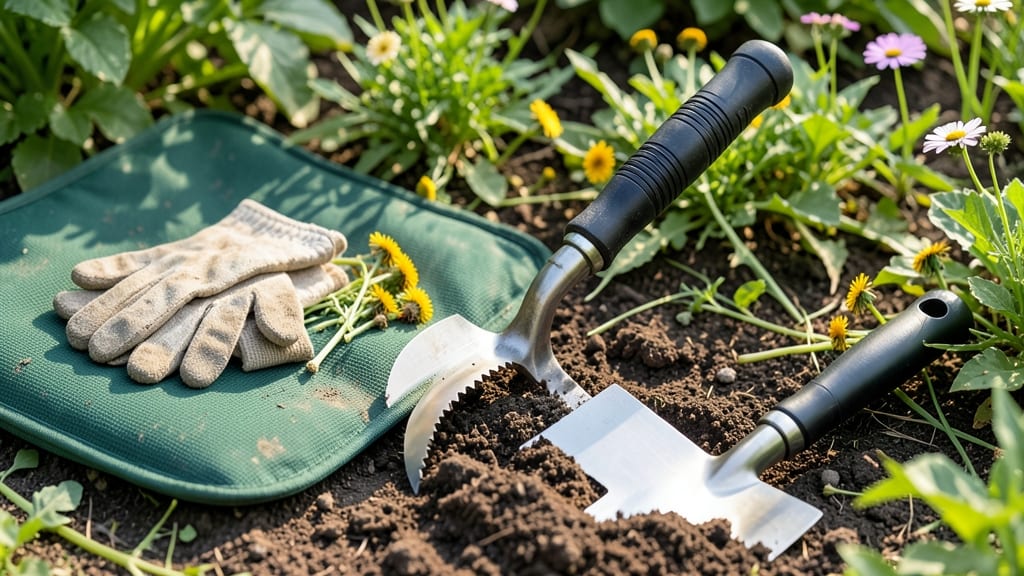
A weed puller tool can turn a peaceful gardening session into a battle of wills—until you meet the twist-and-tug design that makes it effortless. This tool transforms what feels like a losing fight into a quick, satisfying victory, even for deep-rooted weeds like dandelions or creeping Charlie.
I’ve used it to clear my backyard in under an hour, something that used to take all day with my hands and a trowel.
The magic lies in its design: a sharp, curved blade twists into the soil, loosening roots before you tug upward with minimal effort. No more breaking your back or leaving fragments behind to regrow.
It works best in well-drained soil when weeds are actively growing—spring and fall are prime times. For larger areas, pair it with a long-handled version to avoid bending over repeatedly.
You’ll notice the difference immediately: fewer weeds, cleaner edges, and less strain on your back. The tool also doubles as a soil aerator, helping your lawn or garden beds breathe better.
Just keep the blade sharp, and it’ll last for years. No more digging or pulling weeds by hand—this is the game-changer I wish I’d known about years ago.
Whether you’re tackling a small flower bed or a sprawling lawn, this tool fits seamlessly into a sustainable weed management routine. Pair it with mulching and regular inspections, and you’ll spend less time battling weeds and more time enjoying your garden. Here’s how to make the most of it.
📚 In This Guide
- What you need
- Instructions
- Tips and common mistakes
- Wrapping up and next steps
What you need
- ● Weed puller tool (Twist-and-Tug system) – Choose one with a sturdy, ergonomic handle (e.g., 12"–18" length) and a durable, forked or claw-like head for gripping weeds.
- ● Garden gloves – A pair of thick, cut-resistant gloves (e.g., nitrile or leather) to protect your hands from thorns and debris.
- ○ Garden kneeler or pad – Optional but helpful for comfort during long sessions.
- ● Garden twine or burlap sack – For bundling pulled weeds (10–20 ft roll or a small sack).
- ○ Garden shears or pruners – For trimming stubborn roots or thick weeds (optional but handy).
- ● Water spray bottle or hose – To dampen soil before pulling (reduces dust and loosens weeds).
- ● Garden fork or trowel – For loosening compacted soil if weeds are deeply rooted.
- ● Mulch or landscape fabric – To suppress future weed growth in treated areas.
- ● Vinegar or natural herbicide – For spot-treating persistent weeds (use cautiously!).
- ● Sun hat or cap – Because no one wants a sunburn mid-weeding!
- ● Portable stool – For larger gardens or backaches.
How to use a twist-and-tug weed puller tool
This tool turns stubborn weeds into an easy task—no more digging or bending over.
Insert the Blade Between the Weed and Soil
Position the weed puller tool at a 45-degree angle between the weed stem and the soil. The twist-and-tug design relies on leverage, so place the blade as close to the base as possible without cutting into the ground. Push down gently until the blade sits snugly against the weed’s root.
For thick weeds, you may need to wiggle the blade slightly to create a tight fit. If the weed resists, check your angle—too shallow and it won’t grip, too deep and you’ll damage the soil. The goal is to split the root cleanly without tearing the surrounding dirt.
Twist the Tool to Loosen the Root
Grasp the handles firmly and twist the tool clockwise with steady pressure. The twisting motion cuts through the weed’s root system while the blade’s serrated edges create separation from the soil. You’ll feel resistance at first, but once the root breaks free, it should give way smoothly.
Don’t rush this step—twisting too quickly can snap the weed off at the surface, leaving stubborn fragments behind. A slow, controlled twist ensures the entire root comes out in one piece. If the weed feels stuck, twist counterclockwise once before trying again.
Tug Upward to Remove the Weed
Once the root is loosened, shift your grip to the handles and pull upward with a firm, steady motion. The weed should come out effortlessly if you’ve twisted correctly. If it resists, the root may still be partially attached—twist a little more before tugging again.
For especially stubborn weeds, like dandelions or quackgrass, you might need to repeat the twist-and-tug motion 2-3 times. The key is patience—yanking too hard can break the tool or leave the weed’s root system intact, leading to regrowth.
Clean and Store the Tool
After use, wipe the blade with a damp cloth to remove soil and plant debris. A quick rinse under water helps prevent rust, especially if you’ve been working in wet conditions. Store the tool in a dry place, ideally hanging it or placing it in a tool shed to avoid moisture buildup.
If the blade gets dull over time, sharpen it with a file or replace it—keeping the edges sharp makes the tool more effective and reduces the effort needed to pull weeds. A well-maintained weed puller lasts for years and makes garden maintenance a breeze.
Repeat for Stubborn Spots
For dense weed patches, work in small sections to avoid missing any roots. The twist-and-tug method is most effective on individual weeds, but you can use it repeatedly in the same area until the ground is clear. Focus on the largest weeds first—they’ll take the most effort to remove.
If you encounter a weed that won’t budge, don’t force it. Step back, reassess your technique, and try again. Sometimes, a quick pass with a hoe or a few extra twists will make all the difference. With practice, you’ll pull weeds faster and with less strain than ever before.
Tips & tricks for mastering the twist-and-tug weed puller
Real talk: This tool is a game-changer, but only if you use it right. Here's what nobody tells you about getting the most out of your weed puller.
Angle is Everything: That 45-degree angle in Step 1 isn't just a suggestion—it's the secret to success. Too shallow and you'll struggle to grip the root; too deep and you'll damage your soil. I learned this the hard way after tearing up my garden bed trying to force the tool in too aggressively. For thick weeds, wiggle the blade just enough to create a tight fit, then push down gently until you feel resistance. Think of it like fitting a key into a lock—just enough pressure to seat it properly.
Twisting Technique Matters: When you twist clockwise in Step 2, imagine you're unscrewing a stubborn jar lid. Apply steady pressure—don't yank! The serrated edges do the work, but they need time to cut through the root fibers. If you feel resistance, pause and try twisting counterclockwise once before continuing. I've found that stubborn weeds like dandelions often release more easily after this quick counter-twist. And remember, patience pays off—rushing leads to broken roots and regrowth.
Maintenance Makes the Difference: After cleaning your tool in Step 4, take an extra minute to check the blade's sharpness. A dull blade requires more force, which can damage your garden. I keep a small file in my tool shed specifically for this purpose. Regular maintenance not only makes pulling easier but also extends the life of your weed puller. Store it properly—hanging it prevents moisture buildup that leads to rust, and keeping it dry means it'll be ready when you need it next.
Pro Tips for Weed Puller Tool
- Real talk: This tool is a game-changer, but only if you use it right. Here's what nobody tells you about getting the ...
- Angle is Everything: That 45-degree angle in Step 1 isn't just a suggestion—it's the secret to success. Too shallow a...
- Twisting Technique Matters: When you twist clockwise in Step 2, imagine you're unscrewing a stubborn jar lid. Apply s...
Frequently asked questions
Got questions about using a weed puller tool? You’re not alone! Here are some of the most common queries—and their straightforward answers—to help you tackle weeds like a pro.
What’s the best time of year to use a weed puller tool?
The ideal time is when the soil is moist but not soggy—typically early spring or fall. Weeds pull easier when roots are soft, and you avoid disturbing dry, hard-packed soil. Pro tip: Water the area 1–2 days before pulling for best results!
Can I use a weed puller tool on all types of weeds?
Most twist-and-tug tools work well on small to medium weeds (like dandelions, clover, or chickweed). For large, deep-rooted weeds (e.g., thistles or bindweed), pair it with a weed wrench or digger. Avoid using it on delicate plants (like grass) to prevent damage.
How do I clean and store my weed puller tool?
Rinse it with soapy water after use to remove sap/residue, then dry thoroughly to prevent rust. Store it in a dry, shaded spot (like a tool shed) with the blade facing up. Pro tip: Apply a light coat of WD-40 occasionally to keep moving parts smooth!
Is a weed puller tool worth it compared to manual pulling?
While manual pulling works, a weed puller tool saves time and effort—especially for stubborn weeds. It’s a one-time investment that pays off in less back strain and faster results. For small gardens, it’s cost-effective; for large areas, consider a long-handled version.
What do I do if the tool gets stuck in the ground?
Don’t panic! Gently wiggle the tool side-to-side while pulling upward—most jams release this way. If stuck, never force it (you might bend the tool). Instead, use a hose to loosen the soil or dig around it with a trowel. Pro tip: Apply a bit of lubricant to the blade if it’s rusty!
Wrapping up and next steps
Say goodbye to stubborn weeds with ease! A weed puller tool using the twist-and-tug system is your new ally for a pristine yard—no backaches or wasted time. Whether you’re tackling dandelions or crabgrass, this simple, effective method works like magic. 🌱✨
Ready to transform your garden? Grab your tool, follow the steps, and enjoy the satisfaction of a weed-free space in no time. Your green thumb (and back) will thank you!
Next step: Try it this weekend and share your before-and-after results—we’d love to see your progress! 🌿💪