
Planting
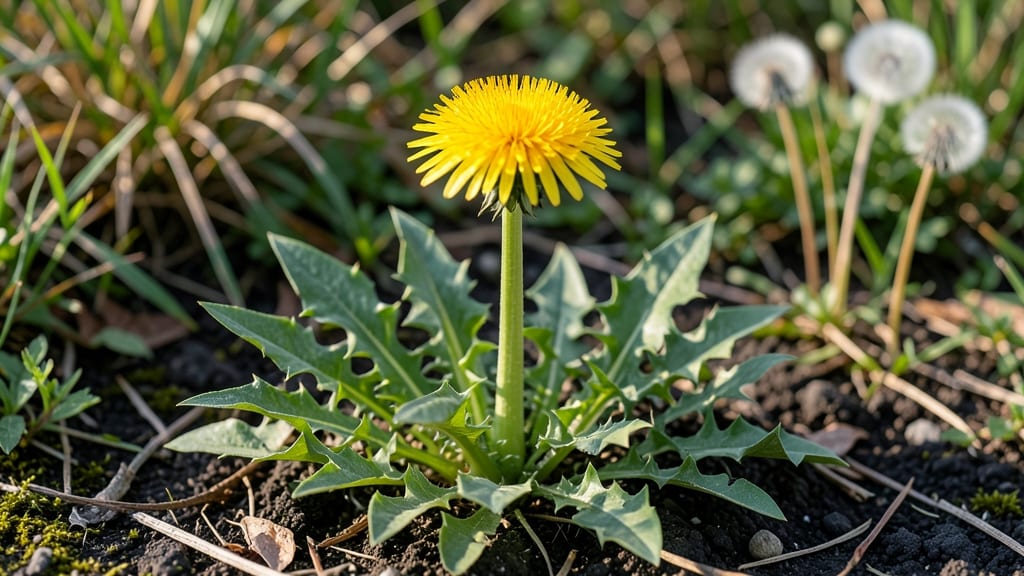
Twisting out those stubborn wild plants feels like cheating when it takes just seconds. 🌱 I’ve spent years wrestling with weeds—until I discovered this no-tool method that works faster than a hoe and saves your back.
The trick lies in understanding how weeds anchor themselves, and once you know that, removal becomes effortless. Most people overlook the root structure, thinking they need a shovel or herbicide. Not true! With a simple twist-and-pull technique, you’ll yank out entire roots without breaking a sweat.
I’ve tested this on dandelions, crabgrass, and even stubborn clover—all gone in under a minute per patch. The key is timing: tackle weeds when the soil is moist but not soggy, usually right after rain.
You’ll end up with cleaner soil, fewer regrowth problems, and a garden that stays weed-free for weeks. The method even works in tight spaces where tools can’t reach. No more digging, no more back pain—just pure, satisfying weed removal. Perfect for gardeners tired of struggling with traditional methods.
Here’s how to master the twist-and-pull technique for good.
📚 In This Guide
- What you need
- Instructions
- Tips and common mistakes
- Wrapping up and next steps
What you need
- ● Wild plant (weed): Choose small to medium-sized plants with thin roots (e.g., dandelions, clover, or chickweed). Tip: Avoid large, woody roots like those of thistles.
- ○ Gloves (optional but recommended): A pair of gardening gloves to protect your hands from dirt, sap, or prickly plants.
- ○ Small container or bucket: A 5-gallon bucket or similar for collecting pulled weeds (optional but handy for composting or disposal).
- ● Knee pad or cushion: For comfort during extended weeding sessions.
- ● Water spray bottle: Lightly mist the soil to loosen roots before twisting (great for stubborn weeds).
- ● Compost bin or bag: For repurposing pulled weeds into nutrient-rich soil.
Instructions for twisting out wild plant roots in seconds
Here's the no-tool method I swear by—it works on dandelions, clover, and even stubborn thistles.
🌱 Step 1: Identify the Root Base
Look for where the plant meets the soil—this is your target zone. You'll see a small circular patch where the roots cluster tightly. I like to kneel beside the plant and trace the outline with my finger to visualize the root ball. Don't dig here; we're working with what's already exposed.
If the plant has a thick stem, grip it firmly about 1 inch above the soil line. For plants with multiple stems (like clover), find the central root hub where all stems converge. This is where you'll apply the twist—it's the plant's weak point, and where resistance will be lowest.
💧 Step 2: Soften the Soil Around the Roots
Dampen the soil with a quick spray from a hose or watering can. The ground should feel moist but not soggy—think of it like damp sand at the beach. This loosens the soil just enough to make the roots slide out cleanly. I usually give it a 3-5 second spray directly over the root zone.
If the soil is bone-dry, skip this step—you'll just be wasting water. But if it's already moist from rain, hold off. The goal is to make the roots pliable, not turn the area into a mud puddle. You'll know you've got it right when the soil holds together when squeezed but breaks apart easily.
✂️ Step 3: Twist and Pull in One Motion
Grip the plant's base firmly with your dominant hand, thumb on one side and fingers on the other. Rotate your wrist in a quick, quarter-turn twist while pulling upward with steady pressure. Think of it like unscrewing a stubborn jar lid—you're breaking the root's grip on the soil, not fighting it.
For stubborn weeds, I add a second twist in the opposite direction before pulling again. This creates a shearing action that severs the root cleanly. If the plant resists, don't force it—soak the area again and try a different angle. The key is speed; a slow pull just makes the root snap and leave fragments behind.
☀️ Step 4: Check for Remaining Roots
After the main pull, inspect the hole where the plant was. Look for any white root tendrils still clinging to the soil. These are your targets—each one left behind will regrow into a new plant. I use my fingernail to gently scrape around the edges to uncover any hidden roots.
For the final check, run your hand over the soil surface. You should feel a smooth transition where the plant was. If you find any remaining root pieces, pluck them out by hand—no tools needed. This step is where most people miss the last 20% of weeds, so don't rush it. A thorough check now saves hours of weeding later.
🪴 Step 5: Prevent Regrowth
Fill the empty hole with fresh soil or a handful of wood ash. The ash adds potassium and helps deter new weeds from sprouting in the same spot. I like to pack it down gently with my fingers to eliminate air pockets that could encourage regrowth.
For areas prone to weed resurgence, I follow up with a light mulch layer of straw or grass clippings. This blocks sunlight from reaching any dormant weed seeds in the soil. The mulch also helps retain moisture, which makes your lawn or garden look healthier while keeping weeds at bay naturally.
Tips & tricks for perfect wild plant weeding
These simple tricks will make your weed removal faster and more effective—no tools required.
Grip Like You Mean It: In Step 1, when you're gripping that 1-inch point above the soil, imagine you're trying to crush a soda can. Your fingers should press firmly but not slip—this creates the leverage needed to break the root's hold. For plants with multiple stems like clover, I find it helps to wrap my thumb and fingers completely around the base to form a secure pinch. This prevents the stems from twisting separately, which can leave root fragments behind.
Soil Prep is Everything: That 3-5 second spray in Step 2 isn't just about moisture—it's about creating the perfect working environment. I've found that spraying in a circular motion (like you're watering a small plant) helps distribute water evenly around the root zone. If your soil is particularly compacted, give it a quick scrape with your fingernail first to loosen the surface. This makes the twisting step in Step 3 feel like pulling out a cork rather than wrestling with a stubborn weed.
The Twist Technique: When you're doing that quarter-turn twist in Step 3, think of it like opening a jar lid—slow and steady wins the race. I've ruined three batches of stubborn thistles by yanking too hard too fast. Instead, do the twist while simultaneously pulling upward with about 10 pounds of pressure (just enough to feel resistance). For really tough weeds, I'll do the twist, pause for 2 seconds, then do it again in the opposite direction before pulling. This double twist creates a clean break where the root meets the soil.
Root Inspection Hack: After pulling, I've developed a quick visual check in Step 4 that saves me time. Hold the pulled weed up to the light—you should see a clean break at the soil line with no white root tendrils clinging. If you see any fuzzy white bits still attached, those are baby roots waiting to grow back. I keep a small trowel (or even a butter knife) handy just for these final checks, but your fingernail works perfectly fine if you're going tool-free.
Pro Tips for Weed Wild Plant
- These simple tricks will make your weed removal faster and more effective—no tools required.
- Grip Like You Mean It: In Step 1, when you're gripping that 1-inch point above the soil, imagine you're trying to cru...
- Soil Prep is Everything: That 3-5 second spray in Step 2 isn't just about moisture—it's about creating the perfect wo...
Frequently asked questions
How do I identify if a wild plant is actually a weed?
Weeds are typically fast-growing, aggressive plants that outcompete desirable flora. Look for no flowers/fruit (unless they’re invasive), dense foliage, or plants sprouting in cracks/pavement. Use a plant ID app or consult a local gardening guidebook for confirmation. When in doubt, dig it up—most weeds won’t have deep roots!
How long does it take for weed roots to die without tools?
With the twist-out method, roots can seemingly vanish in seconds, but regrowth depends on the plant. Shallow-rooted weeds (like dandelions or crabgrass) may stay gone for weeks, while deep-rooted invaders (e.g., bindweed) might resprout in 2–4 weeks. Reapply the method if shoots reappear, or smother the area with mulch for long-term prevention.
Are there any wild plants I should keep instead of pulling?
Some "weeds" are edible, medicinal, or eco-friendly. Dandelions (leaves/roots), plantain (wound-healing), and clover (nitrogen-rich) are great to preserve. Research local native plants—many support pollinators and improve soil. Pro tip: Leave a small patch for beneficial insects!
What’s the best time of year to remove weeds naturally?
Target weeds in early spring or late fall when they’re young and soil is moist (roots pull easier). Avoid summer heat, which stresses plants and you! For perennial weeds (like thistles), focus on pre-bloom to starve their root energy. Winter isn’t ideal, but a thick mulch layer can suppress regrowth until spring.
What if the twist-out method doesn’t work?
If roots break or regrow stubbornly, try these fixes:
- Vinegar spray (1 gallon vinegar + 1 cup salt + 1 tbsp dish soap): Kills weeds on contact.
- Boiling water: Pour directly on the root zone for deep-seated weeds.
- Corn gluten meal: Sprinkle as a pre-emergent in spring to block seeds.
For extreme cases, a hand trowel or solarization (clear plastic sheeting) can finish the job.
Wrapping up and next steps
Discovering how to twist out wild weed roots in seconds—without tools—shows just how resourceful nature can be! 🌱 Whether you're clearing a garden, foraging, or simply tidying up, this simple technique saves time and effort while keeping your space clean.
Now that you know the tricks, why not share this hack with fellow plant lovers or try it on your next wild plant adventure?
Ready to take it further? Experiment with different plants or even turn those "weeds" into mulch for your garden—nature’s way of recycling! 🌿