
Pests
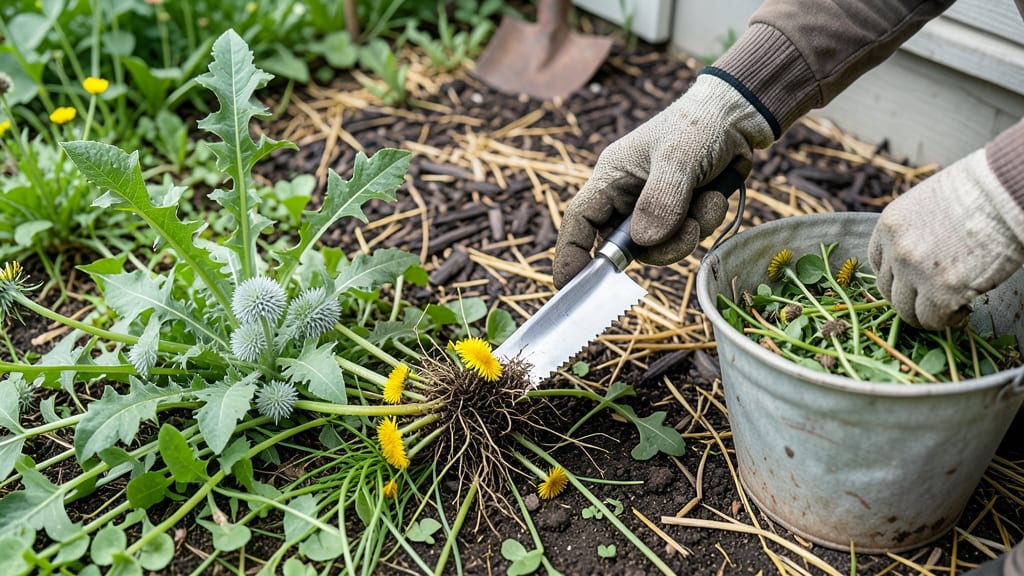
Weeding them out doesn’t have to be a battle—just a 10-minute rescue mission every week. 🌱 I’ve spent years wrestling with stubborn weeds, and I’ve finally cracked the code: a mix of smart timing, the right tools, and a few secret tricks that make weeding feel like a breeze instead of a chore.
The key is working when weeds are young and the soil is moist—early morning on a damp day is ideal. Grab a sturdy handscraper for deep roots and a pair of sharp pruners for cutting at the base.
Organic vinegar spray works wonders for tough patches, but always spot-test first to avoid damaging your plants. By the end of the season, your garden beds will look cleaner and healthier than ever, with fewer weeds returning year after year. The best part?
You’ll save time, reduce waste, and keep your garden thriving without harsh chemicals. This method works for vegetable gardens, flower beds, and even container plants—no matter the size. Let’s get those weeds out for good!
📚 In This Guide
- What you need
- Instructions
- Tips and common mistakes
- Wrapping up and next steps
What you need
- ● Garden Gloves: 1 pair (nitrile-coated for durability, size medium or large)
- ● Hand Weeder Tool: 1 (sturdy, ergonomic grip—look for a D-handle design)
- ● Pruners: 1 pair (bypass pruners, 6-8" blades for precision)
- ● Garden Kneeler/Pad: 1 (foldable, cushioned for comfort)
- ● 5-Gallon Bucket: 1 (for waste disposal or composting)
- ○ Hose with Adjustable Nozzle: 1 (optional but handy for rinsing tools)
- ● Spray Bottle (8 oz): 1 (for vinegar or soapy water—see Tips)
- ● Long-Handled Weeder: 1 (for thick weeds in hard-to-reach spots)
- ● Compost Bin: 1 (if repurposing weeds—avoid diseased plants)
- ● Sunscreen & Hat: 1 each (SPF 30+ for long sessions)
- ● Portable Seat: 1 (foldable stool for larger gardens)
- ● Garden Twine: 1 roll (for tying up stubborn weeds before pulling)
Instructions for weeding them out: garden-bed rescue in minutes
Here’s how I tackle weeds fast—without breaking your back or ruining your plants.
🪴 Step 1: Gather Your Tools for Speed
Start with a sharp hoe or weeding knife—dull tools make work harder, not faster. I grab a small hand trowel for stubborn weeds with deep roots, and a bucket or wheelbarrow to haul them out. A glove (or two) keeps blisters away. Work in short bursts—10-15 minutes at a time—to avoid exhaustion.
If you’re working in a large bed, a long-handled weeding tool lets you stand up and reach deeper without straining. I like to keep a small spray bottle of vinegar and dish soap solution (1 gallon vinegar + 1 tbsp soap) nearby to spot-treat weeds that pop up later. Just don’t spray near your plants—it’ll kill them too.
✂️ Step 2: Tackle Weeds at the Right Time
Weeds are easiest to remove when the soil is moist but not soggy. Water the bed lightly the night before if it’s dry—this loosens the soil and makes pulling weeds effortless. I start at one edge and work my way inward, using the hoe to slice just below the soil line to sever roots. For broadleaf weeds like dandelions, a quick twist removes the whole plant.
Don’t let weeds go to seed! If you spot a weed with a flower or seed head, pull it immediately—those seeds will spread like wildfire. I keep a small trash bag handy to toss weeds into as I go. Pro tip: If you’re weeding on a sunny day, work early in the morning or late afternoon to avoid the midday heat, which can be brutal.
🌱 Step 3: Use the Right Technique for Each Weed Type
Grassy weeds (like crabgrass) need a sharp upward cut with the hoe to slice through their roots. For deep-rooted weeds, like thistles, I use the trowel to dig around the base until I can grip the root and pull it out in one piece. Never leave any part of the root behind—it’ll regrow faster than you can say "garden chores."
If you’re dealing with a thick mat of weeds, like clover or chickweed, I like to use the hoe to chop them down first, then pull the smaller pieces by hand. This saves time and reduces the mess. For weeds growing between plants, like in a vegetable bed, I use the trowel to gently lift the soil and tease the weed out without disturbing the roots of your desired plants.
💧 Step 4: Prevent Future Weeds Without the Hassle
After pulling weeds, I spread a 2-3 inch layer of mulch (straw, wood chips, or shredded leaves) over the bed to block sunlight and slow new weed growth. Mulch also keeps the soil moist, which your plants will thank you for. I avoid plastic mulch—it traps heat and can smother plants if not used carefully.
For stubborn weed hotspots, I’ve found that a thin layer of cardboard or newspaper (covered with mulch) works like a charm. Just make sure to overlap the edges to prevent weeds from sneaking through. Water the mulch lightly to help it settle and blend into the soil. Over time, the mulch breaks down and adds nutrients to your bed—it’s a win-win.
⏰ Step 5: Keep It Up—But Make It Manageable
Weeding isn’t a one-time job—it’s an ongoing process. I set a reminder to check my garden beds every 5-7 days during the growing season. Even 10 minutes of weeding prevents weeds from taking over. I also like to "weed while I feed"—when I’m fertilizing or watering, I take a few extra seconds to pull any new weeds I spot.
If weeds are still overwhelming, consider adding living mulch, like clover or creeping thyme, between plants. These ground covers shade the soil and outcompete weeds naturally. Over time, your garden will need less and less intervention. And remember: the more you weed now, the less you’ll have to do later—trust me, your future self will thank you.
Tips & tricks for speedier garden-bed rescue
A few simple adjustments will make your weeding sessions even more efficient and less exhausting.
Tool Organization: Keep your tools in a portable caddy or bucket so you can move between beds without backtracking. I keep mine near the garden hose too—this way, I can water and weed in one trip. A sharp hoe is non-negotiable; dull tools require more force, which leads to fatigue and missed weeds.
Timing Secret: Those 10-15 minute work bursts I mentioned? Set a timer! It prevents burnout and ensures you don’t skip areas. I also schedule weeding for right after rain—soil is naturally moist, and weeds pull out with minimal effort. The 10 minutes you spend daily keeps weeds from becoming a full-blown battle later.
Spot Treatment Strategy: That vinegar solution (1 gallon vinegar + 1 tbsp soap) is your secret weapon for weeds that sneak back in. Test it on a small area first—some plants are sensitive to vinegar. I apply it to weeds growing near pathways or between pavers where pulling isn’t practical. Reapply every 3-4 days until weeds die back completely.
Mulch Layering: When adding that 2-3 inch layer of mulch, overlap edges by at least 2 inches to block light completely. I use a rake to create a slight trench around plants to prevent mulch from piling against stems, which can cause rot. For new garden beds, I double up on mulch in the first year to establish a weed-free foundation.
Pro Tips for Weeding Them Out
- A few simple adjustments will make your weeding sessions even more efficient and less exhausting.
- Tool Organization: Keep your tools in a portable caddy or bucket so you can move between beds without backtracking. I...
- Timing Secret: Those 10-15 minute work bursts I mentioned? Set a timer! It prevents burnout and ensures you don’t ski...
Frequently asked questions
Got questions about weeding pests out of your garden efficiently?
Here are answers to the most common concerns—so you can tackle the job like a pro!
What’s the fastest way to “weed them out” without chemicals?
Use a mix of manual tools (like a hula hoe or dandelion digger) and organic methods. Pull weeds early (before they seed), smother them with mulch, or try vinegar-based sprays (3% acetic acid + dish soap). For stubborn pests, handpick them at dawn when they’re sluggish.
How often should I “weed them out” for best results?
Check your garden weekly during growing seasons (spring-fall) and biweekly in winter. Weeds grow fast—even 5 minutes daily prevents overcrowding. Pro tip: Set a phone reminder or tie it to your watering routine!
Are there tools I don’t need for this method?
Skip heavy-duty tillers or broad-spectrum herbicides—they disrupt soil health. Avoid metal rakes (they damage roots) and plastic gloves (they degrade). Instead, opt for:
- A sturdy fork for deep roots (like dandelions).
- A weeding knife for precision.
- Knee pads to save your joints!
What if weeds keep coming back after I “weed them out”?
Persistent weeds often mean soil issues—low organic matter or compacted dirt. Boost your garden with:
- Compost or aged manure to improve soil.
- A pre-emergent mulch (like straw or wood chips) to block seeds.
- Plant ground covers (clover, creeping thyme) to outcompete weeds naturally.
Will this method harm my plants or beneficial insects?
Not if done right! Manual removal and mulching protect pollinators. Avoid:
- Vinegar sprays near edibles (they can burn leaves).
- Over-tilling (it kills soil microbes).
Wrapping up and next steps
Transforming your garden from a pest-ridden struggle to a thriving sanctuary is totally doable—and faster than you think! 🌱 By mastering the art of weeding them out with the right tools and techniques, you’ve taken the first big step toward a healthier, happier garden.
The key? Consistency and confidence—now go show those pests who’s boss!
Your next step: Grab your tools, hit the garden, and start reclaiming your space—one bad bug at a time. 🚀 Review your supplies one last time, then dive in with the know-how you’ve gained. Happy gardening!