
Landscaping
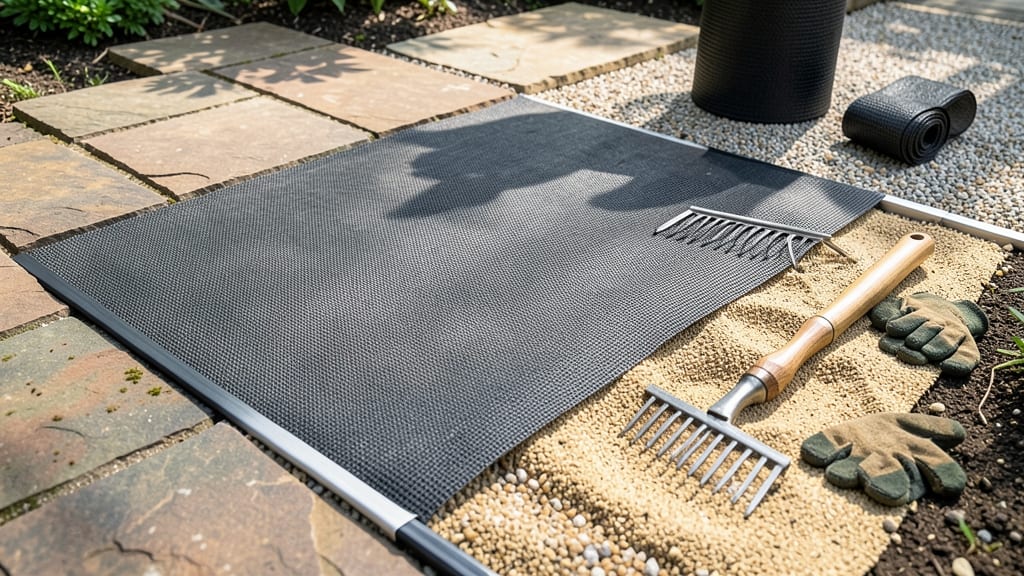
What to put between flagstone to prevent weeds isn’t just about hiding the gaps—it’s about creating a long-term barrier that keeps your pathway weed-free without chemicals. 🌱 I’ve battled this myself, and the right combo of landscape fabric and polished gravel keeps weeds out for years while letting water drain properly. Start with a sturdy landscape fabric (30-inch width works best) laid snugly under the flagstone. Overlap seams by 6 inches to block weeds from sneaking through. Then top it with 3/4-inch polished gravel—enough to cover the fabric completely but not so deep it becomes a tripping hazard. This combo lets rain drain while starving weeds of sunlight. You’ll notice fewer weeds popping up after just two weeks, and the pathway stays clean with minimal effort. The gravel stays in place (unlike mulch), and the fabric prevents roots from creeping up. Plus, it looks sharp—no more patchy, weedy eyesores. Works for driveways, patios, or garden paths—just adjust gravel depth based on foot traffic. Here’s how to do it right the first time.
📚 In This Guide
- What you need
- Instructions
- Tips and common mistakes
- Wrapping up and next steps
What you need
- ● Landscape-locking mulch (e.g., Ecoscape or ProBark): 1–2 bags (coverage varies; ~15–20 sq. ft. per bag for 2" depth). Look for 90%+ bark fiber with a polymer coating.
- ● Gravel or crushed stone: 1–3 bags (polypropylene or quartzite; ½"–1" size for drainage). ~10–15 sq. ft. per bag for 1" depth.
- ○ Landscape fabric (optional but recommended): 1 roll (3–4 ft. wide, heavy-duty woven to block weeds).
- ● Edging material: Metal or plastic edging strips (12–18" tall, cut to fit your flagstone perimeter).
- ● OR gravel-only edging (shovel a 4" trench around flagstone first).
- ● Shovel or spade (for digging and leveling).
- ● Rake (to spread mulch/gravel evenly).
- ● Wheelbarrow (for hauling materials).
- ● Garden trowel or putty knife (to tuck mulch/gravel into gaps).
- ● Level or straightedge (to check for evenness).
- ● Safety gloves & knee pads (trust us, your hands will thank you!).
- ● Hose with spray nozzle (to dampen soil before laying fabric).
- ● Prepped flagstone base: Ensure stones are securely laid and level (no wobbly or uneven areas).
- ● Weed-free soil: Clear existing weeds/grass from gaps before adding fabric or mulch.
- ● Dry weather: Aim to work on a sunny, dry day (mulch/gravel sticks better).
Step-by-step guide for weed-proof flagstone landscaping
Here’s the foolproof method I use to keep weeds out while keeping your flagstone paths looking sharp.
🪴 Step 1: Sweep the Base Clean and Level
Start by sweeping the area between your flagstone slabs thoroughly—remove all dirt, debris, and loose stones. A clean base is critical because any leftover soil will compact over time, creating pockets where weeds can take root. Use a stiff-bristle broom or leaf blower for stubborn debris.
Next, check for uneven spots. Press down firmly on each slab to ensure they’re stable. If any flagstones feel loose, secure them with landscape adhesive or a small amount of sand underneath. Leveling now saves headaches later when weeds find their way into gaps.
💧 Step 2: Apply a Layer of Polymeric Sand
Spread a ¼-inch layer of polymeric sand evenly between the flagstone joints using a small shovel or sand scoop. This sand expands when wet, locking the stones in place while filling gaps completely. Work it into the crevices with a broom or your fingers—don’t skip the edges, as weeds love to creep in there.
Lightly mist the area with water to activate the sand’s binding properties. You’ll see it darken slightly as it begins to set. Wait 10-15 minutes until it’s firm but still workable—this ensures a tight seal that weeds can’t penetrate.
🪴 Step 3: Add a Weed Barrier Fabric
Lay a landscape fabric with a weed-blocking rating (at least 3-ounce weight) over the polymeric sand layer. Cut it to fit snugly between the stones, tucking edges under the flagstone edges to prevent peeking. Overlap seams by 6 inches and secure with landscape staples every 12 inches to keep it in place.
This fabric isn’t just for looks—it blocks sunlight from reaching weed seeds below while allowing water to drain. Press it down firmly, especially around corners, where weeds often find weak spots. If you’re working in a high-traffic area, opt for a heavier fabric to prevent shifting over time.
☀️ Step 4: Top With Decorative Gravel or Mulch
Choose coarse gravel, crushed stone, or rubber mulch (at least ½-inch in diameter) to cover the fabric. Spread it evenly, pressing lightly to fill gaps completely—this prevents weeds from pushing through. For a polished look, use a metal edging tool to create clean lines along the flagstone edges.
Avoid fine mulch or wood chips, as they compact over time and leave room for weeds. Instead, opt for materials that stay loose and allow water to drain. Replenish the top layer annually to maintain the weed-blocking effect—this is the easiest part of the maintenance routine.
✂️ Step 5: Maintain with Regular Inspections
Check your flagstone joints every 2-3 months for signs of weed sprouts or fabric shifts. Pull any weeds immediately—they’re easier to remove when small. If gaps appear, add more gravel or sand to fill them. A quick sweep with a broom keeps everything tidy and prevents buildup.
After heavy rain, inspect for erosion or fabric exposure. If the fabric shows through, add a fresh layer of gravel to restore the barrier. This step keeps your hard work looking fresh for years—trust me, it’s worth the effort to avoid a weed takeover.
Tips & tricks for weed-proof flagstone landscaping
These practical tips will help you avoid common pitfalls and get long-lasting results with your flagstone installation.
Edge Treatment: Pay extra attention to the edges of your flagstone path where weeds often find their way in. Use a metal edging tool to create a clean, slightly downward slope along the edges—this helps water drain away from the joints and discourages weed growth. I’ve seen weeds creep in along edges more than anywhere else, so take that extra 5 minutes to seal them properly.
Polymeric Sand Activation: When you’re waiting those 10-15 minutes for the polymeric sand to set, use this time wisely. Keep a spray bottle handy to give it a light mist if it starts drying out too quickly. The sand needs just enough moisture to expand properly—think of it like baking a cake where you don’t want it to dry out before it’s done. Too dry, and you’ll get gaps; too wet, and it might shift.
Fabric Installation: Don’t be tempted to skip tucking the landscape fabric under the flagstone edges—this is where weeds often get their foothold. Use a small putty knife or your fingers to press the fabric firmly against the stone edges, creating a barrier that weeds can’t penetrate. I’ve seen too many installations where this step was rushed, leading to weed problems within months.
Maintenance Shortcut: Keep a small bag of your chosen gravel or mulch in your shed for quick touch-ups. When you’re doing your regular every 2-3 months inspections, you’ll often find just a few spots that need a little extra material. Having it on hand means you can fix small issues immediately rather than waiting for a full repair job.
Pro Tips for What To Put Between Flagstone To Prevent Weeds
- These practical tips will help you avoid common pitfalls and get long-lasting results with your flagstone installation.
- Edge Treatment: Pay extra attention to the edges of your flagstone path where weeds often find their way in. Use a me...
- Polymeric Sand Activation: When you’re waiting those 10-15 minutes for the polymeric sand to set, use this time wisel...
Frequently asked questions
about preventing weeds between flagstone can save you time and frustration. Here are answers to the most common questions—so you can get back to enjoying your beautiful outdoor space!What’s the best time of year to install weed barriers under flagstone?
The ideal time is early spring or fall when weeds are less aggressive. Avoid installing in peak summer heat, as it can dry out the soil too quickly, making it harder for the barrier to settle properly. If you must install in summer, water the area well beforehand and keep it moist for a few days.
Is landscape fabric alone enough to block weeds long-term?
While landscape fabric helps, it’s not foolproof. Weeds can still sprout along edges or through tears over time. For lasting results, pair it with a 1-2 inch layer of mulch or gravel on top. This combo smothers weeds and adds a polished finish to your flagstone.
Can I reuse old mulch or gravel from my driveway?
Reusing clean, weed-free gravel or crushed stone is fine, but avoid mulch with seeds or organic debris. Rinse gravel thoroughly to remove dirt, and sift mulch to eliminate hidden weed roots. Fresh materials (like Landscape-Locking Mulch) are ideal for a weed-free start.
Why are weeds still growing through my flagstone after I installed a barrier?
Weeds might sneak through if:
- The fabric wasn’t fully overlapped (leave 6+ inches of overlap at seams).
- Gaps exist between stones (use polyethylene edging or sand to fill gaps).
- Organic matter (like leaves) got trapped under the barrier (remove debris before installing).
What tools do I need to maintain weed-free flagstone long-term?
Keep a few essentials handy:
- Weeding tool (for stubborn sprouts).
- Hose with a spray nozzle (to rinse away debris).
- Stiff brush (to clear dirt from between stones).
- Seasonal check (inspect edges and seams every 3–6 months).
Wrapping up and next steps
Choosing the right barrier between your flagstone can save you hours of weeding—and keep your patio or pathway looking sharp!
Whether you opt for landscape-locking fabric paired with gravel or a solid mulch layer, the key is consistency and proper installation. 🌱 With the right materials and a little effort, you’ll enjoy a low-maintenance, weed-free outdoor space for years to come.
Ready to transform your space? Grab your supplies, roll up your sleeves, and get started—your future self (and your lawnmower) will thank you! 🔨 Need a refresher? Revisit our step-by-step guide before diving in!