
Landscaping
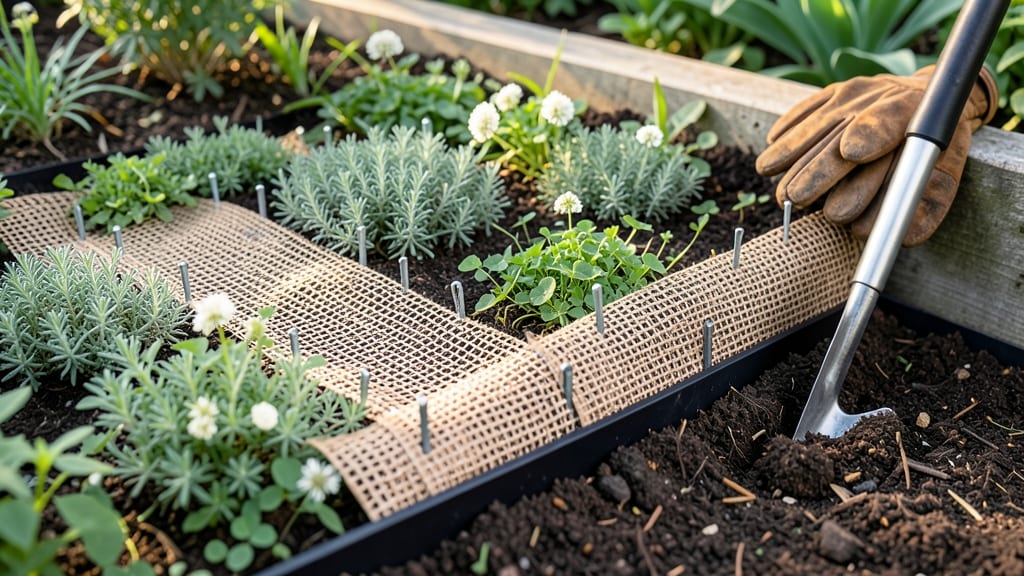
A woven fabric weed barrier stops weeds dead in their tracks—no more pulling those stubborn sprouts every week. 🌱 I’ve used plastic barriers before, but fabric lasts longer, lets air and water through, and actually improves soil over time.
The key is choosing the right type (landscape fabric vs. woven root block) and installing it properly so it doesn’t shift or decompose too fast.
You’ll need a sturdy fabric rated for 3-5 years (check the label), scissors, landscape staples, and a layer of mulch or soil on top.
The trick is overlapping seams by 6 inches and securing edges with U-shaped staples every 12 inches—this keeps it from blowing away or letting weeds sneak through. For vegetable beds, leave 4-inch holes around plants to avoid suffocating roots.
What you get is a weed-free zone that stays cool in summer and retains moisture better than bare soil. My flower beds look neater for years, and I spend half the time weeding.
The fabric also breaks down slowly, adding organic matter to the soil—unlike plastic, which just sits there forever.
Works great under mulch, around trees, or in raised beds. Just avoid using it under heavy mulch layers (like 4+ inches of wood chips), or it can decompose faster. For long-term gardens, this is the foolproof way to cut weeds without chemicals.
📚 In This Guide
- What you need
- Instructions
- Tips and common mistakes
- Wrapping up and next steps
What you need
- ● Woven fabric weed barrier: 4–6 ft wide rolls (length depends on garden size; pro tip: 🌡️ opt for UV-stabilized, biodegradable options like coconut coir or jute for long-term performance).
- ● Landscape fabric staples: 1 lb box (galvanized or stainless steel for rust resistance).
- ● Landscape pins or U-shaped staples: 50–100 pieces (for securing edges).
- ● Soil or mulch: 2–3 cubic yards (to cover the barrier after installation).
- ● Utility knife or scissors: For cutting fabric to size.
- ● Measuring tape: 25 ft roll (precision is key!).
- ● Garden rake: For smoothing soil before laying the barrier.
- ● Gloves: Heavy-duty work gloves (to protect your hands from prickly plants).
- ● Cleared garden bed: Remove existing weeds, rocks, and debris (💡 pro tip: use a broadfork to loosen soil without tilling!).
- ● Sunny or partially shaded area: Woven barriers work best where weeds thrive (full sun = extra vigilance!).
- ● Time commitment: 2–4 hours for average-sized beds (depends on prep work).
- ● Edging material (plastic, metal, or stone) to keep fabric in place.
- ● Compost or organic mulch for added soil health.
- ● Watering can or hose for settling soil post-install.
How to install a woven fabric weed barrier for permanent weed control
This method keeps weeds out for years while improving soil health—no plastic to degrade or replace.
🪴 Step 1: Prepare the Garden Bed
Clear all existing weeds and debris from the area using a garden fork or hoe. Work the soil to a depth of 6-8 inches to loosen compacted layers. I like to add a 1-inch layer of compost here—it improves drainage and gives beneficial microbes a head start.
Rake the surface smooth, removing any remaining rocks or roots larger than ½ inch. The goal is an even, weed-free base. If you're working in an established bed, consider a pre-emergent herbicide spray 10-14 days before installation to kill any dormant weed seeds.
🌱 Step 2: Lay the Fabric Barrier
Unroll the woven fabric weed barrier over the prepared bed, allowing 6-12 inches of overlap at edges and seams. The fabric should extend 2-3 inches beyond the planting area to prevent weeds from creeping underneath. For larger areas, overlap sections by 6 inches and secure with landscape staples.
Smooth out wrinkles as you go—fabric bunches create gaps where weeds can sprout. I like to use a garden roller or even a 2x4 board to press it firmly against the soil. This ensures full contact with the ground, blocking light to weed seeds below.
✂️ Step 3: Secure the Edges and Create Planting Holes
Fold the excess fabric at the edges downward 1-2 inches and weigh it with landscape rocks or bricks. For permanent installations, use galvanized staples to anchor the fabric along borders. Cut 3-4 inch diameter holes in the fabric where you'll plant—just large enough for roots but small enough to block weeds.
Here's the thing—don't cut holes for every plant upfront. Instead, make them as you plant. This prevents light from reaching weed seeds through unused holes. For perennials, make holes slightly larger than the root ball to allow room for growth.
💧 Step 4: Plant and Mulch for Long-Term Success
Place plants directly into the cut holes, ensuring the root ball sits just below the fabric surface. Backfill with native soil, pressing gently to eliminate air pockets. Water thoroughly to settle the soil and help roots establish contact with the barrier.
Apply 2-3 inches of organic mulch (like wood chips or straw) over the fabric. This serves two purposes: it blocks additional light to weed seeds and regulates soil temperature. Check mulch levels annually—top off as needed to maintain coverage.
☀️ Step 5: Maintain and Monitor
Weeds may still appear along edges or through gaps in the first 6-12 months. Pull these immediately—they'll be easier to remove before they establish deep roots. Avoid using string trimmers near edges, as they can tear the fabric over time.
Every 2-3 years, lift a corner of the fabric to check for weed seed buildup. If you see excessive organic matter accumulating, lightly rake it away and replace the mulch. The woven fabric itself will last 10+ years—far longer than plastic alternatives.
Tips & tricks for perfect woven fabric weed barrier installation
These practical insights will help you maximize the lifespan and effectiveness of your weed-blocking system.
Soil Preparation Secret: In Step 1, when working the soil to a depth of 6-8 inches, consider adding a thin layer of coarse sand if your soil is particularly dense or clay-heavy. This improves drainage and prevents water pooling underneath the fabric, which can create anaerobic conditions that weaken plant roots over time. The 1-inch compost layer you add afterward will still work its magic on soil health while the sand creates the right structural foundation.
Fabric Overlap Strategy: The 6-12 inch overlap in Step 2 isn't just about coverage—it's about creating a continuous light-blocking barrier. For particularly windy areas, consider doubling the overlap to 18 inches along exposed edges. I've found that using a staple gun with galvanized staples every 12 inches along seams prevents fabric shifting, which is especially important if you're installing in a sloped garden bed where erosion could be an issue.
Planting Hole Precision: When creating those 3-4 inch diameter holes in Step 3, use a sharp utility knife rather than scissors to cut clean edges. The key is making holes just large enough for roots but small enough to block weeds—any larger than 4 inches risks letting light through. For container plants, you can cut slightly larger holes (up to 5 inches) since the fabric will naturally press against the pot's sides, creating an effective seal.
Mulch Maintenance Insight: The 2-3 inches of mulch in Step 4 serves as your first line of defense against weeds, but it also needs strategic placement. Apply mulch directly over the fabric, not against the plant stems, to prevent moisture buildup that could rot stems. Every 2-3 years when you check for weed seed buildup, consider replacing half the mulch with fresh material to maintain its weed-blocking effectiveness while preventing compaction.
Pro Tips for Woven Fabric Weed Barrier
- These practical insights will help you maximize the lifespan and effectiveness of your weed-blocking system.
- Soil Preparation Secret: In Step 1, when working the soil to a depth of 6-8 inches, consider adding a thin layer of c...
- Fabric Overlap Strategy: The 6-12 inch overlap in Step 2 isn't just about coverage—it's about creating a continuous l...
Frequently asked questions
Got questions about woven fabric weed barriers?
You’re not alone! Here are answers to the most common ones to help you make the best choice for your landscaping project.
How long does a woven fabric weed barrier last compared to plastic?
A high-quality woven fabric weed barrier can last 10–15 years or longer when properly installed, outperforming plastic options that degrade in 3–7 years due to UV exposure. Fabric resists tearing and allows water/air flow, while plastic often cracks or breaks down.
When is the best time to install a woven fabric weed barrier?
The ideal time is early spring or fall when soil is workable but not frozen. Avoid extreme heat—installing in summer can stress plants or dry out the fabric. For new beds, lay it before planting to prevent weed seeds from settling beneath it.
Can I reuse or remove a worn-out woven fabric weed barrier?
Yes! Unlike plastic, woven fabric biodegrades naturally over time (5–10 years), so you can compost it or till it into garden beds. If still intact but worn, cut out damaged sections and patch with new fabric. Avoid burning—it releases toxins.
What’s the difference between woven fabric and landscape fabric for weed control?
Woven fabric has larger, stable holes (1/4"–1/2") that block weeds while allowing roots to penetrate, unlike non-woven landscape fabric, which clogs with soil and suffocates plants. Woven barriers also resist tearing and last longer under foot traffic.
Do I need to secure the edges of the woven barrier to prevent weeds from growing around it?
Absolutely!
Bury edges 6–12 inches deep or weigh them down with rocks/mulch to seal gaps. Weeds exploit even small openings. For slopes, use landscape staples or edging to keep it in place. A secure edge = 90% fewer weeds.
Pro Tip:
For extra durability, choose a UV-stabilized woven fabric (like coir or polypropylene) and pair it with 3–4 inches of mulch on top. This combo blocks light, retains moisture, and keeps weeds at bay for years!
Wrapping up and next steps
Investing in a woven fabric weed barrier is a game-changer for any landscaper or gardener looking for a durable, eco-friendly, and effective solution to suppress weeds while improving soil health.
Unlike plastic alternatives, these barriers break down naturally, reduce maintenance, and even enhance root development—making them a win-win for your garden’s long-term success. 🌱
Ready to transform your garden? Start by measuring your space, choosing the right thickness for your needs, and laying your barrier with confidence. Your weed-free oasis is just one step away!