
Landscaping
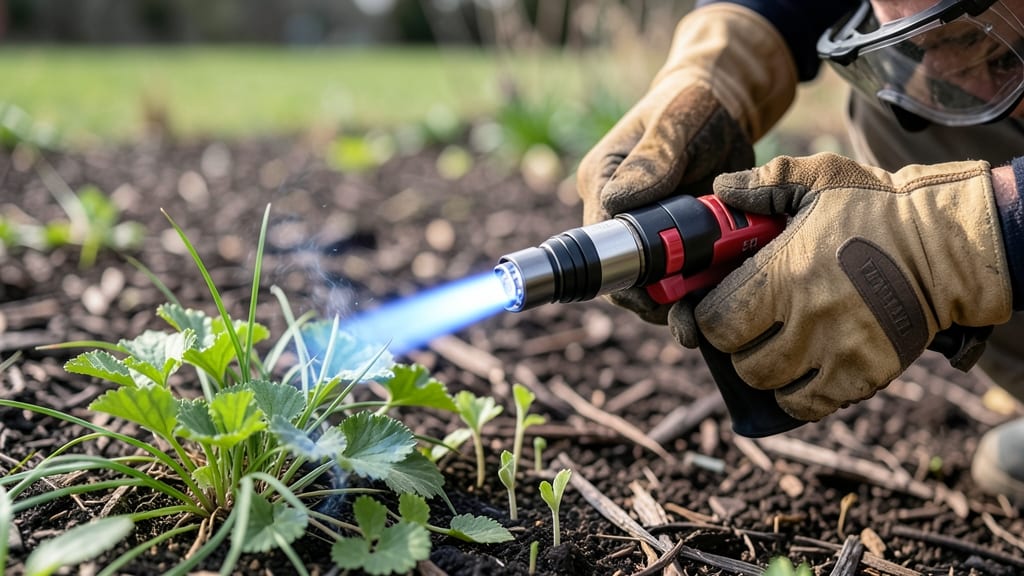
A yard torch for weeds means no more backbreaking digging or chemical residue. 🔥 I swapped my old herbicide spray for a propane torch last spring, and weeds haven't stood a chance since—no tilling, no waiting, just instant results on my stubborn creeping Charlie patches.
The torch works by delivering a precise burst of flame that sears weed roots without harming surrounding soil or plants (when used correctly). It's especially effective on young weeds or those in cracks between pavers, where herbicides can't reach.
My 15-minute torch sessions now replace hours of weeding, and the results last 2-3 weeks between treatments. You'll see immediate blackened patches where weeds once thrived, with no regrowth for days afterward.
The heat kills weeds at the root while leaving the soil structure intact—perfect for lawns, garden beds, and even driveway cracks. Just be ready to work when conditions are dry and wind is calm. This method beats herbicides for spot treatment and manual pulling for speed.
The torch is chemical-free, reusable, and works on any weed type—just avoid using it near flammable materials or on damp plants. Let's get those weeds gone for good!
📚 In This Guide
- What you need
- Instructions
- Tips and common mistakes
- Wrapping up and next steps
What you need
- ● Propane-powered yard torch (weed burner) – Choose a commercial-grade model (e.g., Weed Dragon, Torch-In-A-Box, or similar) with a 1-2 lb propane tank and adjustable flame control.
- ● Propane tank (1 lb or larger) – Ensure it’s filled to 80-90% capacity for optimal performance and safety.
- ● Fire-resistant gloves – Look for heat-resistant leather or Kevlar to protect your hands from burns.
- ● Safety goggles – ANSI-rated goggles shield your eyes from debris and flame.
- ● Long-sleeve flame-resistant clothing – Cotton or wool (avoid synthetic fabrics like polyester).
- ● Garden hose with nozzle – A 10-15 ft hose for quick water access to douse flames or cool hot spots.
- ● Fire extinguisher (Class A or B/C rated) – Keep it within arm’s reach during use.
- ○ Windshield or barrier (optional but recommended) – A metal screen or fire-resistant tarp to block wind from 5+ mph.
- ● Weed killer spray – Apply pre-treatment on stubborn weeds for extra effectiveness.
- ● Pruners or shears – Trim thick weeds or brush before torching for cleaner results.
- ● Garden rake or hoe – Clear loose debris after torching to prevent regrowth.
- ● Portable fireproof container – For safely storing propane tanks when not in use.
- ● Weather monitor – Check for wind speeds under 5 mph and humidity below 50% for best results.
Step-by-step instructions for using a yard torch to eliminate weeds
Here's how I torch weeds effectively—safely and without chemicals—using the right technique.
🔥 Step 1: Choose the Right Conditions for Flame Weeding
Timing matters most when using a yard torch. Wait for a day with dry, calm conditions—wind speeds over 5 mph can spread embers unpredictably, while damp weeds won’t ignite properly. I always check the forecast for low humidity and avoid torching before rain. Early morning works best because the dew has evaporated, but the air remains still.
Clear the area of flammable debris like dry leaves or mulch within 3 feet of your target zone. Even small twigs can catch fire unexpectedly. If weeds are tall or thick, trim them back to 6-8 inches first—this ensures the flame reaches the base without wasting fuel. I use a string trimmer for stubborn patches before torching.
🔥 Step 2: Prepare Your Torch and Safety Gear
Fill your torch with propane (never gasoline or kerosene) and check the flame adjustment—you want a blue, steady flame about 12-18 inches long. A longer flame works for dense weeds, while a shorter one is better for precision around plants you want to protect. I always wear leather work gloves, long sleeves, and closed-toe shoes to prevent burns.
Keep a garden hose or bucket of water nearby—you’ll need it to extinguish any stray flames immediately. I also clip a small spray bottle filled with water to my belt for quick touch-ups. Never torch near wooden structures, fences, or other flammable materials, even if they’re far away. The heat can travel farther than you think.
🔥 Step 3: Apply the Flame Correctly to Kill Weeds
Hold the torch 6-12 inches above the weeds and move it in slow, overlapping passes—like mowing a lawn. The goal is to char the base of the weed without scorching the surrounding soil. You’ll see the leaves curl and blacken instantly when the heat penetrates. If the weeds are still green after passing, you didn’t get close enough or the flame wasn’t hot enough.
For stubborn weeds like dandelions or clover, pause slightly longer on the center of the plant. You’ll know it’s working when the stem collapses and turns brown within minutes. Avoid torching in one spot for too long—this can create bare patches or even burn the soil’s microbial life. I move in zigzag patterns to ensure full coverage without overdoing it.
💧 Step 4: Follow Up and Maintain the Area
After torching, the weeds will die back within 24-48 hours, but the roots may linger. Water the area lightly to help break down any remaining organic matter. I use a soaker hose set on low to avoid disturbing the soil. Repeat the process every 2-3 weeks for new growth—weeds regenerate quickly, especially in warm weather.
To prevent regrowth, apply a thin layer of mulch (like straw or wood chips) after torching. This blocks sunlight and suppresses future sprouts. I’ve found that torching works best as a maintenance tool—not a one-time solution. Combine it with regular mowing or hand-pulling for the best long-term results. Just don’t skip the safety steps—even a small fire can spread faster than you expect.
Tips & tricks for flame-based weed elimination
Mastering the yard torch takes practice, but these insights will help you torch weeds like a pro while keeping your garden—and yourself—safe.
Weather Intelligence: Double-check wind direction and speed just before torching. I’ve seen 3 mph winds turn into 6 mph gusts in seconds—always torch into the wind, not with it. A portable anemometer (or even a wind sock) can save you from accidentally setting nearby plants ablaze. The ideal window is between 7-10 AM when dew has evaporated but morning breezes are still calm.
Torch Technique: The 6-12 inch distance isn’t arbitrary—it’s where the flame reaches its peak heat without losing control. For thick weeds, start at 12 inches and move closer if needed, but never let the flame touch the torch handle. I’ve found that a slight downward angle (about 15 degrees) helps direct heat to the weed base more effectively than holding it straight up.
Visual Success Cues: You’ll know you’ve done it right when you see three things:
- leaves instantly curl like a paper burn,
- stems collapse within 30 seconds, and
- the soil around the base darkens slightly but doesn’t smoke excessively. If weeds stay green after your pass, you either moved too fast or need a hotter flame—adjust your torch’s fuel flow if possible.
Maintenance Strategy: The 24-48 hour die-back period is your first warning system. If weeds aren’t brown and wilted within 48 hours, you’ll need to torch again—this means either the roots are too deep or you missed some plants. For persistent weeds, I’ve found that combining torching with a 1-inch layer of wood chip mulch creates a double barrier against regrowth.
Pro Tips for Yard Torch For Weeds
- Mastering the yard torch takes practice, but these insights will help you torch weeds like a pro while keeping your garden—and yourself—safe.
- Weather Intelligence: Double-check wind direction and speed just before torching.
- Torch Technique: The 6-12 inch distance isn’t arbitrary—it’s where the flame reaches its peak heat without losing control.
Frequently asked questions
Got questions about using a yard torch for weeds? You’re not alone! Here are some of the most common concerns—and their answers—to help you torch weeds like a pro.
When is the best time of year to use a yard torch for weeds?
The ideal time is during dry, warm conditions—typically late spring through early fall. Avoid windy days or when weeds are wet (fire risk!). Early morning or late afternoon work best, as temperatures are cooler and humidity is lower. Never torch in drought conditions or near flammable materials.
How do I prevent the fire from spreading to my lawn or plants?
Use a propane torch with a flame shield to direct heat precisely at weeds. Keep a garden hose or fire extinguisher nearby and never torch near mulch, dry grass, or wooden structures. For extra safety, mow your lawn short first to reduce fuel for accidental fires.
Will a yard torch kill weeds permanently, or do they grow back?
Flame weeding kills weeds on contact by dehydrating their cells, but deep-rooted perennials (like dandelions) may regrow. For stubborn weeds, repeat treatments every 1–2 weeks until they’re gone. Pair with vinegar or corn gluten meal for long-term prevention.
Are there any weeds a yard torch won’t work on?
Yes! Broadleaf weeds with thick stems (like poison ivy or creeping Charlie) may need pre-treatment with herbicide or repeated torching. Woody plants or deep-rooted shrubs are also tough—opt for manual removal or targeted herbicides instead.
What should I do if the torch won’t ignite or the flame is too weak?
Check your propane tank—it may be empty or frozen (if used in cold weather). Ensure the torch valve is fully open and the flame adjuster is set correctly. If the flame flickers, clean the burner nozzle with a wire brush. For electric torches, inspect the battery or charging port.
Can I use a yard torch instead of herbicides?
Flame weeding is chemical-free, eco-friendly, and safe for pets/kids once cooled. However, it’s labor-intensive for large areas. Combine it with mulching or manual weeding for best results. Just avoid torching near organic gardens or compost piles—heat can alter soil microbes.
Wrapping up and next steps
Say goodbye to stubborn weeds without breaking a sweat! A yard torch for weeds offers a fast, chemical-free solution that keeps your lawn looking pristine with minimal effort. Whether you're tackling crabgrass, dandelions, or clover, this method is efficient, eco-friendly, and satisfyingly effective—just remember safety first!
Ready to transform your yard? Grab your torch, follow the steps, and enjoy a weed-free paradise in no time! 🌿🔥 For extra tips, check out our complete landscaping guide—your greenest (and cleanest) lawn awaits!