
How To
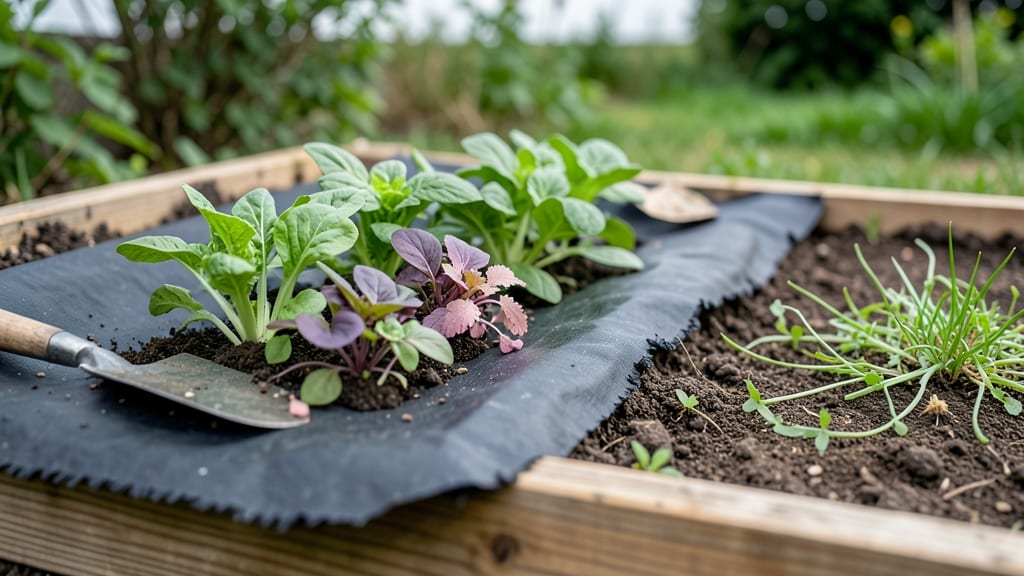
Weed battles just got easier with anti-weed cloth—this lightweight fabric blocks 90% of weeds for months while keeping soil moist and cool. I used it last summer in my vegetable beds, and the difference was shocking: no more pulling dandelions by hand, no more bending over for hours.
The cloth lets water and air through while smothering weeds before they sprout.
Installation takes less than 30 minutes for a raised bed, and you don’t even need to dig. Just lay it down before planting, secure the edges with rocks or landscape pins, and cover with mulch or compost.
It works in flower gardens too—just cut holes for perennials or annuals. The best part? You’ll spend less time weeding and more time enjoying your garden.
There’s a catch: in hot climates, the cloth can trap heat, so water deeply before installing. Also, avoid using it under plants that need direct soil contact, like strawberries. For pathways, opt for heavier landscape fabric instead—it lasts longer under foot traffic.
If you hate weeding but want organic control, this is your secret weapon. Try it in one bed this season and compare the difference to areas you don’t cover. You’ll wonder why you didn’t switch sooner.
📚 In This Guide
- What you need
- Instructions
- Tips and common mistakes
- Wrapping up and next steps
What you need
- ● Anti-weed cloth (landscape fabric): 1 roll (width: 3–6 ft, length: 50–100 ft, depending on your garden size). Opt for UV-stabilized, breathable fabric (e.g., polypropylene or polyester).
- ● Staple gun + staples: Heavy-duty staples (1/4"–3/8") to secure edges.
- ○ Shovel or spade: For digging small trenches (optional, if prepping uneven ground).
- ● Rake or garden hoe: To smooth soil before laying the cloth.
- ● Measuring tape: For precise cuts and alignment.
- ● Scissors or utility knife: To trim fabric cleanly.
- ● Garden stones, bricks, or edging: To weigh down edges (e.g., 10–20 lbs per linear foot).
- ○ Mulch (optional but recommended): 2–3 inches of organic mulch (straw, wood chips, or pine needles) to cover the cloth.
- ● Wheelbarrow: For hauling mulch or fabric.
- ● Level: To ensure the cloth lies flat (especially on slopes).
- ● Garden twine: For temporary securing before stapling.
- ● Knee pads: Because comfort matters! 😉
- ● Clear the area of existing weeds, rocks, and debris (use a hoe or pull them by hand).
- ● Choose a dry, sunny day for installation (wet fabric is harder to work with).
- ● Check local regulations—some areas restrict fabric use in natural landscapes.
How to install anti-weed cloth for long-term weed control
This no-dig method keeps weeds at bay for months without tilling or chemicals.
Choose the Right Location and Prepare the Ground
Select an area where you want to suppress weeds permanently, like a garden bed, pathway, or around established plants. Clear away existing weeds and debris by hand or with a hoe—this prevents weeds from pushing through the cloth later. I like to work on a dry day so the soil is easier to handle, but avoid installing when the ground is frozen or waterlogged.
Mark the boundaries of your installation area with stakes or spray paint. Measure twice to ensure you have enough anti-weed cloth to cover the space completely with at least 6 inches of overlap on all sides. This extra coverage prevents weeds from creeping in along the edges.
Lay Down the Anti-Weed Cloth
Unroll the anti-weed cloth over the prepared area, smoothing it out to eliminate wrinkles or folds. These can create gaps where weeds will eventually grow through. For larger areas, use 24-inch-wide rolls to minimize seams—each seam is a potential weak spot for weed intrusion.
Secure the edges with landscape staples or heavy rocks to keep the cloth in place. Avoid using nails or screws, as they can puncture the cloth and create holes. If installing around plants, cut X-shaped slits in the cloth to wrap it around stems without damaging the plant or creating gaps.
Secure the Cloth and Add a Finishing Layer
For pathways or high-traffic areas, cover the anti-weed cloth with 2-3 inches of mulch or gravel to weigh it down and prevent shifting. Organic mulch like wood chips or straw will also break down over time, adding nutrients to the soil beneath. In garden beds, a thin layer of straw or pine needles works well to hold the cloth in place while allowing rain to penetrate.
Check the edges periodically, especially after rain or wind, to ensure the cloth remains secure. If you notice gaps forming, press the cloth back down and re-secure it with staples or rocks. This step is critical for long-term effectiveness—even a small uncovered area can become a weed hotspot.
Maintain and Monitor for Weed Growth
Anti-weed cloth doesn’t last forever—expect it to degrade after 2-5 years, depending on the material and weather conditions. Inspect the cloth annually for tears or gaps, especially in high-traffic areas. If you see weeds sprouting through, trim them off at the base before they establish roots.
In areas where the cloth is exposed to sunlight, it may dry out and become brittle over time. If this happens, add a fresh layer of mulch to protect it. For permanent solutions, consider layering the cloth with cardboard or landscape fabric for added durability, though this may reduce drainage slightly.
Tips & tricks for perfect anti-weed cloth installation
Here's what nobody tells you about making this weed barrier last—these little details make all the difference.
Prep Like a Pro: Before laying down your anti-weed cloth, take an extra 10 minutes to remove any stubborn weeds by their roots. I've seen people skip this step and end up with weeds pushing through within weeks. Use a hoe to scrape away any remaining soil debris—this prevents tiny gaps where weeds can grow through later.
Overlap is Your Best Friend: That 6-inch overlap mentioned in Step 1 isn't just a suggestion—it's critical. I've learned the hard way that cutting corners here leads to weeds creeping in along the edges. For extra security, especially in windy areas, consider adding an additional 2-3 inches of overlap beyond what's specified.
Plant Protection Strategy: When making those X-shaped slits around plants in Step 2, cut them just large enough to wrap around the stems without touching the soil. Any exposed cloth creates a potential entry point for weeds. I like to use scissors to make clean cuts and then gently tuck the cloth edges around the plant stems before securing.
Long-Term Maintenance Secret: The 2-5 year lifespan mentioned in Step 4 can be extended significantly if you perform one simple check every spring: remove any accumulated mulch, inspect the cloth for tears, and replace any damaged sections immediately. I've seen installations last up to 7 years by doing this annual maintenance—it's worth the 20 minutes of effort.
Pro Tips for Anti Weed Cloth
- Here's what nobody tells you about making this weed barrier last—these little details make all the difference.
- Prep Like a Pro: Before laying down your anti-weed cloth, take an extra 10 minutes to remove any stubborn weeds by th...
- Overlap is Your Best Friend: That 6-inch overlap mentioned in Step 1 isn't just a suggestion—it's critical. I've lear...
Frequently asked questions
about anti weed cloth—here’s what you need to know before getting started!How long does anti weed cloth last before needing replacement?
Most high-quality anti weed cloth lasts 1-3 years depending on material (polypropylene or woven fabric). UV-stabilized cloth holds up longest in sunny areas. Check for tears or sunlight degradation—replace if it’s brittle or weeds poke through.
When’s the best time to install anti weed cloth?
Install it early spring or late fall when weeds are dormant but soil is workable. Avoid extreme heat or freezing—soil should be dry enough to prevent mold but soft enough to cut cleanly. For new gardens, lay it down before planting to prevent weed seeds from settling.
Can I use landscape fabric or cardboard instead of anti weed cloth?
Landscape fabric can work but often degrades faster (6 months–2 years) and blocks airflow, trapping moisture. Cardboard may suppress weeds short-term but rots quickly (3–6 months) and can introduce mold. Anti weed cloth is designed for long-term durability and better weed control.
What if weeds keep growing through the cloth?
Weeds poking through usually mean the cloth is too thin or torn. Double-layer it in high-weed areas or use a heavier-duty (3–5 oz) cloth. For stubborn weeds, add a pre-emergent herbicide (like corn gluten) before installing, but avoid post-emergent sprays—they can damage plants.
Does anti weed cloth work under mulch or alone?
It works best under mulch (wood chips, straw) for extra weed suppression and moisture retention. Alone, it’s effective but may require more frequent checks. Mulch also improves soil health—win-win! Just ensure the mulch layer is 3–4 inches thick for optimal results.
Wrapping up and next steps
Anti weed cloth is your easy, no-dig solution for keeping unwanted plants at bay—without breaking a sweat! Whether you're a busy gardener or a DIY enthusiast, this lightweight barrier offers months of weed suppression while protecting your soil and plants.
The best part? It’s simple to install and works like a charm.
Ready to reclaim your garden? Grab your roll of anti weed cloth today and take the first step toward a low-maintenance, lush landscape. 🌱 Start small—try a patch in your flower bed or along pathways—and watch the difference in just a few weeks!