
Plants
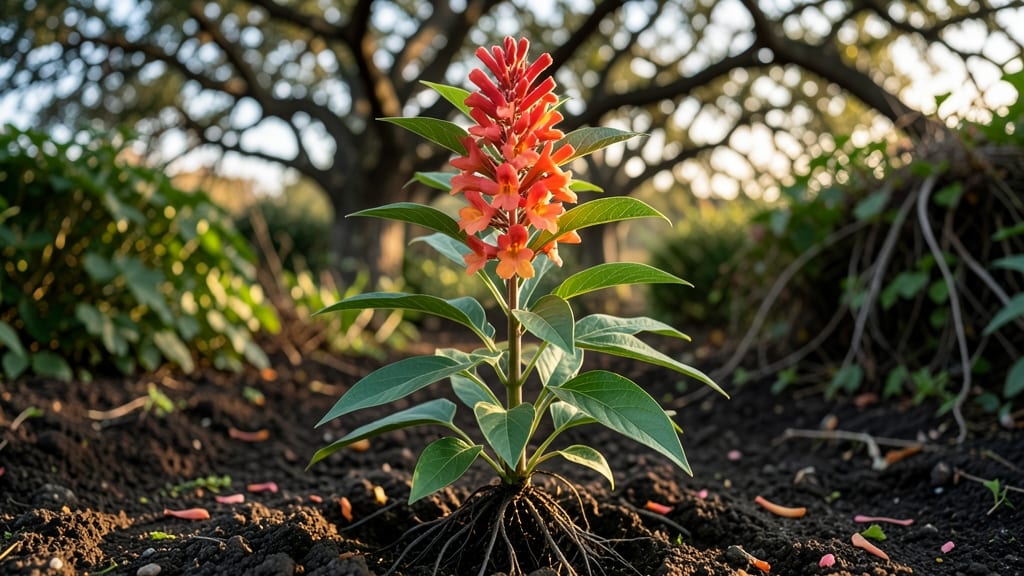
Growing Asclepias curassavica milkweed means welcoming a flurry of orange wings to your garden. 🌿 This vibrant plant thrives in heat and humidity, making it a perfect choice for southern gardens or containers in cooler zones.
I've watched monarch caterpillars strip my plants bare—then return year after year—because they can't resist its nectar-rich blooms.
The secret to success is simple: full sun, well-draining soil, and occasional watering once established. Unlike native milkweeds, this tropical variety handles summer heat without fuss, though it may need winter protection in colder climates.
Start with seeds or transplants in spring, and you'll see those first orange flowers by early summer.
By mid-summer, your milkweed will be a buzzing hub of activity, with monarchs, bees, and hummingbirds visiting daily. The plants grow aggressively—up to 5 feet tall—so regular pruning keeps them manageable.
Just don't cut back too late in the season, or you'll miss the late blooms that feed migrating monarchs.
Common challenges? Overgrowth and powdery mildew in humid climates. The solution? Space plants 2-3 feet apart and improve airflow with pruning. With the right care, your milkweed will reward you with three seasons of blooms—and a front-row seat to nature's most spectacular migration.
📚 In This Guide
- What you need
- Instructions
- Tips and common mistakes
- Wrapping up and next steps
What you need
- ● Asclepias curassavica seeds: 50–100 seeds (organic, untreated preferred for best germination).
- ● Seed-starting mix: 2–3 gallons of sterile, well-draining potting soil (e.g., Pro-Mix or coconut coir blend).
- ● Containers: 4–6 biodegradable seed pots (3–4" diameter) or a shallow tray with drainage holes.
- ● Clear plastic dome or plastic wrap: To retain moisture during germination.
- ● Grow lights or sunny windowsill: 6–8 hours of light daily (south-facing window or LED grow lights like Spectrum 9000 Series).
- ● Watering can or spray bottle: With a fine mist nozzle for gentle hydration.
- ● Fertilizer: Balanced liquid fertilizer (5-5-5 or 10-10-10, diluted to half-strength).
- ○ Hardening-off tray: Optional but helpful (a shallow container with mesh sides).
- ● Gloves: Nitrile or garden gloves to protect from sap (can irritate skin).
- ● Small hand trowel: For transplanting seedlings.
- ● Pruners or scissors: Sharp, clean pair for trimming (sterilize with rubbing alcohol).
- ● pH test kit: To ensure soil pH is 5.5–6.5 (ideal for milkweed).
- ● Outdoor planting site: Full sun (6+ hours/day).
- ● Well-draining soil (amend with compost if clay-heavy).
- ● Space: 18–24" apart in rows (or 3' apart for clusters).
- ● Cold stratification: Refrigerator or seed stratification kit (speeds up germination).
- ● Butterfly nectar plants: Seeds for Lantana or Salvia to complement your milkweed.
- ● Egg carton: For seed-starting (cheap and biodegradable!).
- ● Shade cloth: 30–50% coverage for seedlings if temps exceed 90°F.
- ● Monarch butterfly guidebook: For ID tips and lifecycle insights!
Step-by-step guide to cultivating Asclepias curassavica for monarch butterflies
Here's how I establish a thriving milkweed patch that keeps monarchs visiting for years.
🌱 Step 1: Select the Right Location and Prepare the Soil
Choose a spot with full sun—at least 6 hours of direct sunlight daily—and well-draining soil. Asclepias curassavica tolerates poor soil but thrives in sandy loam with a pH between 6.0 and 7.5. I always test my soil first; milkweed hates soggy roots, so amending with compost or coarse sand improves drainage if needed.
Clear the area of weeds and loosen the top 6 inches of soil with a garden fork. This breaks up compacted layers and encourages root penetration. If your soil is heavy clay, mix in 2-3 inches of organic matter like composted leaves or aged manure. You'll see roots spread aggressively once planted—this is a good sign!
🌱 Step 2: Plant Seeds or Transplants at the Right Time
For direct sowing, plant seeds in early spring after the last frost, or in late summer for fall germination. Milkweed seeds need light to germinate, so I scatter them on the soil surface without covering—just press them gently into the top ¼ inch of soil. Water lightly to settle them in place.
If using transplants, space them 12-18 inches apart in rows 2 feet apart to allow for mature plant spread. Dig holes just deep enough to accommodate the root ball, then water deeply before and after planting. I always add a slow-release fertilizer at this stage to support early growth—milkweed isn't fussy but responds well to a little extra nutrients.
☀️ Step 3: Water and Maintain Through the Growing Season
Water deeply once a week during the first growing season to establish roots, then reduce to every 10-14 days once established. Milkweed is drought-tolerant but looks best with consistent moisture. You'll know it's thriving when the stems develop a waxy bloom and leaves stay deep green without wilting.
Apply a 2-3 inch layer of mulch around plants to retain moisture and suppress weeds. I use straw or wood chips because they break down slowly and won’t compact like grass clippings. Avoid heavy mulch piles against stems—keep it 2 inches away to prevent rot. Fertilize lightly in early spring with a balanced 10-10-10 formula to encourage lush foliage.
✂️ Step 4: Prune and Encourage Seed Production
In early spring, cut back dead stems to 6 inches tall to stimulate new growth. This also removes overwintering pests and clears space for fresh foliage. I never prune more than one-third of the plant at a time—milkweed recovers quickly but can get leggy if over-pruned.
Allow some stems to flower and seed—monarchs rely on these seeds for next year's patches. When seed pods turn tan and dry, leave them on the plant until they split open naturally. Collect seeds in late fall and store them in a cool, dry place until spring planting. You'll see monarchs flocking to your plants by mid-summer if you've got a healthy stand!
⏰ Step 5: Prepare for Winter and Encourage Multi-Year Growth
Milkweed is perennial in USDA zones 7-11 and needs no special winter care beyond a light mulch in colder regions. In zones 6 and below, cut back stems to 2 inches tall and add 4-6 inches of mulch to insulate roots. I always mark the location with stakes so I don’t accidentally dig up the crown in spring.
Each year, divide mature clumps in early spring by digging up sections and replanting them. This keeps plants vigorous and spreads your monarch haven. You'll notice new shoots emerging from the base by late spring—this is how milkweed naturally expands. With minimal care, your patch will multiply and support generations of monarchs!
Tips & tricks for perfect Asclepias curassavica cultivation
Here's what I learned after years of growing milkweed for monarchs—these details make all the difference between a struggling patch and a thriving monarch magnet.
Soil Preparation Secret: The key to happy milkweed roots lies in that 6-inch deep soil loosening I mentioned. Use a broadfork instead of a shovel—this preserves soil structure while breaking up compaction. For clay-heavy soils, mix in 2-3 inches of coarse sand (not fine sand) to create those tiny air pockets roots crave. I test drainage by digging a hole, filling it with water, and checking if it drains within 24 hours—if not, add more organic matter.
Timing is Everything: When planting seeds in late summer for fall germination, I always mark the location with biodegradable flags so I don't accidentally disturb them during winter. For transplants, the 12-18 inch spacing might seem generous, but mature plants spread aggressively—this prevents overcrowding and fungal issues. I've found that planting in early spring gives roots a full growing season to establish before winter.
Watering Wisdom: That deep watering once a week during establishment isn't just about moisture—it's about encouraging deep root growth. I water in the morning so foliage dries quickly, reducing fungal risks. Once established, the 10-14 day interval works because milkweed stores water efficiently in its thick stems. Watch for wilting leaves as your first sign of drought stress, but don't overwater—soggy soil is milkweed's worst enemy.
Winter Protection Strategy: For zones 6 and below, I don't just cut back to 2 inches—I also wrap the crown with burlap for extra insulation. The 4-6 inch mulch layer should extend beyond the plant's drip line. I've seen milkweed survive winters with just this protection, even in zone 5 with occasional sub-zero temps. Pro tip: Use straw mulch—it breaks down slower than wood chips and provides better insulation.
Pro Tips for Asclepias Curassavica Milkweed
- Here's what I learned after years of growing milkweed for monarchs—these details make all the difference between a st...
- Soil Preparation Secret: The key to happy milkweed roots lies in that 6-inch deep soil loosening I mentioned. Use a b...
- Timing is Everything: When planting seeds in late summer for fall germination, I always mark the location with biodeg...
Frequently asked questions
Is Asclepias curassavica safe for monarch caterpillars year-round?
While it’s a fantastic food source, Asclepias curassavica can harbor _OE_ (a parasitic protozoan) if left in the ground over winter. For best results, remove spent plants in fall or grow it only in warm climates. Native milkweeds (like Asclepias tuberosa) are safer long-term for monarchs.
How fast does tropical milkweed grow?
This powerhouse grows fast—up to 12 inches per season! With proper care (full sun, well-draining soil, and regular watering), you’ll see lush foliage in as little as 4–6 weeks. Pinch back stems early to encourage bushier growth and more flowers for monarchs.
Why aren’t monarchs using my milkweed?
Monarchs may skip your plant if:
- No flowers: Deadhead spent blooms to encourage reblooming.
- Pesticides: Avoid chemicals—monarchs need chemical-free leaves!
- Shade: Ensure 6+ hours of sun daily.
- Wrong season: Monarchs time their lifecycle with milkweed growth. In cooler climates, plant Asclepias tuberosa for spring/summer.
Can I grow Asclepias curassavica in containers?
Use a 5-gallon+ pot with drainage holes and a mix of potting soil and perlite. Place it in full sun and fertilize lightly (half-strength) every 4–6 weeks. Just watch for root-bound stress—repot if roots circle the container.
What pests should I watch for?
Tropical milkweed is generally pest-resistant, but keep an eye out for:
- Aphids: Spray with soapy water if clusters appear.
- Spider mites: Increase humidity or hose off plants.
- Whiteflies: Use yellow sticky traps nearby.
Monarch caterpillars? Leave them be! They’re doing their job—eating leaves to fuel their growth.
Can I overwinter Asclepias curassavica indoors?
Yes! Cut back stems to 6 inches, pot the plant, and place it near a south-facing window (or under grow lights). Reduce watering and avoid fertilizing. In spring, harden it off before moving back outdoors to prevent shock.
Wrapping up and next steps
Transforming your garden into a monarch butterfly haven with Asclepias curassavica is a rewarding journey that benefits both your space and these iconic pollinators! 🌸 This vibrant milkweed thrives year-round in the right conditions, offering shelter, food, and beauty across all three seasons.
Whether you’re a seasoned gardener or just starting, your efforts make a real difference—one butterfly at a time.
Ready to take the next step? Plant your first seeds or seedlings today and watch your garden bloom with life! Share your progress with fellow butterfly enthusiasts or explore local conservation programs to amplify the impact. Every small action grows into something extraordinary.