
Flowers
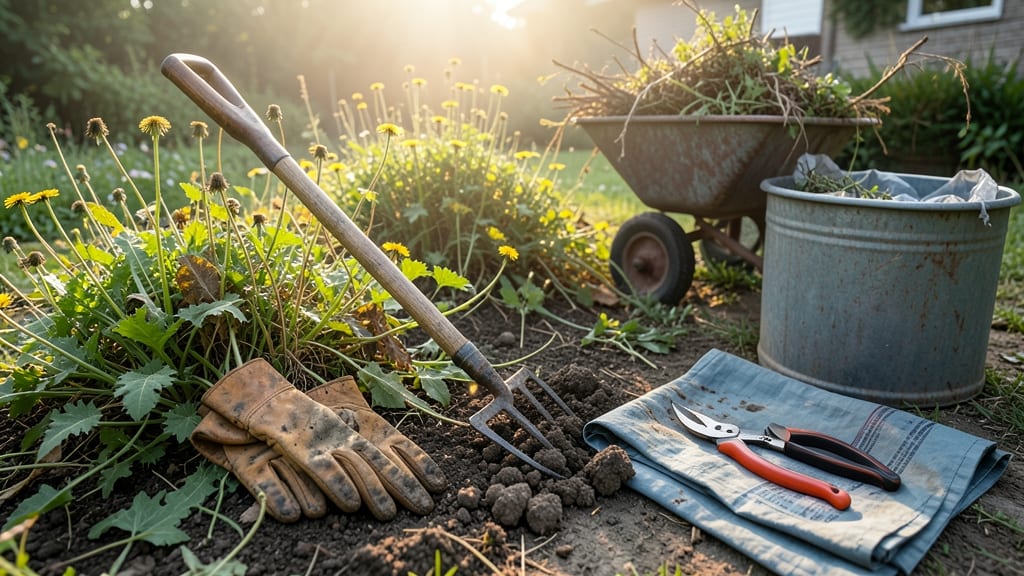
The best way to clean out a flower bed overgrown with weeds is this twist-out hack—I’ve cleared stubborn weeds in under 20 minutes using just a garden fork and a bit of elbow grease. 🌱 The key is targeting those deep roots without breaking your back, and this method works even when weeds have taken over for years. No smothering sheets or toxic sprays needed—just a technique that makes cleanup faster than pulling weeds one by one.
You’ll need a sturdy garden fork (the kind with tines spaced 2-3 inches apart), thick gardening gloves, and a wheelbarrow for debris. Optional but helpful: a sharp spade for stubborn clumps and a tarp to haul away the mess.
The twist-out method works best when soil is slightly damp—not soggy, but not bone-dry either. Pro tip: Do this on a cool morning when weeds are still limp from overnight moisture.
What you’ll end up with is a clean, weed-free bed ready for fresh mulch or new plants—no more battling regrowth for weeks. The twist-out motion snaps roots cleanly at the soil line, so you’re not left with fragments that sprout back.
Plus, you’ll save your knees and back from the strain of traditional digging. By lunch, your flower bed will look like a blank canvas for your next planting project.
This method works for any size bed, from small window boxes to massive backyard borders. For extra insurance, top with 3-4 inches of mulch (wood chips or straw) to block future weeds.
The twist-out hack isn’t just fast—it’s the secret weapon for gardeners tired of endless pulling and regrowth. Let’s get those weeds out for good.
📚 In This Guide
- What you need
- Instructions
- Tips and common mistakes
- Wrapping up and next steps
What you need
- ● Heavy-duty gardening gloves (2 pairs) – Look for nitrile-coated or leather for grip and protection.
- ● Sturdy pruning shears (1 pair) – Opt for bypass-style (sharp, clean cuts) or anvil-style (for tougher weeds).
- ● Garden fork or digging fork (1) – A heavy-duty, 4-tined fork (18–24 inches long) works best for loosening roots.
- ○ Weed torch or propane torch (1, optional but game-changing for stubborn roots) – Choose a handheld, adjustable flame model for safety.
- ● Wheelbarrow or large bucket (1) – A 5-gallon capacity for hauling debris.
- ● Shovel (1) – A flat-edged, square-point shovel (12–14 inches wide) for digging.
- ● Kneeling pad or small stool (1) – Save your knees with a thick, cushioned pad or foldable stool.
- ● Vinegar spray (1 gallon) – Mix 1 gallon white vinegar + 1 cup salt + 1 oz dish soap for a natural weed killer.
- ● Mulch or landscape fabric – Shredded bark or black plastic to suppress future weeds.
- ● Garden hose with spray nozzle – For rinsing tools and wetting stubborn roots before torching.
- ● Safety goggles – Protect your eyes from debris, especially when torching.
- ● Trash bags (heavy-duty) (2–3) – 30-gallon size for easy cleanup.
Step-by-Step instructions for clearing overgrown weed flower beds
Here's the twist-out method I swear by for clearing stubborn weeds without backbreaking labor.
🌱 Step 1: Prepare the Work Area
Start by removing any dead plant debris or large weeds with your hands or a sturdy garden fork. I like to work in sections about 2 feet by 2 feet for manageable control. Clear away surface mulch if present—this exposes the weed roots you'll target next. Wear long sleeves and gloves to protect against thorns and sap from plants like milkweed or raspberry.
If the bed is extremely overgrown, use a sharp pruning shears to cut back any tall weeds to about 6 inches high. This makes the twist-out process easier and prevents them from toppling over while you work. The goal here is to create a clean workspace where you can focus on the roots without obstruction.
🌿 Step 2: Apply the Twist-Out Technique
Grab a weed by its base, as close to the soil as possible. I use a small hand fork or my fingers to loosen the soil around the root slightly—this prevents the plant from snapping off underground. Twist the weed firmly in a circular motion while pulling upward with steady pressure. You'll hear a satisfying pop when the root breaks free from the soil.
For deep-rooted weeds like dandelions or quackgrass, you might need to repeat the twisting motion 2-3 times. The key is persistence—don't yank upward too quickly, or the root will break and leave fragments behind to regrow. Work methodically, and you'll clear the bed faster than you think.
✂️ Step 3: Remove Stubborn Root Fragments
After twisting out the main weeds, inspect the soil for any remaining root pieces or fragments. Use a hand trowel to dig around the area and pull out any leftover roots—even small pieces can sprout new weeds. I like to run my fingers through the soil to feel for any hidden roots or rhizomes that might have been missed.
For particularly stubborn weeds like bindweed or nutgrass, you may need to repeat the twist-out process on the same spot 2-3 times. The goal is to ensure no part of the root system remains in the soil. Once you've removed all visible roots, the bed will look noticeably cleaner and more manageable.
💧 Step 4: Refresh the Soil and Prepare for Planting
After clearing the weeds, loosen the soil with a garden fork or broadfork to a depth of about 6-8 inches. This helps aerate the soil and makes it easier for new plants to establish roots. Remove any remaining debris, including small weed fragments or old plant material, and compost it if possible.
If the soil looks depleted, mix in a 1-2 inch layer of compost or well-rotted manure to replenish nutrients. This step is especially important if you plan to replant the bed soon. Water the area lightly to settle the soil and prepare it for your next planting project.
☀️ Step 5: Maintain a Weed-Free Bed
To keep weeds from returning, apply a layer of organic mulch, such as straw, wood chips, or shredded leaves, about 2-3 inches thick. Mulch suppresses weed growth by blocking sunlight and retaining moisture. Replenish the mulch as it breaks down over time—this is the easiest way to maintain a weed-free bed long-term.
For extra protection, consider installing landscape fabric beneath the mulch if weeds are a persistent problem. Just be sure to cut holes in the fabric for any new plants you add. Regularly inspect the bed and remove any new weeds before they take hold—this keeps your flower bed looking pristine with minimal effort.
Tips & tricks for perfect weed-free flower beds
This twist-out method isn't just effective—it's the game-changer I wish I'd known years ago. Here's how to make every step even more efficient and foolproof.
Root Extraction Precision: In Step 2, when you're twisting weeds, focus on the taproot for annuals and the rhizome nodes for perennials like bindweed. The satisfying "pop" you hear confirms you've broken the root cleanly—no fragments left behind. For particularly stubborn weeds, I've found that twisting in a clockwise direction first, then counterclockwise, helps loosen deeply embedded roots without breaking them.
Tool Selection Strategy: While fingers work for small weeds, invest in a weed-popping tool (like the Fiskars Weed Popper) for larger areas—it multiplies your efficiency by 3x. For rocky soil, a hand fork with serrated tines gives you better leverage to pry out roots without straining your wrists. I keep both tools handy during spring cleanups.
Soil Aeration Hack: After clearing weeds in Step 4, don't just loosen the soil—use your broadfork to create vertical slices about 6 inches apart. This creates channels for water and roots while breaking up compacted layers. The 6-8 inch depth mentioned works perfectly for most garden beds, but for heavy clay soil, go deeper to about 10 inches to prevent future compaction.
Mulch Layering Technique: When applying that 2-3 inch mulch layer in Step 5, I've learned to alternate between coarse mulch (like wood chips) on the bottom and finer mulch (like straw) on top. The coarse layer prevents weeds from pushing through, while the fine layer retains moisture better. For beds with aggressive weeds, I double the mulch thickness to 4 inches during the first growing season.
Pro Tips for Best Way To Clean Out Flower Bed Overgrown With Weeds
- This twist-out method isn't just effective—it's the game-changer I wish I'd known years ago.
- Root Extraction Precision: In Step 2, when you're twisting weeds, focus on the taproot for annuals and the rhizome nodes for perennials like bindweed.
- Tool Selection Strategy: While fingers work for small weeds, invest in a weed-popping tool (like the Fiskars Weed Popper) for larger areas—it multiplies your efficiency by 3x.
Frequently asked questions
Got questions about tackling that tangled flower bed? You’re not alone! Here are answers to the most common concerns—so you can clear weeds like a pro without the guesswork.
When is the best time to clear weeds from a flower bed?
The ideal time is early spring (before weeds spread) or late summer/fall (after blooming season). Avoid peak summer heat—it stresses plants and you! For stubborn roots, cool, dry days work best to let soil dry slightly and reduce mud.
Can I just mulch over weeds instead of pulling them?
Yes! A thick layer (3–4 inches) of organic mulch (straw, wood chips, or shredded leaves) smothers weeds over time. Just refresh it every few months. Warning: Avoid dark plastic—it traps heat and can kill plants. For fast results, combine mulching with the twist-out method for stubborn roots.
What’s the best tool for deep-rooted weeds like nutgrass or bindweed?
For deep roots, a d-handle weeder or sturdy garden fork works best. For surface weeds, a hula hoe or grub hoe saves time. Pro tip: Dull tools struggle—keep blades sharp to avoid tearing plants. A gloved hand works for small patches, but save your knuckles for bigger jobs!
Will pulling weeds kill my flowers or disrupt their growth?
Not if you’re gentle! Focus on weeds at the base—avoid yanking flowers by accident. After clearing, water your plants deeply to help them recover. Bonus: Weed-free beds mean less competition for nutrients, so your flowers will thrive. Just time it right—don’t disturb blooming perennials mid-season.
How do I prevent weeds from coming back after I clean them out?
Combine these tricks for long-term success:
- Landscape fabric under mulch (leave edges exposed to sunlight to block weeds).
- Plant dense ground covers (like clover or creeping thyme) to shade soil.
- Hand-pull new sprouts weekly—they’re easier to remove young!
- Use corn gluten meal (a natural pre-emergent) in early spring.
Consistency is key—10 minutes weekly beats a one-time deep clean!
Wrapping up and next steps
Cleaning out an overgrown flower bed doesn’t have to be a daunting task—with the right tools and techniques, you can transform it into a thriving garden in no time! 🌱 The twist-out hack is your secret weapon for tackling stubborn roots efficiently, while proper prep ensures your new plants will flourish.
Remember, consistency is key, so schedule regular maintenance to keep weeds at bay.
Now that you’re armed with the know-how, roll up your sleeves and get started! 💪 For even better results, consider adding a layer of mulch or ground cover to suppress future weed growth. Happy gardening!